After four years, we finally pulled the trigger on buying garage door openers for our two garage doors. With our fifth winter looming and a “twelve month same as cash” deal at Lowe’s now was as good of time as any.
At our old house we had a Genie garage door opener installed shortly after we moved in. This time around I researched openers a bit and decided to switch brands and go with Chamberlain because they got better customer review ratings from the various sites I looked at online. We purchased two 1/2 horsepower belt driven Chamberlain Whisper Drive openers at about $168 apiece. Since our garage doors are 8′ tall, not the normal 7′ tall, I had to buy two extension kits as well as some hardware, and L-shaped steel material to create a hanger for each opener, about $164 in extra materials. Also turns out I had to spend around another $20 for longer power cords, but we’ll get to that later.
Lowe’s offers installation starting at $119 per opener plus any extra for materials, or extra labor. After talking to the guy at Lowe’s I decided I could probably handle it and save some money. That’s kind of a funny thought in hindsight but first, the installation…
Metal L-channel for hanging the openers from the ceiling.
What I thought was going to take a couple hours per door quickly turned into a three day ordeal over the course of the last month. Every little thing that could go wrong sort of did go wrong; although catastrophic deal breakers were limited and obviously I did get the job done. Eventually.
The biggest challenge I faced was that our garage is 14′ tall inside. Which means I only had one ladder tall enough to even get close to the ceiling. It was a precarious job often spent with me on a tall ladder envisioning, not my death, but rather my breaking my neck, peeing myself and laying hopelessly on the cold hard cement until hours later when my wife comes out to see if I’m “okay”.
I managed to get the first opener assembled. I mounted a board to the header above the door to attach the track to. That was it for day one.
Late in the night of day one, I finally have the track attached to the front header. I had to scrounge wood, and then attach the board to a seemingly stud free wall. All in an attempt to get the height just right.
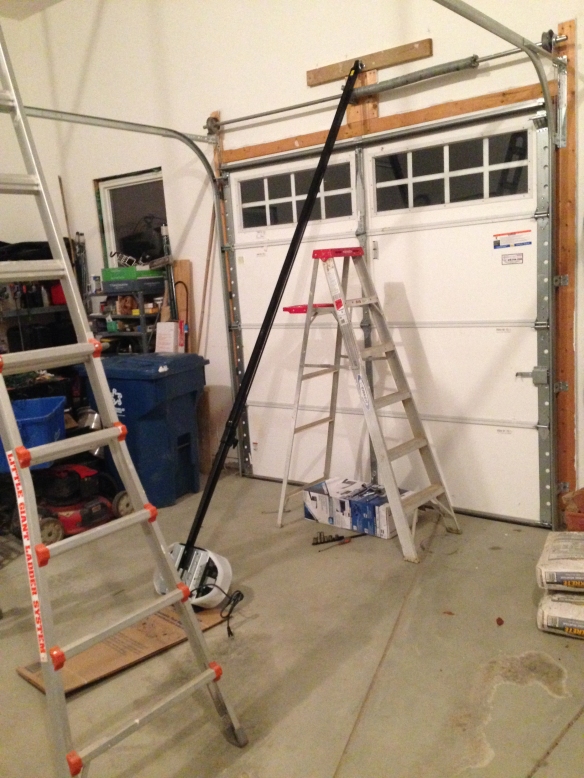
The next day I propped the opener up on the ladder and realized no way could I prop the opener on there and still be able to access the ceiling to install the L-shaped metal channels that create the hanger assembly. So I spent an hour fabricating a wooden stand, about ten feet tall to rest the opener on while I attempted to mount it. Here are some pictures to behold my craftiness.

The ladder was not an option for supporting the opener during the hanging phase of my endeavor.

I had to craft this stand out of scrap wood to rest the opener on.

The opener on it’s stand, allowing me to use the ladder to try and kill myself.

My platform I made, actually worked out well.
Okay, with the opener finally resting level, it was time to install the metal hanger assembly. This took awhile because I kept dropping hardware; up and down I went on that ladder about a million times. I could just barely reach the 14′ tall ceiling to find ceiling joists and mark them without falling over. One way or another I got the hangers installed, including one at an angle to keep things from racking.
Next up was wiring the unit and plugging it in.
The only problem there was the electricians who installed the garage wiring totally screwed me. The outlet was too far away from the opener. So I’d either have to get the outlets moved, or, after some thought, put longer cords on the openers. Turns out I went the longer cord route. But in addition to that they didn’t run the low voltage wires long enough to reach where the openers needed to be mounted. They basically installed everything for a standard 7′ tall door, without actually accessing our garage’s real world situation. So there I was four years later cursing up a storm to empty air.
So I adjusted the ladder and clambered on up into the attic hoping I wouldn’t have to run new low voltage wires or have to splice anything. Turns out what I did was undo the staples that held the low voltage wires in neat ninety degree runs from the walls to their holes in the ceiling. This allowed enough slack in the lines that they would then reach the garage door openers. So while it may not look pretty in the attic, and I don’t know if that breaks some code, I truly do not care because the problem was solved and I didn’t have to splice or re-run wires.

You can see the brown low voltage wires, free of their oppressive staples, and free to connect the shortest distance between two points.

The fun thing is, if I step through that drywall I fall 14′ to my death. Also in hindsight, this photo explains why my stud finder was registering a double hit in this location of the garage when I was hanging the second hanger.
I am, by no means, an electrician but eventually I was able to figure out how to wire the wall switch as well as the electronic eyes that prevent the unit from closing if something like a kid or small animal is in their way. I plugged the first opener into an extension cord and sure as shit it worked. I was as shocked as anyone.
End of day two.
Only one opener to go.
The first wall button installed.
I took a few weeks off to mentally prepare for installing the second opener. In the meantime I went to Lowe’s and bought two 8′ long appliance cords. I asked the guy if I could simply change out the cords on the openers instead of fussing with moving outlets. He was a older gentleman, and I just loved his response of “Let’s not overthink every damn thing. Just change out the cords.” So that was good enough for me. The cords I got had three wires to match the three wires on the units – green ground, and white and black.
After assembling the second unit I started to mount it, but then realized quickly that it’d be easier to change the cord on the ground.
What a royal pain in the ass.
Once again I was soon bitching out my electrician for putting the outlets in the wrong spot as I worked over my perfectly new garage door opener; taking it apart, having it flop around in my hands. By the way, the cover is held on with eight screws that can only be removed with a 1/4″ wrench because they are so tightly secured. Eventually I got the cover all thinking: “There’s no way this is 1) ever going back together, and 2) ever going to work again. $168 dollars down the drain.
I spent a good fifteen minutes trying to free the cord from the unit. An injection molded grommet had a death grip on everything. With a little flat head screwdriver love I got the grommet out. The wires on the original cord were nice because they had little loops and prongs for easily connecting them. My generic new cord just had wires, but I did the best I could to attach them. I even got the grommet to go back in, using a big pair of pliers to squeeze it tight as can be on the power cord, allowing it to re-enter its hole. Eventually the cover even went back on and everything looked okay.

The original cord wired in place, you can see white, black and green ground wires.

This grommet was a holy bitch to get in and out but I persevered and together we made it through this very difficult time in our lives.

Original cord on left, new cord on right. A little cutting of the thick black sleeve and I was able to get enough slack to hook up all three wires.
Don’t forget, I still have to install the new cord on the first opener, except that one is ten feet in the air. Not looking forward to that.
Once the power cord was installed, the rest of the installation went relatively easily. Having installed the opener once already, the second install was infinitely easier. Plus I had prepped a lot of the wiring ahead of time when I did opener number one.

Opener number two getting ready to hang.

The electronic safety eyes installed. The brackets just friction fit over the garage door rails. The wiring is spliced into the pre-wiring using yellow electrical nut thingies.

The installed garage door openers. I still have to change out the one power cord, as well as tie up the wires so it doesn’t look in such disarray.
Does it feel good to have garage door openers?
Yes.
Was it worth it?
Monetarily? No. If I worked billable hours for half the time I spent playing with the installation I would be way ahead.
Mentally? Not at the time because it was a headache I didn’t need.
But now that it’s over it was rewarding to finish the job. And now I know how to install garage door openers. Still I’m not that quick but I do know the ins and outs of them and how they are installed. So that’s a worthless skill I can add to my heap of worthless knowledge.
I will get the satisfaction of knowing I did it all by myself whenever I go in and out of the garage. So I’m ultimately happy. And now after four years we finally don’t have to manually open our garage doors which will be great in the winter time. Now I just need to clean out the garage.
-Chris