Porch Ceiling Trim

This past weekend we got a project completed that had been in the works for over a year. We trimmed out the screen porch and adjacent outdoor porch ceilings. I actually had bought the material this time last year, and just now got around to installing it. The project took me the better part of a Saturday to complete.

Ceiling before installing trim. You can see seams between 4x8 sheets of ceiling plywood.

Ceiling before installing trim. You can see seams between 4×8 sheets of ceiling plywood.

The purpose of the trim is to cover up all the unsightly seams between the sheets of cedar plywood that make up the porch ceiling. I selected 1×4 cedar boards, approximate 12′ long for the project. I ripped each board in half creating a bunch of 1×2’s. I suppose you can purchase 1×2’s but they’re not always easy or economical to find, plus I think you get a straighter board by ripping down a 1×4 into two 1×2’s.

Last year I drew up a plan on the computer, so I used a print out of my plan as a guide. Originally I had planned to go 16″ on center with the strips, but we felt that would be overkill. By going 4′ on center we could cover up most of the seams. Any seams not covered would be inconspicuous once we stained the ceiling.

I trimmed out the entire perimeter of the ceiling first, nailing a 1×2 flat against the ceiling, and butting the side walls. I used galvanized finish nails, and a nail gun / compressor to make the job easier.

The first cross board in place.

The first cross board in place.

Next I measured out the major seams in the plywood and made marks for the boards that go all the way across the porch, width wise. Since the porch is around 12′ wide, I was able to use a solid board and not have to splice anything. I placed boards 4′ on center, covering up each seam in the plywood above. I also made sure to pound any drooping plywood back in place before nailing the trim boards home.

Detail of ceiling trim near chimney corner

Detail of ceiling trim near chimney corner

Once all the boards were up, going across the width of the porch, I infilled with short segments running the other direction until the grid pattern was complete.

Finished ceiling with trim. Large squares are 4' on center.

Finished ceiling with trim. Large squares are 4′ on center.

Trim carries over to the outside porch.

Trim carries over to the outside porch.

The trim adds a nice level of detail to the porch, making the it feel more room like. We’ll stain the ceiling either a reddish color to match the floor and walls, or we may go bold and stain it a charcoal color to match the center of the house exterior.

Staining The Porch

Today was probably one of the hottest days of the year. With a change in weather coming up, from 90 degrees plus to barely 60 degrees and a chance of rain, we decided we’d better get the decks stained now. I got some work done and could delay the rest til later in the day. So around 9 AM we went out to get the back porch stained, and figured we could get the front one stained this evening or tomorrow morning. The heat wouldn’t build up until later in the day and the back porch is shielded well into the afternoon from the sun, so we didn’t think staining it would be an issue today, even if it got past 90 today.

I grabbed the two gallons of semi-transparent stain we picked out at Sherwin Williams several weeks ago. The color name escapes me now, I have a chip card somewhere in this ramshackle house, but we picked a color that we thought matched the cedar siding the best. Anyway, I taped the trim on the porch and shook up the paint can. Upon opening the can though I was fairly mortified. The stain looked a hideous shade of pink. Just to be safe I test stained an area on the porch steps and it looked just as bad there. No way was this grandma pink color going to dry to look like the siding. Crap, two gallons of stain figuratively down the drain. I couldn’t think of one use for that color anywhere on the estate. Hmmm. Well I guess no staining today.

Then I looked around the yard and saw the garden posts. That’s it. What about that 5 gallon can of stain from the old house. Who knows how old it was. Three years? Five…could it be seven years old? Does stain go bad? Well it seemed to work fine on the bat houses and the fence posts. After presenting my idea, the wife and I looked at the bat houses again. Boy, it sure looked spot on to the house siding. What the hell, I couldn’t think of a reason why not. After all I was going to throw it out just a month or two ago before I decided to use some of it on the bat house and fence post projects. And we had a ton of it left, at least 4 gallons.

So that’s what we used. And it looks great. We did the screen porch floor and the back porch floor and steps. Tomorrow we’ll do the front porch. One design change though, even though it’s stained to match the side, I think down the road we’ll actually change the color of the back porch and screen porch floors to a charcoal stain color to match the painted portion of the house. That will look really sharp, but for now the reddish-brown cedar stain looks good too.

One thing I forgot to mention in my last post, the other morning I had a fun awakening. I was fast asleep dreaming when I heard a clawing noise under my bed. I woke up disoriented wondering what the dog was doing clawing the wall under my bed. Then I realized we don’t have a dog. So then I thought, what’s the cat doing? We have a cat, but it’s a miracle she even shows up let alone do any crazy bed clawing. As I awoke further out of my slumber, I realized, crap the clawing isn’t under my bed, it is on the outside wall that my bed butts up against.  First the idea that maybe it was a zombie trying to break in and eat my cat. Then an image of a raccoon building a nest in our blue foam entered my consciousness, just like our resident yellow jackets. I leapt out of bed and tried to figure out what one wears to battle raccoons at 6am Monday morning. I decided on shorts and a t-shirt that were laying on the floor. I then listened and could still hear scraping so I ran to my studio. Well all the windows fog up every morning so I could barely see except near the edges. Squinting I could see the culprit staggering away around the back corner of the house. Was neither raccoon or zombie, but rather one of our skunks. His little black and white body disappeared from view. I ran to the family room and picked him up out of the corner of my eye as he crossed the playground into the woods. Well that was kind of interesting. Also as he was crossing, two rabbits were playing with each other in the playground too. For a second I thought maybe animals were assembling in my yard to get on an ark. With that, I went back to bed. At least I don’t have raccoons living in my walls…yet.

Harvest

Today was sort of a waste. I didn’t get any paying work done really, instead I tried to get some monkeys off my back. Not sure what I accomplished if anything.  By 8:30 am thought I had cleaned the litter box and tied up my tomato plants in the garden. The wife and I were back out by 10 am laying down garden fabric in the play area. The single roll I bought didn’t go very far so we spread out some playground mulch to keep it from blowing away and then turned our attention to the veggie garden. That was fairly productive. We were able to weed most of the veggie garden and we had quite a first official harvest of the year. We netted almost a dozen cucumbers and several zucchini including the biggest one I’ve ever seen in person. Additionally we pulled the last of the radishes and started harvesting beets. The pea plants all died but we gathered a couple more pods that were left. We even got a couple of peppers and green beans.

This year peas did horrible after starting out from seeds so well. Maybe all the rain killed them off. The tomato plants don’t look that productive yet either. The cucumbers, zucchini and squash all look like they will be out of this world productive this year. I spent the afternoon looking up recipes and going grocery shopping for ingredients. For dinner we tried a great zucchini recipe found here. It was excellent. I also pulled a zucchini bread recipe from Allrecipes.com too.

Today's harvest was pretty good. Look at the size of that one zucchini. Half of it was dinner tonight, the other half will be bread. The mothers-in-law helped by taking some of the veggies off our hands.

Today’s harvest was pretty good. Look at the size of that one zucchini. Half of it was dinner tonight, the other half will be bread. The mothers-in-law helped by taking some of the veggies off our hands.

We tried to weed the front bed in preparation for laying down some weed fabric there too but it was just too humid and hot around lunch time, so I called it a day in terms of working outside. The afternoon found us getting hammered by severe storms and yet more rain on top of the too much rain we’ve already had. We literally have temporary creeks in the front and back yard it seems. There are a few spots, which are already landscaped, that need to be regraded some day, when we’ve got the money to do so.

I ran out to go grocery shopping, but I also stopped off at the lumber store and ordered some provisions for a couple of projects. Christine wants to make some toy bins for the family room so I ordered a 4×8 sheet of birch plywood ($68).  This sheet will yield three bins. She said if I cut the wood she’ll make them.  They will be covered in fabric of some sort and this should help clean up the family room a bit, maybe even provide some bonus temporary seating.

I picked up a 16′ treated 4×4 and bag of cement also so I can get that bat house mounted in the yard. Bats are endangered and they eat mosquitos so I like the idea of helping them find a place to live on the property.

For the screen porch ceiling I ordered some rough sawn cedar trim. Finishing the ceiling should be a quick project and the material should only cost about $150 for wood and nails. Once it’s done we can stain the ceiling and we should think about staining the decks too to protect them. The wood trim I bought is 1″x4″‘s which I’ll rip down to 1″x2″‘s and nail over the seams in the ceiling 4’x8’ plywood. I’m going to nail them in a grid pattern which will tie into our square motif for the house. Only bummer is the carpenters nailed up the sheets in an inconsistent pattern, so unless I go with at 16″ on center grid, I’m going to have some weird anomalies visually. I’ve decided on a 48″ on center grid and I’ll have extra trim boards to cover any leftover seams. It won’t look aesthetically perfect the way I want it to but the only alternative is to rip out the ceiling sheets and start over or do the aforementioned 16″ grid which is way too much wood and money, not to mention visually crazy I bet.

This is the ceiling with a 16" grid, and the orange lines are the grid pattern I'm planning on laying up. Because the plywood seams are all over the place, I won't have a perfect square grid like I wanted but it's not worth ripping the ceiling down to do it over.

This is the ceiling with a 16″ grid, and the orange lines are the grid pattern I’m planning on laying up. Because the plywood seams are all over the place, I won’t have a perfect square grid like I wanted but it’s not worth ripping the ceiling down to do it over.

Well today marks the 2nd anniversary of  my blog and two years since the bulldozer first ventured into the tall grass. We’ve come a long way and have a long way to go. My blog hasn’t amounted to much but hopefully I’ve helped a couple of people out. To this day my most popular topic I think is the “L”-shaped shower curtain I put up in the boys bathroom.

Stay tuned and spread the word. We’ve got some good Summer projects coming up including the laundry room and hopefully my studio soon.

-Chris

Screen Porch Finished

The screen porch monkey is off my back. Sure there are some minor decor things that need to be addressed, but we finally have a screen porch; something we’ve been waiting for since we were building our last house. In fact we always hoped to have a screen porch so Daphne, our cat, could go outside to enjoy the fresh air without running away. She’s 13 now, and cat’s don’t live forever. It’s really nice to go out there to eat dinner, or just hang out. We have an adjacent open porch area as well, so that serves as a nice spot for the grill and a chair to rest in whilst waiting for burgers to cook.

As you may or may not know, we installed a Screen Tight system to enclose our porch. This is definitely the way to go. The base track went on easy, and eventually the screen and cap pieces went on fairly easily as well. After about 4-5 screen sections we got the hang of it, making the rest fairly easy to install. Tips:

  • install on a warm day, in late morning or afternoon. This loosens the track, spline and screen, decreasing the chance of “bubbles” in the finished screen section, as well as making it easier to insert the spline in the track.
  • keep track sections slightly away from overhangs and columns if possible, will make it easier to hammer the cap onto the track.
  • use tape to hold large screen panels in place until you can insert the first, top, spline into the track. I used the butt end of my spline tool to “hammer” in the spline to start each section. Insert top then sides and finally bottom spline in that order.
  • have a helper to help keep screen tight as you insert spline.
  • get 10′ lengths of cap material if possible. We had 8′ so we have a lot of unsightly seams. The extruded cap material is cut in line during production so not all the ends are square, especially the double (3.5″) cap material.
  • cut cap material with a hacksaw. I tried snips (messy), chop saw (plastic shattered, nearly taking an eye out), and a utility knife (mind numbingly tedious).

With all the screens and caps in place, the last step was to install the door. I installed a pre-made door, from Screen Tight. This was a bit more difficult because my posts / columns were a bit out of whack. I decided to mortise the hinges into a column, but it had such a bow, that only the top and bottom hinges got cut into the column; the middle hinge was just flush mounted so to speak. I checked the door and it showed level horizontally, but the bottom corner still rubbed on the deck boards….oh well, not sure what else to do I decided I could sand down the bottom corner of the door. I then installed door stops on the inside; made by ripping down a leftover pressure treated 2×4 into 1″ strips. I fastened all three strips and checked the fit. My door fit okay but was kind of all over the place…I then installed the door hook on the inside, this tightened up the closure, but only with the hook latched. Finally I installed the spring which was my only complaint. To get the door to close tight I need a lot of tension. Well the inside door hook doesn’t bite into the fiberglass door enough. Under tension it’s already starting to pull out. Poor design if you ask me, even with my sub par installation job. Overall I’d give my door install a D+ or C-. It works but it’s not the best and will probably benefit from a complete redo at a later date, but for now it’s manageable and keeps the bugs out.

As for the Screen Tight system I’d give it a A.  It’s the way to go if you want a screen porch at your home.

So that’s one major project done. Tomorrow I’ll install the garden gates and we should get most of the veggie garden planted.

The boys are really enjoying the house and yard. Each day they discover more and more ways to make me smile and laugh. I am very fortunate to be able to spend so much time with them while they are this age. Granted we may starve but I’m glad that we at least have this time together as a family. I realize a vast majority of parents are just trying to make ends meet or busy chasing wants or needs. So in one way we’re very lucky in these times.


The east meadow is exquisite this time of year. Like a painting it's saturated with greens, yellows and purples. The colors reach into your pores, as if seeing them isn't enough.

The east meadow is exquisite this time of year. Like a painting it’s saturated with greens, yellows and purples. The colors reach into your pores, as if seeing them isn’t enough.

Aronia arbutifolia ‘Brilliantissima’

Sorry, sorry, sorry I have not posted in a while.  As usual we’ve been busy.  More and more people are getting to see the house and visit.  In between entertaining, raising kids and working the day job we’re also staying busy working on the house.  This week I cleared up some “to do list” tasks and we’ve been working in the yard.  I am about at the end of my rope mentally and  physically.  Need to recharge again and get back at it.

We spent Saturday and Sunday visiting Lowes, Home Depot and Petitti Garden Center to see if there were any end of the season deals to be had.  Sure enough we found plenty of goodies to satiate our short-term planting needs.  Amongst the treasures we discovered were the Brilliant Red Chokeberry bushes we needed for the front bed.  We’re trying our best to find exact varieties as spelled out in the landscape plan.  When we find something that matches up perfectly we pounce on it.  This weekend was buy 2 get 1 free at Petitti’s.  Sunday upped the ante to include a 10% off your entire purchase sale.  So we also loaded up on some of the Green Velvet Boxwoods we need.  Ultimately we need about eighty boxwoods.   We got about fifteen this weekend on sale.  We’re comparing prices and what we got the weekend was our best pricing so far.

Home Depot had the two Hydrangea’s we needed, Hydrangea arborescans though I’m not sure if they are the ‘White Dome’ variety, they do have white flowers so closes enough in my book.  These go by the playset.  Lowes came through with $3 perennials, so we loaded up by buying twenty-three Echinacea pupurea (Purple Coneflowers).  As a bonus we bought two other neglected perennials for a dollar apiece.  Perenial wise we need 850 when it’s all said and done.  Long term we can actually divide many of the plants we’re buying now so it’s not like we have to buy them all.  The plan is to get the front bed done this Fall and next Spring.  We’re making progress.  Some of the remaining bushes we need we found at a great price online so we’ll order those ASAP to get Fall shipping.

We were going to plant everything today but it was just to damn hot.  The sweat was pouring off of us.  All we accomplished was garden weaseling the bare spots on the lawn and spreading grass seed.  It then rained pretty good so the seed hopefully set up and can start growing in the coming weeks.  I have some natural bagged fertilizer I’m going to spread around this week too.  This should get the lawn headed in the right direction come Spring.

Non plant wise I finally cleaned the garage windows, and it definitely felt good to get this chore off my back.  Also I’m keeping progress on the porch; I installed 2×4’s on the sole plates of the screen porch framing.  These will provide a mounting place for the screen porch system.  Next I’ll pressure wash the columns on the front porch and start caulking everything in preparation for painting.  Once everything is painted the screen can go on.

So this week is more planting, start caulking and we have an art show to get ready for.  There definitely is no time to rest.

By the way, Brilliant Red Chokeberry bushes are native to Ohio.  Birds love ’em and supposedly we can pick them and make jam if we are so inclined.  They look really nice and they are supposed to look great in the fall.  I’ll keep you posted.


Screen Porch Construction

Construction on the screen porch is underway.  So far our two amish workers have successfully covered all the previously exposed blue foam under the porches and they have also wrapped the columns.  The front columns need to be rewrapped as they were originally wrapped to be just 6×6 and we need them to be 10×10.  The larger size wrap will be appropriate with the scale of the house.  The back porch columns are wrapped and they look great.  The frame work for the screen system is going in place as well.

I’ll install a Screen Tight system on our porch.

(Ugh, I hate WordPress at times, just lost my post for tonight.  When I insert pics they sometimes are missing their caption, then when I goto fix them the blog part disappears. Alas it’s too late for me to re-write so I’ll share my gallery for now and tell you more about the porch construction during my travels in the coming days.  Sorry.  Boo WordPress).

July 27th – Alright quick add on for this post regarding the porch. The carpenters removed several floor boards and put cement board over the blue foam that is insulating the rim joists of the house.  Since the boards were removed I crawled down there to caulk the fireplace base area once and for all.  You’ll remember that I had icicles growing in my fireplace cause super cold air was shooting between the cracks and freezing the warm interior air.  This caulking should fix it up just right.  Of course in trying to do so all I had been about 6″-8″ of vertical space.  This coupled with all the spiders, alive and dead, all over me and the dirt in my ear made this about as enjoyable as icing a cake in hell.  I think I got it all sealed up.

What else?  Trying to remember….inside the screen porch the top of the columns are larger than the skinny 4″ headers, so they’ll drop in a false header to visually beef things up.  Once it’s all done I’ll get it painted and then I’ll throw in the screen system myself.

Screen Porch Design

Not much happening today.  Moved more boxes up from basement of old house and staged them in garage to move to new house.  It boggles my mind, and breaks my back, realizing how much crap we truly have.  We’ll get it all to the new place and go through it there.  We don’t have the time ane patience to go through it now.  I moved at least a half-dozen boxes that were never unpacked since we moved into the current house.  In our defense there are a couple of treasures here and there that should see the light of day in the new place.  And there is a lot of garbage that needs to find a new home or a landfill quite frankly.  You know it’s crap when the tree hugger says it needs to go in a landfill.  A little bit of it may even find its way onto eBay if I get frisky.  If you ever wanted an mid 20th century wringer washer, I’m your guy.  What a pain that will be to haul up.

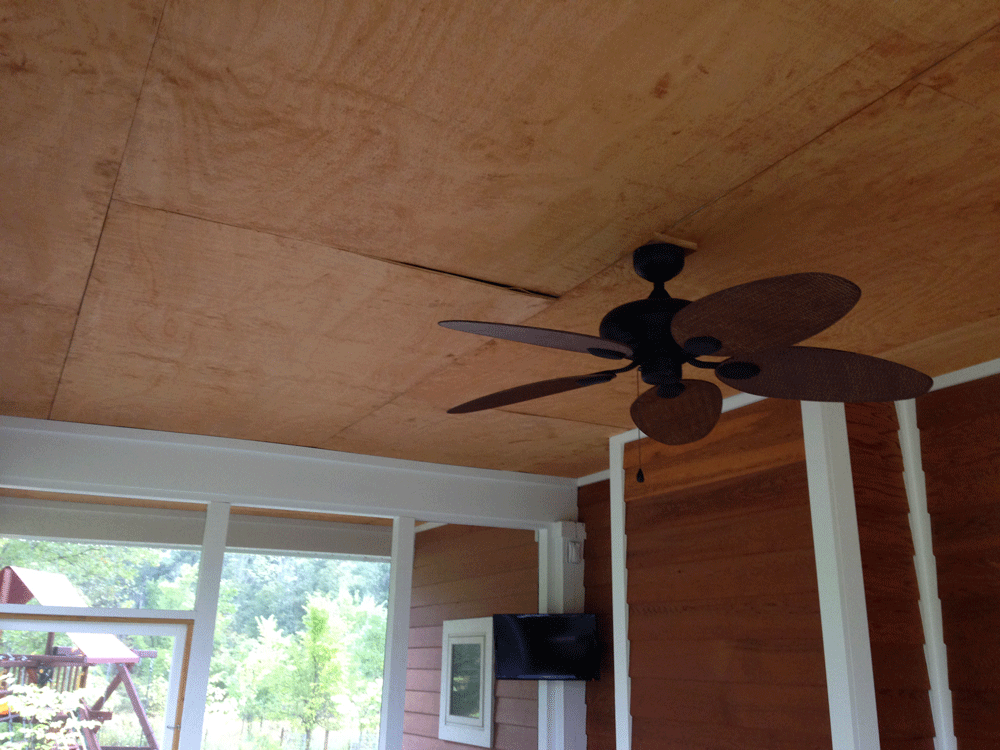
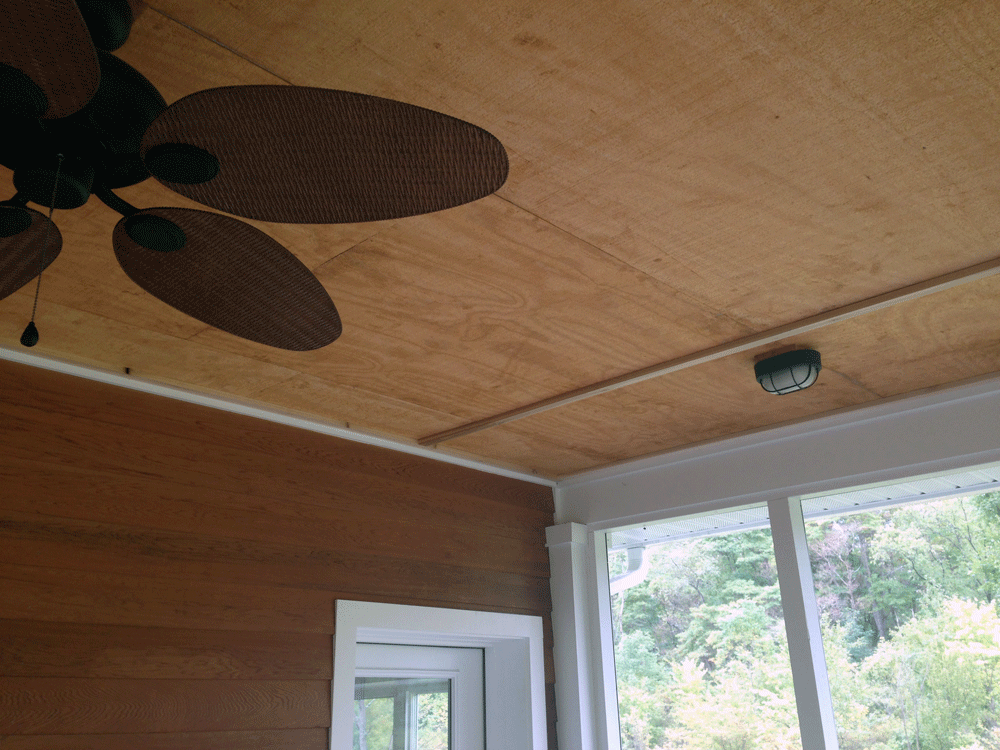
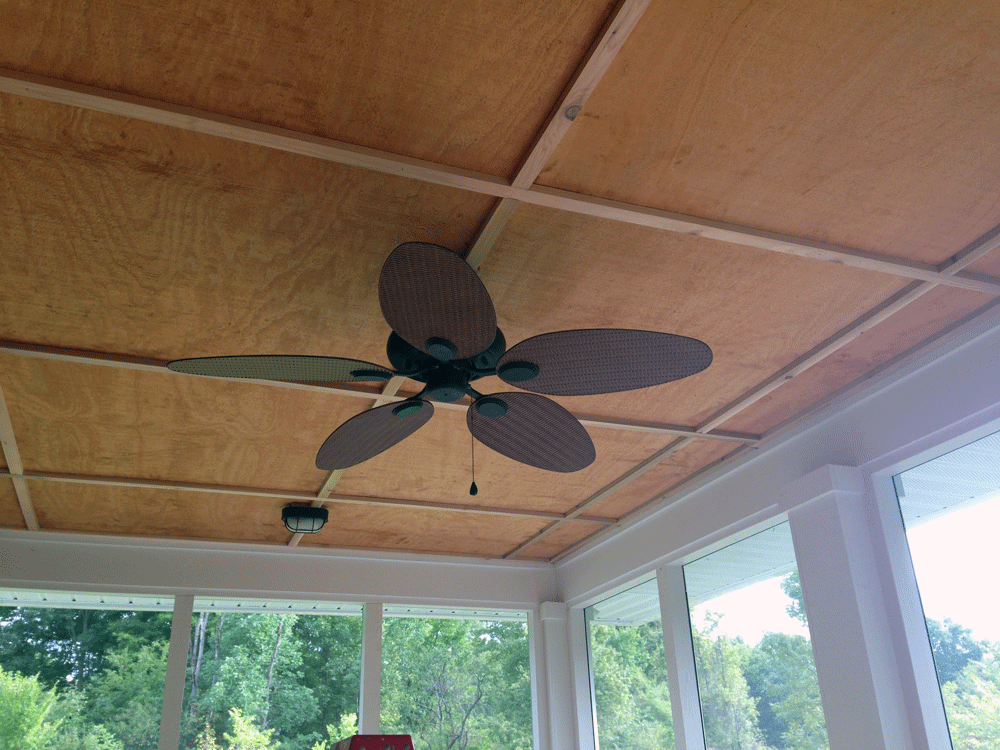
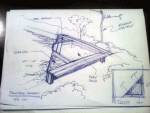
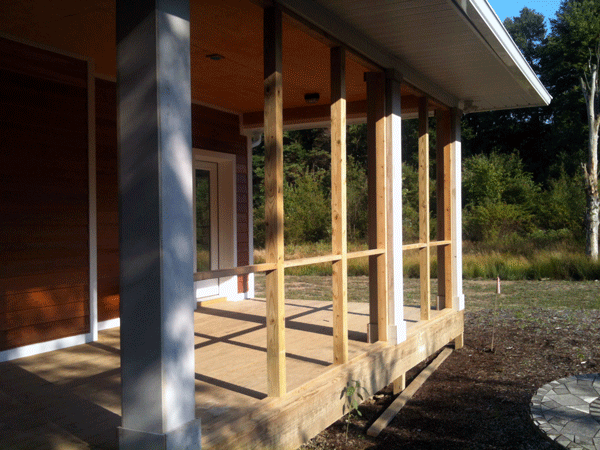
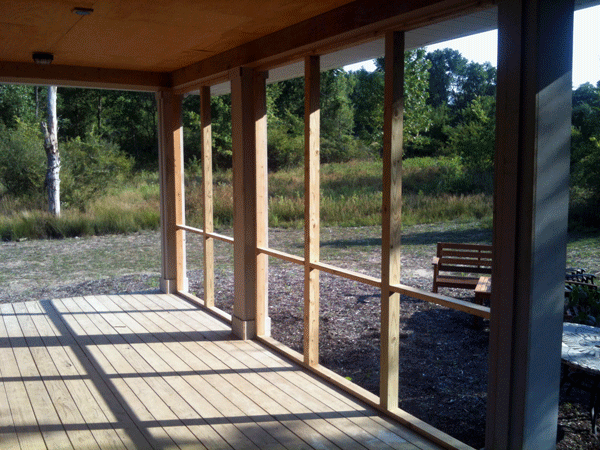
Anyway, as today’s title suggests, I actually designed something useful today.  They’re going to paint the house as soon so we’ll want to get the porches wrapped up now and get them painted as well.  Here’s a picture of what I came up with.


My design for our screen porch

All the trim on the house will be painted white, this includes all the framework for the screen porch.  I’m also planning on painting the risers on the porch steps white as well.  The key in my opinion is to make sure the deck looks like part of the house and not some cookie cutter “add-on” deck like you see on 95% of American houses.  I’m hoping to employ several made up tricks that I have up my sleeve to do this.  May turn out cool, may look like dog crap.  To be determined, but having a plan and design is half the battle.  The other half is made up of execution, good listening skills, money, craftsmanship, luck and beer. So far we have cookie cutter deck on both ends of the house.  This is totally my plan in my head as of tonight; I’ll know more if this is doable tomorrow after meeting with my master carpenter brother.  He’s the one who make ideas reality.

First thing we’ll do is slap a primed (white) 1×8 trim piece on all the deck edges.  This will do two things, cap off all the floor boards so we don’t have to see them from the sides, and it will create a shadow line on the rim joists of the deck where there aren’t steps.  Shadow lines equal visual money.  You can take that to the bank mister.  This will be the first step in creating our wickedly contemporary yet evocative farmhouse look.  Next up we’ll wrap all the columns to make them 12×12.  The large square scale should fall right in line with the overall scale of the house.  Many aspects of the house are amped up scale wise.  Seemingly small square windows are actually two or three-foot square.  The simple two car garage is actually a small barn.  And so on….  What’s actually happening here is f-ing brilliant in my opinion as you walk around the house and really visually examine it.  Anyway, the large diameter columns should fall right in scale and proportion with the rest of our one and one eighth modern mill looking, cape cod, farmhouse.  We’ll wrap the bottoms of each in 1×8’s and the tops in 1×4’s to finish them off.  By the way, we’ll carry the 12×12 post look down under the deck to in the areas that don’t have steps obscuring the view (basically under the screen porch). 

From there, where we have screen porch, I want to inset the plane of the screen walls in, once again to create some dimension and shadowlines.  Instead of seeing raw porch floor, I want to cap the area in front of that screen frame plane with a one by board and paint that white too.  This should give a little landing spot for birds and what not that Daphne can look at up close and personal.  These flat boards overhang the 1×8 trim board we first put on to create another shadow line.  Once those are in we’ll frame up the screen walls with simple 2×4’s, most likely cedar.  We’ll build a frame around the perimeter, running along the floor, up the columns and across the header, or just use the header.  We’ll evenly divide the distance between columns with additional vertical 2×4’s.  Finally we’ll screw in a horizontal “rail” at 30″ up from the floor.  The purpose of the rail will be to visually break up the space, harken back to our square windows potentially (if our verticals get close to thirty inches as well), and to make the screen sections smaller and easier to fix or replace.  We want a super clean and contemporary look so I’m going to forego doing any sort of toe kick by raising up the floor based 2×4.  We should be fine and this will give the kitty a more direct, if a bit exposed, sight line outside.  The door will go in at that point to, also made out of 2×4’s presumably. 

Inside of that framework I’ll mount a Screen Tight system.  It looks like a super easy DIY job, and should be available at a variety of supply stores like Lowes, Home Depot or our local lumber shop. 

The areas that have steps leading up to the porch with get two or three treads and risers.  I think we’re dividing upto 21″ of vertical rise (with 3 risers).  We’ll paint the risers white and the treads can be stained to match the deck color.  The stain for the flooring and treads will be one that matches the color of the main house.  I thought of painting the floor boards but figure it’ll just get trashed and be slippery.  Doing a stain that is similar to the house color should be pretty cool looking and somewhat unconventional.  We’ll see. That’s about it for the porch design game plan.  I’ll talk it over and then maybe we’ll get the ball rolling this weekend assuming the weather cooperates. 

In other news  I did catch flak for calling the wife “mousey” which in my mind means she’s cute with her big ol’ brown eyes and little nose but she took as me being mean in public.  Anyway, I stand by my assertation that she’s cute as a small rodent, but alas she did get one of her house-warming gifts from me tonight as an olive branch.  To thank her for being my lovely bride of something like thirteen years and putting up with me during construction (and moving), I bought her the world’s ugliest chair.  I know, sounds like I am a monster but she wanted it for her studio, so who am I to stand in her way.  If momma’s happy, everyone is happy.  God is it ugly.  I’ll post a pic tomorrow.