World Pangolin Day

World Pangolin Day

Today is World Pangolin Day. If you’re not sure what that means, I’ll give you an ultra brief rundown. This is a pangolin:

This is a pangolin. Super cute. Photo courtesy of http://savepangolins.org

This is a pangolin. Super cute. Photo courtesy of http://savepangolins.org


According to Wikipedia, a pangolin is a mammal that has large keratin scales covering its skin, and is the only known mammal with this adaptation. It is found naturally in tropical regions throughout Africa and Asia. The name pangolin comes from the Malay word pengguling, meaning “something that rolls up”. It is the most trafficked mammal in the world.

People in Southeast Asia love harvesting these little guys, often illegally, and selling all their bits , often illegally, to people in China primarily, as well as other countries. At the rate their habitat is being destroyed, and they are being killed, the pangolin will be extinct in just a few years. Which means while we’ve been able to enjoy their existence and the cool diversity they bring to our world, our kid’s world will be distinctly lacking in diversity cause they won’t have pangolins. Personally I don’t want to live in a world that doesn’t have cool animals, such as the pangolin, in it.

So to raise awareness we celebrate World Pangolin Day today!

Click here for 7 ways to celebrate World Pangolin Day today, and every day really.

And you can use these cool hashtags to raise awareness:

Please take the time to appreciate these awesome critters, and everything they offer in terms of wonder and diversity to our cool world. Think of ways that you and your family can help save these and other endangered plants and animals.

Basement Fireproof Caulking

When not trying to save the world, I’m trying to improve the comfort and performance of our house. Today I checked off a chore that had been on my list for a while.

Plumbers, electricians and HVAC installers in my opinion are nice guys but generally can be horrific when it comes to “whole system thinking”. What happens is the electrician comes in and runs wires, or the HVAC guy runs ducts. Then another trade comes in and does their thing. Well in doing their thing, they may inexplicably mess up the work of another trade and in the end you have a bunch of little issues that need to be addressed. For example, there is support blocking that was removed when air ducts went in, or random hole attempts in the foundation, or holes in air ducts where wires go through.

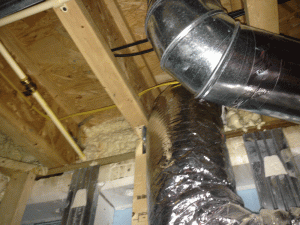
Just like the foam I had to replace / supplement last week, today I had to deal with some air flow issues. There is a large air duct that was created between two first floor joists. Fairly common, the HVAC team tacks up some corrugated like silver board to seal up the space between two joists and “Presto!”, instant air duct. The problem is either before or after someone ran electrical wires through the two joists. So the air duct, which works most efficiently when it’s air tight, has a bunch of holes that allow air to escape. By time the air goes from the furnace to the vent upstairs, it’s lost a lot of its “gusto” which makes the furnace work harder. In fact you want to keep wires out of the ducts altogether because they are an unnecessary obstruction to air flow.

To seal up these holes, finally, I used some fire barrier caulk. Because they’re electrical wires, you have to use fire caulk. The grey gooey stuff was easy to work with and came off of my hands easily when it was clean up time. I ended up using my finger to apply it because it was difficult to reach the holes with the caulk gun; too many pipes and wires in the way.

I even caulked up some gaps at the end of the vent for good measure.

Tip: do all this caulking during construction when you have better access, or ask your tradesmen to do it for you.

Basement

Framing is complete in the basement. So now we’re ready for inspections and then electrical. It’s really exciting to see the rooms formed and ready for the next step. I think we have around $750-$1,000 worth of materials into the project so far. My labor is free.

And I noticed my spray foam job did the trick on the exterior penetrations. I got one more can to touch up one little gap, but otherwise we should be pretty air tight in the basement now. Will see if these sealing chores impact our electric bill in the coming year.


Spray Foam For -15 Days

Winter is kicking the crap out of us. And it’s everything our energy-efficient house can do to keep up. School is cancelled tomorrow because the high is supposed to be around 4 degrees, and lows around -15 degrees.

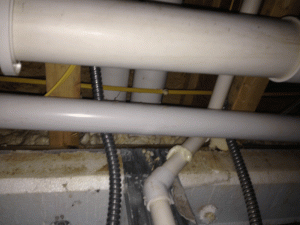
A weak in our super insulated house that I noticed recently is down in the basement. There are a series of penetrations in the rim joist where various mechanical systems go outside. These include holes for a spigot, the fresh air energy exchanger and what I think is the septic tank.

When they built the house nearly three years ago, the insulation was sprayed first, then the plumber and HVAC guys came in to set up their systems. Well when they did their job, they cut away the insulation but never bothered to spray foam around the pipes. Thus creating a kink in our insulating armor.

Recently when we had the spigot replaced (twice), due to leakage, more foam was removed from that particular hole and not replaced.

When I was finishing off the basement shelves this winter, I noticed I could see cobwebs near the holes blowing in the wind. Air was rushing into the house through the uninsulated penetrations. Because the house is super tight (or is supposed to be), any air penetration is exaggerated. So it was like little jet streams of air pouring in, and recently 0 degree air.

I was going to wait until the weather warmed up to spray some foam into the openings. I’m not sure if the cold air will affect the curing of the foam, as it hardens into an air tight barrier. But with -15 facing us tomorrow I figured I’d better spray today.

I used one can, and sprayed around all the openings. The foam takes a while to expand and harden, so I’ll check progress in the morning, and likely pick up another can to spray. There were a couple other little areas, like where a HVAC register is smack dab against the rim joist, that could use some foam.

When spraying, take your time. These areas are really tight to access, and a flashlight is necessary to be able to see. And don’t be like me: wear gloves. I got the nasty stuff on my hands and in the fur on my arms. It does not come off!

Overall the house has been holding up to winter in terms of keeping us warm. My office area is fairly cold and I’ve taken to plugging in a space heater. I’m also getting old and can’t seem to shake the cold anymore. We’ve been using the pellet fireplace a lot more this winter too. It works like a dream. One other note, the passive solar part of our home building equation definitely works. The kitchen, dining, family room area gets unto 75+ degrees on sunlight alone, which presumably takes some load off of the HVAC system.

I hope you’re all staying as warm as you can. I’m really depressed with the weather we’re having and can not wait for spring to get here as soon as possible.

Here are today’s pics. Peace.

Spray foam comes in a can. It's one time use, so use the whole can.

Spray foam comes in a can. It’s one time use, so use the whole can.

Pipes for the geothermal or septic system. Really tight access to where they penetrate the rim joist.

Pipes for the geothermal or septic system. Really tight access to where they penetrate the rim joist.

The input or output, I forget, for the fresh air heat exchanger. Fairly good access. Note, the laundry room HVAC vent in the adjacent bay is right against the rim joist, and could benefit from some spray foam.

The input or output, I forget, for the fresh air heat exchanger. Fairly good access. Note, the laundry room HVAC vent in the adjacent bay is right against the rim joist, and could benefit from some spray foam.

spray-foam-around-house-penetrations

Basement Project – Insulation

In the past basement insulation was often overlooked. Typically basement walls were cinder blocks and that was it. Now there are so many options from a construction standpoint, you really need to do your homework to see what suits your home building situation. Layer on top of that all the options there are for insulating your basement, and you’ve got your work cut out for you.

Insulating your basement goes a long way to reducing your energy bills, and increasing the comfort of the occupants living inside the home. Even if your basement is a storage catch-all, or a place to sequester unruly family members, there is great value in making your basement warm through the use of insulation.

The main advantage basements have, compared to the rest of the house, is it’s surrounded by soil. And the deeper you go, the more the temperature of the soil levels off around 50-60 degrees. Even at 4′, the temperature starts to hold its own verses air temperature above.

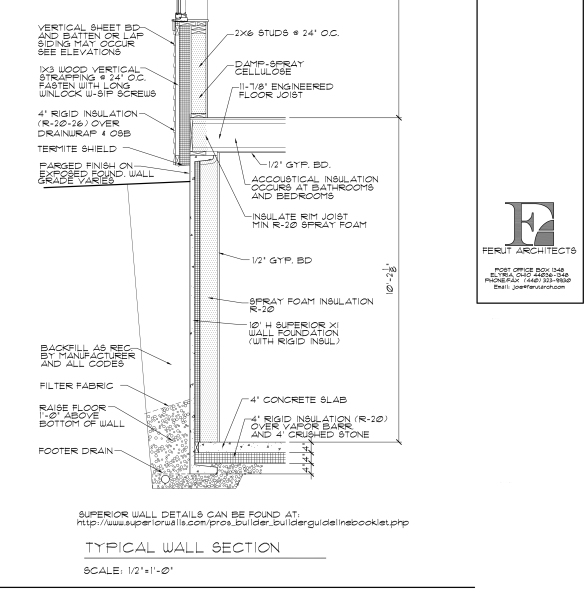
Here is a cross-section of our basement, provided by the wonderful peeps at Ferut Architecture:

Basement wall section courtesy of Ferut Architects. copyright 2014

Basement wall section courtesy of Ferut Architects. copyright 2014

So, taking a look at the diagram, you can see our awesome Superior walls make up our foundation. They’re awesome because they are prefabricated cement and include R-15 of rigid insulation right from the factory. Check out  this post to see how they were installed. It was amazing.

The plan was to add 3″ of sprayed 2 pound insulation to the inside of the Superior walls; adding R-20 to our R-15 walls for a phenomenal R-35 insulation rating to our basement walls. Also note we already have R-20 (4″ of rigid) under the cement floor. The basement would be warm snuggly nest once we were done.

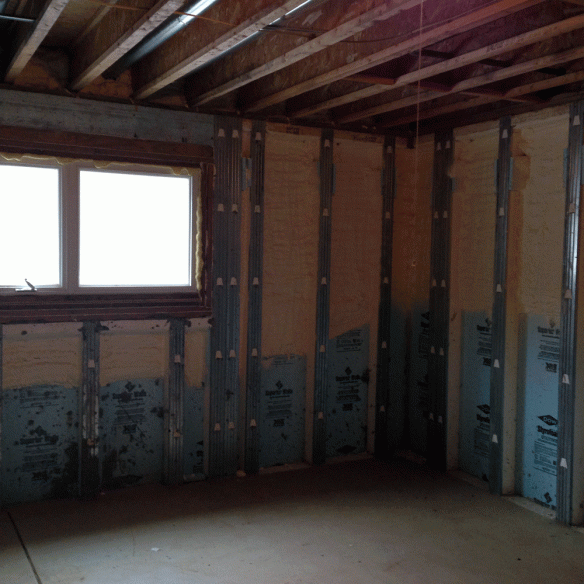
Basement before insulation.

Basement before insulation.

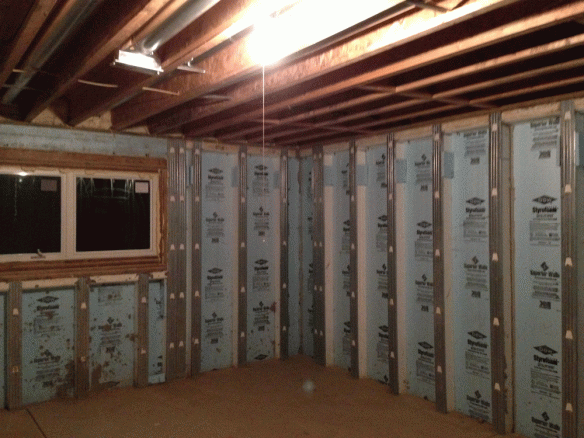
Well turns out due to cost restraints we needed to dial it back a bit. What we did was in all of the areas that were getting drywalled, we had our friends at R-Tek Insulation in sunny Barberton, Ohio, spray 1.5 inches of insulation on just the top 4′ of the 10′ walls. This gives that area an added R-10 of insulation, for a total of R-25. This is better than most foundations, and worlds apart from traditional uninsulated cinder block walls.

The spray foam provides an air tight and presumably water tight, or at least water-resistant seal on the walls. Once the drywall is on, our basement should prove to be more air tight. The combination of air tightness and increased insulation should lower our HERS rating from its current level at 41. I’m not sure if I’ll get the house tested again. Maybe down the road after I do a few other things (to be determined).

By the way, spray insulation must be covered with sheet rock (drywall) as I do think there are fire concerns with the material when it’s simply exposed. We limited our spray only to those areas where there would be drywall. The storage rooms did not get any additional insulation at this time.

For reference on a scale from 0-150 the average home has a HERS rating of 130. New homes have to have a 100 rating. A zero energy house (which we hope to be someday) is 0. Our house is about 59% more efficient than your typical new house.

The cost for our additional insulation was $2,000. To do the entire top to bottom at R-20 would have likely been $8,000 or more.

Basement after insulation.

Basement after insulation.

The white colored spray foam expands as it dries. It also creates a air tight, water tight barrier.

The white colored spray foam expands as it dries. It also creates a air tight, water tight barrier.

The top 4' are insulated with 1.5" of 2lb. spray insulation (R-10).

The top 4′ are insulated with 1.5″ of 2lb. spray insulation (R-10).

Another option instead of spray insulation would be adding more polystyrene rigid insulation. Check out the Superior website here, for more information. You simply cut and install the rigid, bonding it to the existing rigid in the walls using liquid nails or other non-foam attacking adhesive. In fact this is what I will do for the storage rooms where we won’t have drywall. Because the spray insulation needs to be covered, per code, putting rigid in the storage rooms is my only option really. So strangely enough we will likely get a full R-20 floor to ceiling in the storage rooms because I just have to pay for material. It’s a super simple DIY job that I can do myself – free labor! Actually in hind sight, I should have likely done this everywhere from the get go, but I already had the insulation guys lined up. No worries, I like the spray insulation. And down the road if we really want to I’m sure we can go back in to the exterior walls and spray more (would have to replace drywall though).

One other note, I don’t think you ever want spray paper based insulation in your basement. With all the potential natural moisture issues, like the potential for flooding, in a basement, paper based insulation (like we have upstairs) is a bad idea.

There you have it. Now onto finishing framing and building some storage shelves.

Let me know if you have any questions or comments below.

New Year’s Update

The eve of the New Year finds the land covered in a blanket of snow. The boys having gotten sleds from Santa this year finds me with the urge to be a kid again and go sledding. I’m not sure the quality, or quantity, of snow is there yet to go out, but New Year’s Day could prove to be most enjoyable if we find ourselves on a sledding hill. In the meantime I find myself working through a cornucopia of tasks and endeavors, with a fair degree of accomplishment. The ambiguity of my daily life is like waves on the shore; sometimes calm lapping the sand, other times crashing and tumbling. Regardless there’s always another wave which is good.  Here are today’s miscellaneous waves.

Super Food

Okay we got on a kick around Thanksgiving and starting eating kale. I don’t know what prompted this, but we really like it, even the boys. I got ‘Fifty Shades of Kale’ for Christmas, it’s a cookbook with a cute writing style. There are actually only forty-eight varieties, but there are fifty recipes in the book. From the Amazon overview:

Release yourself from the bondage of guilt and start cooking meals with the ingredients you love: meat, cheese, and yes—even butter. Nutrient-rich kale provides essential vitamins and minerals to keep you healthy, happy, and lean—so you can indulge in your most delicious desires. Whether you’re a cooking novice or a real kale submissive, you will undoubtedly succumb to Kale’s charms.

While I haven’t tried any of the recipes yet, it looks like a good cookbook. Yesterday the wife made kale salad for lunch, which is always good. I believe she usually includes kale, balsamic vinegar, pomegranate seeds, lemon….and I think that’s it. Occasionally, like yesterday, she included quinoa, which are little protein thingies that resemble grain but are actually related to spinach. Both kale and quinoa are ‘super foods’ that are super good for you. One plus about kale, we find it doesn’t wilt as fast as lettuce, it’s always firm…albeit sometimes difficult to spear with a fork.  The salad I ate was delicious and infinitely better for me than anything else I could think of to eat for lunch. Kale is going to be one of my ‘vegetables of the year‘ in our garden for 2014. I plan on focusing on growing kale, along with sunflowers in the coming year. Sure we’ll have other veggies (fruits, etc…you know what I mean) that we grow in the estate garden, but we’ll make 2014 the year of kale and sunflowers in our yard. I’m hoping to have enough sunflower seeds to give some away in the fall as gifts.

Kale salad, next to my new kale cook book.

Kale salad, next to my new kale cook book.

Cats

The kitties are all getting along relatively well. I took the two new kittens to the vet yesterday and they checked out fine. They are gaining weight nicely. We’ve taken to calling Dixon “Mr. Goo” as you can feel how much weight he’s put on, though he looks fairly lanky still. My little tuxedo buddy is like glue, always on my lap or curled up in bed. Hey, I guess if  you gotta have a friend in life, there are worse things in life than a cat.

Dixon is trying to warm up Ms. Daphne but she’s still pretty cold to him. He goes up to her and lays on his back but when he goes to pet her with his paw she hisses at him. Typical woman.  Sorry Dix.  I feel your pain friend. One word of advise, It may be because when you finish your tuna to storm over and start eating Daphne’s too….women don’t like that.

Daphne, Daisy and Dixon aka "Mr. Goo" getting along eating tuna.

Daphne, Daisy and Dixon aka “Mr. Goo” getting along eating tuna.

Charging Station

When I was Christmas shopping in Macedonia, Ohio last week I noticed a big tarp “tent” in the parking lot with a ‘Tesla’ logo on it. Too small to be a car dealer I looked up online and found out it’s a Tesla charging station. Go figure an electric car charging station in our neck of the woods. Very, very cool. Kudos to Macedonia leadership for having the foresight to approve construction and welcome the station to their town. We need more of this sort of thing if we are to progress and succeed. I wish I had the means to get an electric car. In theory our garage is ready to go, since we put a separate breaker box in the garage when we built it, so installing a home charging station should be easy.  Someday.

Tesla electric car charging station under construction.

Tesla electric car charging station under construction.

Basement

One project I’d like to start nibbling away at in 2014 is our basement. I realize that we don’t have to get it all done right away, but getting the basement straightened out would be a boon to the rest of the house.

My family (including me) has crap all over the place. I need to get all this crap pushed away into some space that isn’t my family room. The basement will be a great place for the litter boxes, toys, etc.  The kids can go down there and do whatever they darn well please and I can get my family room, dining room and kitchen back, each devoid of toys, inventions and tricycles.

I don’t know when we’ll be able to afford the basement project but I am starting to get pricing to know what we need to save for. First up is insulation. We had our friends at R-Tek Insulation in Barberton, Ohio give us a quote for insulating the basement. If you recall our Superior Walls – Xi basement walls give us an R value of 12.5. Our plans show R-20 worth of closed cell spray insulation in the bays (for a total, floor to ceiling of R-32.5). We got that insulation quoted during construction and it was around $13K, which we can’t really afford. In talking it over with a few professionals the next thought is to insulate the top 4′ of our 10′ walls which will get us below the frost line.  The two options then are to spray 1.5″ or 3″ of foam, which would give us an additional R-10 or R-20 respectively, for a total of R-22.5 or R-32.5.  Cost is around $2K or $4k for each option, which is do-able from a budget standpoint.

One note, for reference, our architect recommends R-40 for exterior walls. So while not quite there, we’ll be close. Even if we just use 1.5″ of foam at the top 4′ of wall, we should improve the comfort of the basement and home enough to make it worth while. Heat loss below the upper 4′ should be minimal. One area we may spray floor to ceiling will be where the basement window is since final grade is pretty low over there.

The closed cell insulation is sprayed on and hardens to provide an air and water tight seal. This is important because we’re trying to make the house as tight as possible, and our basement floods if the sump pump doesn’t work.  If we were to spray floor to ceiling this would be important because if we used fiberglass or cellulose insulation, were the basement to ever flood the insulation would be ruined and have to be replaced.  Important to keep in mind. Spray insulation is well worth any added cost for that reason alone. In our case obviously though we’re just doing the tops of the walls so it’s a relatively moot point.

Therma-Tru Doors

I’m still working on getting the exterior doors sealed up. I can see daylight on the double doors, its been this way since Day 1, so I called my Therma-Tru dealer and they’re going to see if they can have a technician take a look. I know what the problem is, I just don’t know how to fix it. Fingers crossed they can fix the problem.

That’s it for now. Have a safe and happy New Year’s everyone.

-Chris

Random House Repair

Sunday found me tackling a three items on my “honey do” list. Here is how things went or are going:

Repair The Coat Hook Rack In The Foyer

As you may remember, my sister-in-law ripped the coat rack off the wall in a drunken fit of rage on Thanksgiving (okay not really but that sounds better than “my wife and kids overloaded the coat rack, and my sister-in-law’s coat was the last straw”). Well anyway, the coat rack ripped clean out of the wall. My fix is to install a 1×8 poplar board, between the trim of the studio and front doors. I’m actually a huge fan of horizontal trim boards on walls. I think they add a “farm-y” or “craftsman” look to the interior and they are extremely practical, especially for coat racks, shelves or garment pegs. They also add some visual interest as well as make the wall color pop, if the trim is of a contrasting color such as white. If I was a designer, I would put them all over the place.

As of today, I’ve got the poplar trim board installed and painted. I’m trying to decide how best to install the coat rack. I’m leery to just screw it to the board, as I don’t want the screws to rip out of the poplar board. No worries about the board coming off the wall, it’s fastened with eight (8) SPAX screws so the board is going nowhere; just that the coat rack may still pull off under load if I don’t attach it properly.

Here’s the progress so far:

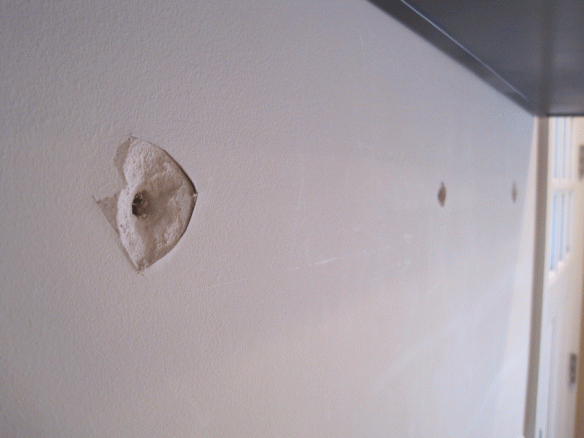
The coat rack ripped right out of the wall under load.

The coat rack ripped right out of the wall under load.

I cut away the damaged drywall.

I cut away the damaged drywall.

I spackled / mudded over the holes to repair them.

I spackled / mudded over the holes to repair them.

I pinned the 1x8 poplar board in place using my nail gun and small trim nails.

I pinned the 1×8 poplar board in place using my nail gun and small trim nails.

I used awesome 2-1/2" SPAX wood screws to attach the board to the studs, countersinking the heads.

I used awesome 2-1/2″ SPAX wood screws to attach the board to the studs, countersinking the heads.

I used spackle to cover up the nail holes. I then painted the trim generic white.

I used spackle to cover up the nail holes. I then painted the trim generic white.

Therma-Tru Door Corner Pads

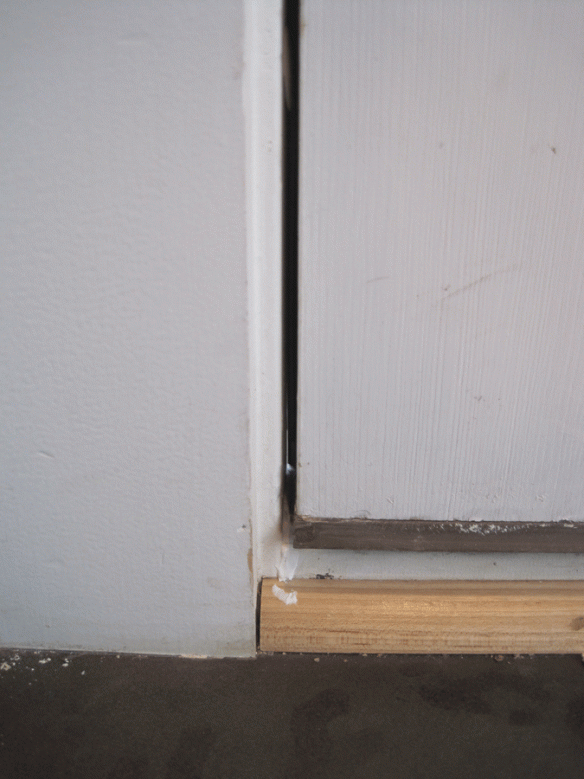
For 18 months now I’ve needed to install the little “L” shaped pads in the lower corners of our Therma-Tru doors. We could see daylight in the corners which means we were leaking warm air outside all winter. I simply followed the directions that were included with the pads. It was super easy.

  1. adjust the threshold plate so the seal under the door fits snuggly
  2. caulk the seam where the plate meets the door frame
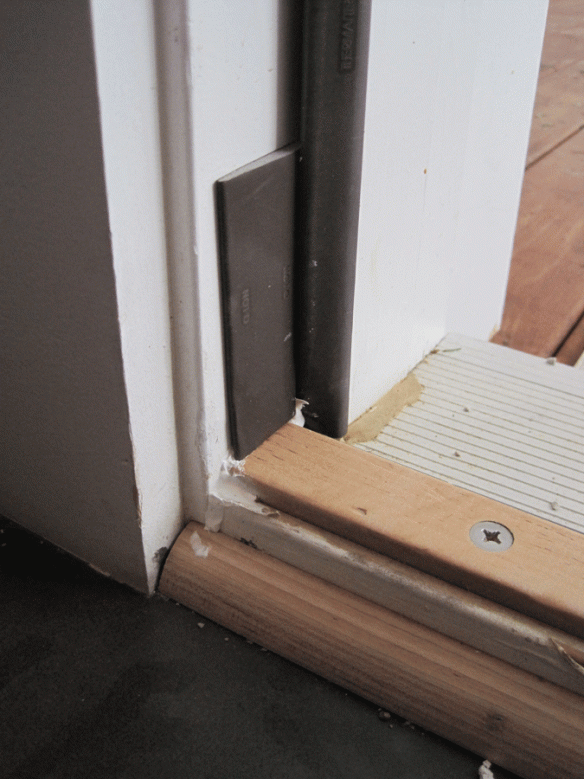
  3. install the wedge-shaped pads in the lower corners, tucking the “L” part behind the vertical seal on the door frame. I put the “L” part up. I think that was right.
You can see daylight before the pads were installed.

You can see daylight before the pads were installed.

Here are the parts and directions from Therma-Tru for the corner pads. They sent these to me for free after I sobbed that I didn't have any and could see daylight in the corners of my exterior doors.

Here are the parts and directions from Therma-Tru for the corner pads. They sent these to me for free after I sobbed that I didn’t have any and could see daylight in the corners of my exterior doors.

I caulked the plate after adjusting it vertically to fit snugly against the door's lower seal.

I caulked the plate after adjusting it vertically to fit snugly against the door’s lower seal.

The pad installed. Now we can't see daylight. Not sure if the house is any warmer.

The pad installed. Now we can’t see daylight. Not sure if the house is any warmer.

Laundry Room Drywall Repair

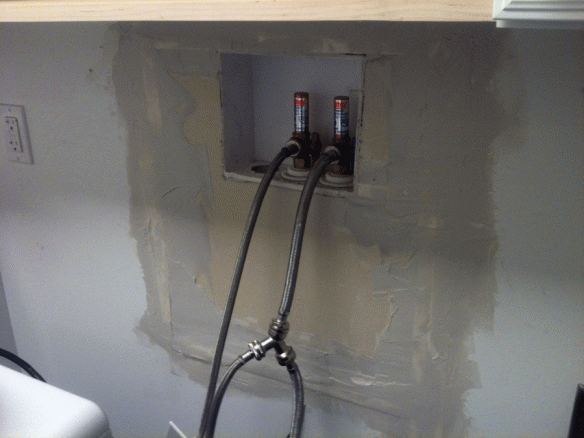
When we moved the water hook ups for the washer and dryer the plumber left a huge hole in the wall of our Laundry Room.  With two new cats exploring, the last thing I need is a cat, or kid, winding up behind the drywall meowing (yes my kids meow too, on occasion).

While the Cleveland Browns were blowing yet another football game I was in my studio cutting drywall. I attempted to cut it out of one piece and install it as such, which I was fairly successful at doing. The problem I ran into was for whatever reason the planes of the new drywall and old drywall already on the wall, didn’t really match up. Well let’s just say I didn’t let that dissuade me from making a mockery of the art of drywalling.  I proceeded to slather mud on the wall and squish tape into the joints. I pretty much hate drywalling.

Most “handy” people would look at something a homeowner does and give them pointers….”do this” or “try that“.  They would encourage and empower that person to do it themselves. They’d even make you feel bad if you called an electrician or plumber. ‘Cause after all, we’re all innately born with the ability to do simple house repair.

If a handyman saw how I do drywall they would say “You really should have hired someone to do that for you.

To say the drywall repair behind the washer and dryer is bad, is a gross understatement. It’s so bad, I CAN’T EVEN THINK OF A SNARKY ANALOGY! Just be glad I don’t make airplanes, condoms or lentil soup.

I put the second coat of mud on today. I’m thinking 32 more coats and everything should be evened out. The tape over some of the joints wasn’t sticking so I pulled it off and just slathered mud over those joints. It’ll be fine (no it won’t).  In the end, aren’t we just gonna tile over it all anyway?

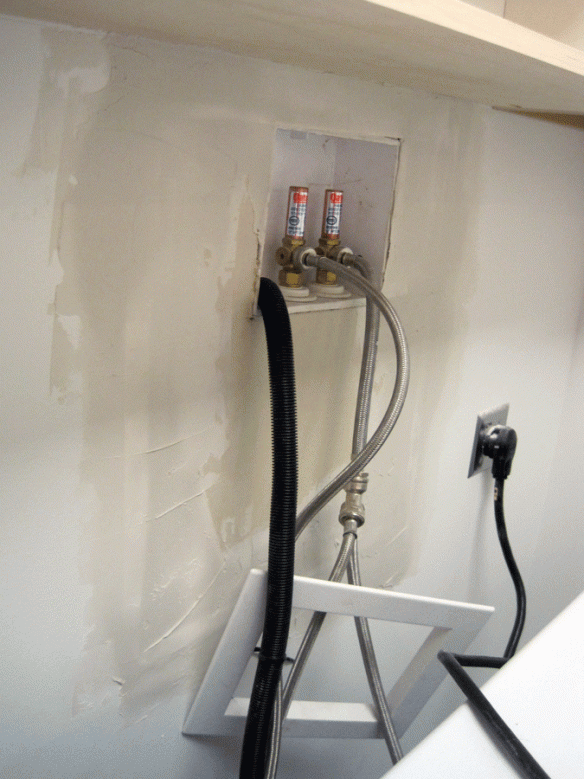
The hole in the wall; a result of moving the water connection up in the Laundry Room.

The hole in the wall; a result of moving the water connection up in the Laundry Room.

On the right I screwed a piece of particle board in place so I'd have something to screw the drywall to.

On the right I screwed a piece of particle board in place so I’d have something to screw the drywall to.

This is where is started to go wrong. Once in place none of the drywall was on the same plane. Instead of fixing I figured mud could cover everything up. Frankly I'm not sure how I woulda fixed it anyway. What the hell, just "do it" baby!

This is where is started to go wrong. Once in place none of the drywall was on the same plane. Instead of fixing I figured mud could cover everything up. Frankly I’m not sure how I woulda fixed it anyway. What the hell, just “do it” baby!

After the first coat of mud.  Eeek!

After the first coat of mud. Eeek!

After the second coat of mud.  Looks better, kind of like having beer goggles on, and drinking your second beer.

After the second coat of mud. Looks better, kind of like having beer goggles on, and drinking your second beer.

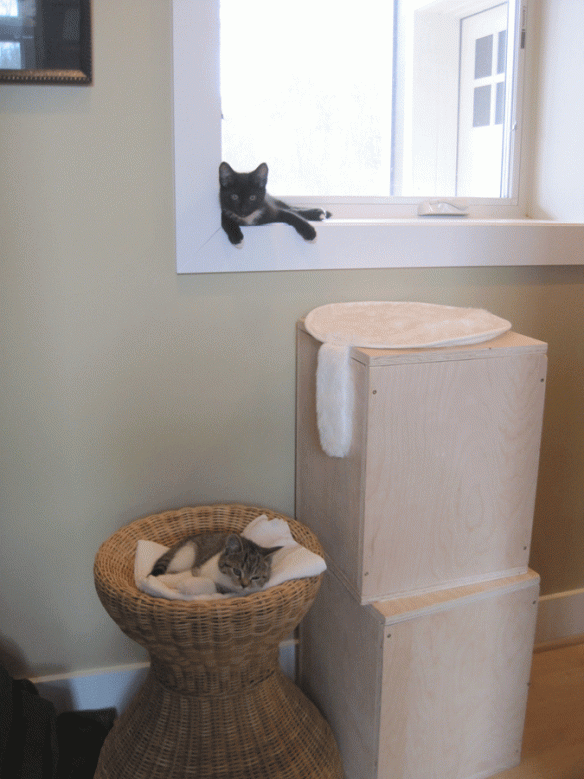
I leave you with a picture of our new cats. Both of whom are driving me insane. They have to be sequestered in my studio indefinitely and cabin fever is forcing them to go insane to. I may have kitten fur mittens by Christmas.

cats-in-studio

OMG Where Hath The Time Gone?

I don’t even remember when I posted on this blog last. It’s only Tuesday, I think, and suddenly this week is turning into a string of 10 hour days of design work. Any hopes of getting anything accomplished outside of paying work have fallen by the wayside. In all fairness though I still find time to talk incoherently to the wife, mumbling every third syllable, just to test our marriage and make sure she’s still interested. I bet it can go either way, really.

Seriously though, I figured I owe it to my blog reader to post an update on what we’ve been up to. Even though I worked all day and it’s 10 o’clock, I have grabbed the wife’s unopened bottle of chardonnay out of the fridge, unscrewed the top and poured myself a glass all the way up to the top (after all Daddy doesn’t get his recommended daily serving of fruits by just filling it halfway right?). Besides, what else am I going to do on a Tuesday night? Sit alone in the family room with the lights off, drinking wine and listening to ‘Blue Eyes Crying In The Rain’?  C’mon…I said it’s Tuesday, not Thursday.

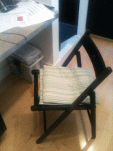
So I settle into my hateful folding office chair and hope the wine quickly numbs my aching back and neck as I share more of my existence with you, in hopes that at least one of us will get put to sleep…I mean like you’d fall asleep reading (or writing if it’s me that falls asleep)…not that you’ll be euthanized. Which makes me think, if I fall asleep while writing it’d be pretty cool if I landed on my keyboard with my nose on the ‘z’ key…then you’d know I fell asleep cause you’d see a sting of ‘zzzzzzzzzz’…. (that makes me laugh….I really find myself funny).

Anyway I digress.

What have we been doing?

  • Covered the play set area in weed fabric and then new playground mulch. It looks awesome. The kids are loving it and hopefully I won’t have to mow the mulch anymore this year. I’ve got a load of mulch waiting for the front beds too in preparation for the big cookout in a couple weeks.  We’re going to weed, lay more fabric and spread mulch.
  • I got to use a chainsaw on tree branches that fell from the neighbors tree onto the drive during a storm.  I still have all my fingers and toes.
  • Went to the Greenfield Berry Farm with our friends and picked a bunch of blueberries. It’s right here in town and even had live music, ironically enough this Saturday featured our friend Brent Kirby playing with his band Hey Mavis. The kids enjoyed picking berries and the weather was warm and sunny. Later in the month the farm should have ripe blackberries hopefully. Suffice to say we had blueberry pancakes the next morning for breakfast.
  • Added fighting yellow jackets to my to do list. There’s a section of the house that wasn’t sealed up properly when it was built. Previously the ants had been getting in there. Then the yellow jackets came and kept the ants out. But now we saw the yellow jackets hauling off our blue foam!!!! Piece by piece, presumably to make a large nest in our walls. So I sprayed something nasty in there and now I have to figure out how to seal it up.
  • Started making a list of stuff we’d change or will change once we have any money. The latest is the master shower. The wife is now making me squeegee the floor after EVERY shower as the water doesn’t drain towards the center.  The grout on the shelf is falling out too. We’re thinking of ripping it all out and starting over someday. I’ve given up on squeegeeing….I’d rather rip out $2,000 the shower.
  • I’m trying to grow two baby apple trees from the branches the deer ripped off. So far the hot humid weather I think has been good. There are still leaves on them.

Oh, and you’re probably wondering about the bees. Here’s the lowdown: we checked them last week with our bee keeping friend and we’ve lost our queen. There are a ton of queen cells that have hatched but still no queen so we’re giving it a week. If the hive doesn’t create a new queen by time we check it next we’ll go buy a new one.  Otherwise the hive looks awesome and seems healthy. We checked for mites and no signs of mites yet. By the way, to check for mites our friend showed us how to jab a toothpick into the unborn drones and pull their little unborn bodies out of the cells to see if there are any little grain of sand sized mites on them. Guess who will get that job in the future? Probably not the gal who has a spider box to release house spider alive into the wild.

Okay, I’m tired and my wine glass is empty.  Here are this weeks pictures.

Ants in the Attic

There is a certain freedom afforded to you when you realize you have made the biggest mistake of your life.  I swear an incessant string of mind numbing middling challenges, obstacles and failures can wear you out more so than hitting a brick wall.  In some regards the brick wall route is the way to go.  The “death by a thousand cuts” path is so artfully crafted that it really is the worst.  Like boiling a frog and he doesn’t even know it cause you’re raising the temperature one degree at a time.  My house is boiling me one ill executed notion at a time.

Today’s challenge, in addition to the standard “your kid might have broken his leg so he needs x-rays” wild card, involved Mother Nature again, as usual.  There a certain irony when you’re trying to do what’s right for the environment and even nature isn’t on your side.  Yeah, I get that family, strangers, friends, geology, etc. are going to fight you every step of the way at times, but c’mon….nature?  She’s got to at least have some sort of clue that I’m on her side.  I’m not saying we have to exchange cards on Earth Day or anything but at least work it out so that I catch a break more than fifty percent of the time.  She’s probably just pissed because of how I decided to combat the latest problem we’re encountering.

Our house was designed and built to be air tight.  Apparently ants are smaller than air molecules cause they’re pouring in like there’s no tomorrow.  Based on yesterday’s biblical rain, there may not be a tomorrow.  Anyway, the wife watches the ants magically appear on the ceiling through the attic access panel.  Now I know why builders of super tight houses don’t like ceiling penetrations like lights and access panels.  They prefer the ants live sight unseen in the attic.  Me being the outdoor lover that I am (this is sarcasm, fyi), I of course relish the thought of communing with bugs while sprawled out on the couch in my half million dollar boondoggle.  It’s bad enough I’m itchy already from ticks, mosquitos and god knows what else is living outside.  What I don’t need are ants.  Incidentally the house is covered in 4″ of blue foam which for all intents and purposes may as well be the shit they put in ant farms.  Essentially we’ll be living in a giant ant farm….mmm sugar water.

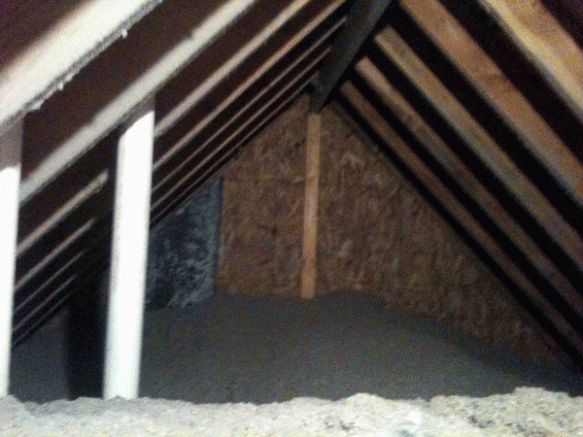
My honey-do list consisted of one task, figure out where the ants are coming from.  Perched atop my six-foot aluminum ladder I pushed up on the attic access panel.  Insulation drifted past my eyes as I reached up for the pull string on the light.  Setting the panel aside I poked my head into the attic and was completely and utterly dumbfounded. It’s not that the sight before me was remarkable, it just wasn’t at all what I expected. 


There was a lot of insulation.  And it was all on the “floor” of the attic.  Technically this is how it was supposed to be.  But I don’t know.  My mind couldn’t comprehend that that is how it was supposed to look.  There is no insulation in the rafters, nor the gable wall.  I could see daylight through the ridge vent.  The attic would be frozen in the winter time.  All of the sudden the attic access panel seemed like an absurd idea.  Beyond that I looked at all the insulation.  I tried to calculate how many ants could live in 16″ of loose insulation….sixteen times, what, a hundred square feet…..not to mention all the ones boring into my unprotected blue foam “outside”….outside by the way that suddenly felt very much inside.  I don’t know how to describe how it made me feel.  Defeated is one way, but it was some how more than that.  Defeated means there’s always next time, next season.  This was whatever is one rung below defeated.  In a normal attic you can wander the joists and spray the crap out of everything.  What I saw before me I couldn’t even step on for fear of compacting the insulation and defeating it effectiveness.  I may as well have been looking at the seabed a thousand feet below the Atlantic.  And then to figure out where the ants were coming from?  Gimmie a f*cking break, where couldn’t they be coming from, or going to, or living?  Hell, there could have been a hippopotamus hiding up there for all I know.  It really freaked me out a scoch.  I fix problems for a living and here was something I had no idea how to solve for.  So like any good husband I reached up and turned off the light, replaced the access panel and vacuumed up the fallen insulation. 

After I bleakly paced along the row of picture windows downstairs the wife asked me if  I was done spraying.  And like any good husband I said “We’re completely fucked.”

And like any good wife she marched my ass right back up into the attic and said “No sir, YOU are completely fucked.

Timidly, yet deftly, I finagled my way up into the attic, and admittedly I prayed a lil bit that I’d fall and kill myself so I wouldn’t have to battle this house anymore.  I dropped my canister of ant poison with a “poof” into sixteen inches of recycled newspaper insulation.  With that much insulation there is no way to tell where the joists are unless you look at the rafters.  One mis-step and my foot is going through the ceiling below.  I don’t know what’s in the spray, and frankly I don’t really care.  If it kills ants and the trade-off is my kids score poorly in math down the road…..well, anyway….I fire up my little sprayer.  Now ‘days the sprayer comes with a fancy battery operated nozzle that can shoot the toxic chemicals like six feet.  Sweet, this meant I didn’t have to wander around a lot up there.  Which is good because each step brought me knee-deep in insulation, leaving nice little compacted footprints everywhere I stepped.  Compacted insulation is useless at keeping your house cool or warm so I used my magic nozzle to fluff up the insulation where I had stepped.  I sprayed all over the place, including the cardboard retainers near the access opening.  The motorized nozzle does not shoot straight up so I couldn’t really hit the ridge vent.  In the end I have no idea where the ants are coming from.  There are just too many entry points between the vents, soffits, and blue foam / siding.

Hoping down I cleaned up the mess I created; insulation was everywhere in the room below.  I then proceeded to spray the entire foundation outside, as well as the doors.  Hopefully this will cut back on the number of ants.  Not sure what in the hell I’m supposed to do when the locusts and frogs show up.

This is why sleep has pretty much become irrelevant, or should I say sleep has decided being elusive is the only game in town.  It’s really getting kind of old.  I have no doubt this project was one of the, if not the worst mistake I’ve ever made.  I guess everyone makes mistakes, what counts is what you do next.  I suppose too that without adversity I wouldn’t get to know myself very well.  And mind numbing, middling adversity is great cause there isn’t much fanfare, charity runs, or Dr. Phil interviews.  I kinda have to face it on my own, cause frankly no one else really gives a rats ass.  They’ve got their own problems.  I guess coming to terms with this mistake and making the most of it will make for a good project. When life gives you lemons, at least you know you won’t die from scurvy right?

I did get the wife to start talking about putting this place up for sale and seeing which house sells first.  Maybe destiny is telling us we were meant to stay at the old place.  But like they say, destiny is a fickle bitch.  Either way the kinks need to be worked out of the new place while we’re the custodians. 

Just this morning I noticed the glass door on the shower no longer closes….

Corylus americana

Landscaping has yet to begin, but my boy and I continued our quest to plant our little trees.  Today we planted four American Hazelnut trees.  In order to stay tick free we picked out a spot along in the back yard, near where the excavated soil ends; keeping us safely out of the long grass. This area gets full sun which should make our nut trees happy.

seedlings are less than a foot tall. They and the house are the same age. They can celebrate birthdays together. I’m marking each with a labeled stake.


We planted four hazelnut saplings / seedlings. We spaced them apart so they could reach their full width but close enough that they can “mate”, therefore producing actual hazelnuts.

 To plant I dug up and loosened a foot diameter hole and dropped in our baby tree.  We then placed some of our handy-dandy top soil, from the house excavation, into the hole and surrounded the tree’s roots.  American Hazelnut trees grow upto 18′ tall and have a 12′ spread.  They’ll actually be more shrub like or small tree like, not towering like an oak.  The nuts should attract deer, squirrels and woodpeckers.  Just the other day we had a woodpecker working one of our free-standing dead trees.  And we’ve seen lots of deer on a daily basis.  I’m looking forward to seeing what our small hazelnut orchard attracts over the years.  Speaking of critters, I did spread some organic materials around each tree to dissuade small and medium critters from eating the baby trees.  We’ll see how that goes.

Inside the house we found an ant which tells me the house isn’t as tight as we would have liked.  Outside the ants are loving the porch areas where the workers failed to protect the blue insulating foam.  I’ll need to get out there and address the situation myself with a permanent solution in the coming weeks.  In the meantime I’ll resort to harmful chemicals or other methods to combat the ants before they have a chance to completely decimate our insulation from the outside in.  This is one instance where it would have paid to have experienced professionals on site during installation.  Nature will find the weak spots every single time. 

We’re also dealing with several gremlins including an ice maker that doesn’t work and random dead phone lines here and there.  Despite the ever-growing “to do” list, it was nice to sit down and have a “normal” family dinner tonight though.  We’re slowly easing into normalcy.  I’ll have to get my studio up and running to so I can focus on painting and less on fixing our new house.


Tar and Feather

I awoke to a relatively meager 3″ of snow on the ground this morning.  After some running around with kids and wife dropping off the car at the repair shop, I hopped in the Jeep; throwing the half bath vanity and the replacement light pharmacy sconce for the master bedroom inside before boarding.

As luck would have it Tony and my brother were freezing their asses off installing the porch columns that I would have had to help install, were I not so tardy this fine Saturday morning.  Approaching the house, after proudly parking the Jeep in front of my studio, I noticed all the breezeway columns were installed.  It appeared that the threaded bolts in the cement footers lined up fairly well with the corresponding headers running the length of the breezeway, from house to garage.  We used simple pressure treated 4×4’s for the columns or posts.  Each will be trimmed out in cedar to give the look of a 10×10 or 12×12 column.  By trimming the narrow dimension posts with large dimension “one by” cedar, we’ll be able to camouflage any inconsistencies or misalignment in the posts.

After a brief joke about letting all the hot air out of the house (the porch door was cracked open to allow hoses and cords outside) to the guys installing posts in the screen porch area, I stepped back inside; relieved that I’d missed that task.  Asking my other brother what I could do he mentioned I could work on the couple of items I’d mentioned the other day.  One was replacing the attic window panes with tempered panes.  A mis-measurement long ago lead to non-tempered panes being installed.  These would have to be fixed before we move in, otherwise the windows would need unsightly railings in front of them.  The other task was to investigate the draft mentioned by my brother.  He had experienced it coming from under the fireplace when they were installing the hardwood flooring.

Laying down some cardboard on the wood floor I got down on my belly and peered into the 8″ tall gun slit below the fireplace. Sure enough I could feel cold air.  And not just a little, actually quite a bit.  I was a fair bit alarmed because the whole premise of the house was that it was air tight and super insulated.  We had identified some problem areas when we did the blower test but the fireplace wasn’t really one of them from what I remember.  I reached into the cavity below the fireplace.  Quickly, for reference, the fireplace unit sits on a cement board and 2×4 platform about 8″ off the first floor deck.  The back of the fireplace juts out into the screen porch several inches.  You may remember, Eric and I built a 2×6 plywood box (or chase) to house everything.  The exterior of the chase has house wrap, 4″ rigid and cedar siding.  The inside has pink or blown insulation with a foil face for fire proofing. We insulated under the fireplace by installing pressure treated 2×10’s to form boxes, then we filled the boxes with 10″ of rigid insulation.  At the time I think we mentioned we should have installed the rigid horizontally, but alas we did 4″ blocks vertically.  We thought we had caulked everything up good.  apparently not, for as I stretched and dipped my hand I could feel a slight draft of cold air.

Slit near floor, below fireplace and to the left of Tony is where we had an air leak. It's about 8" which is just enough to make you think you can do productive work under there.


“Hmmmm…..okay here…..I can feel the draft here”, I think to myself.
Sure enough coming up between the seem in two of the vertically install blocks of, our friend, blue foam.  Mind you, at this point I’m belly down and up to my arm pit in fireplace goodness.  I’m clawing around at loose insulation, made from recycled newspaper, that had fallen down; grabbing handfuls and setting it aside.  I can taste the fiber like grit of insulation in my mouth.  Yummy. 
 
Then my hand reaches way back and the cheapo pink insulation feels cold….but not really, cause what it feels like is not cold but rather cold and wet……what the?  Slowly the fiber like dust settles enough and I gaze into the dark cave under my fireplace.  Scanning right to left I do a double take, not sure what I’m looking at.  At first I think its expanded foam shooting skyward from between the blue foam blocks.  It literally takes five to seven seconds for my brain to comprehend what I’m seeing.  In disbelief I force my hand to continue panning right to left and grip the, literally, ice-cold stalagmite protruding upward.
 
It’s a god damn upside down icicle in the middle of my house.
 
I think to myself, as a form of diversion, “which is it, stalactite or stalagmite?  Those things in caves?”
 
Seriously?!
 
Continuing in disbelief I think to myself “Enough of this” and I break the f-er off at the base.  Damn thing is easily four or five inches long. “How does an icicle even from upside down?”  I peer in again looking for its counterpart on the “ceiling” of the fireplace slit.  Nothing there.  Getting to my feet my mind races.
 
The whole philosophical foundation of this house was that it would be airtight, super insulated and energy-efficient.  And looking down in my hand I’m seeing just the opposite of everything we’ve done for seven months.  Imagine you went out and laid down money for a Lamborghini. On your way home you decide to open it up a bit on the freeway only to find that you’re being passed by mid-90’s Chevy Cavaliers.  You pull over, pop the carbon fiber hatch and find the automotive equivalent of a friggin’ upside down icicle in your engine bay. (Chris, they’re call stalagmites btw).
 
Are you f-ing kidding me?  I’m sweating to death cause the house is so hot everywhere else, yet it is cold enough to form an icicle in the open space under the fireplace.  It’s 70 degrees inside the house yet I can see my breath under the fireplace.
 

This was living under my fireplace inside my super tight insulated house. Trust me, the irony that it looks like a certain body part in my hand was not lost on me in the least. Very apropos all things considered. Basically the energy efficiency gods having a laugh at my expense.


As best I can tell, the air infiltrated our 2×10 box through a uncaulked seam.  The narrowness of the seam accelerated the super cold air.  As soon as that cold air hit the warmth of the house it condensed on contact and created a micro climate under the fireplace.  The insulation got damp and the area where the air penetration was built up this kick butt stalactite or stalagmite or whatever the heck it’s called.  I spent easily the next twenty minutes trying to figure out a fix.  Looking outside I could see there could be some improvement sealing out there but it’d have to wait til spring or summer.  Just too tight and cold to crawl under the deck today.
 

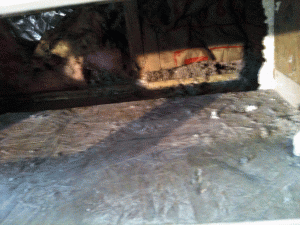
Fuzzy pic but you can see how tight it is under the fireplace. Just tall enough though to think you can be productive. Just short enough to eliminate any success at doing anything worthwhile.


I decided I’d cover the whole surface of the blue board with a cocktail of expanding and non-expanding foam.  On top of that I’d place a cement board panel.  I’d then caulk all the seams.  Running up to Terry Lumber I picked up the two types of spray foam.  I started with the non-expanding type, spraying the perimeter and dumping the rest of the can as best I could on top.  The close quarters made 80% of this work a guessing game.  Next I used most of a can of expanding foam, jamming the nozzle down into the cavity where the icicle was.  I had previously beat the base of the icicle to break up the ice as best I could.  The conditions were not optimal, temperature wise, according to the can but I couldn’t wait til July in Cleveland to do the job.  Once all the foam was down I squished my cement board panel down into the foam.  Securing the panel with screws or even a nail was impossible….believe me I tried.  So I held the panel in place with some cut 2×4’s, applying pressure between the panel and the fireplace “ceiling” above (the platform for the fireplace).  I then caulked all the seams I could see, including some that probably made no difference.  Into other voids I saw, I sprayed expanding foam to seal everything up real tight.  I then tossed the loose cellulose insulation back into the chase bays in the areas that the pink insulation was lacking.  The pink insulation was still a tad wet but I fluffed it up and it should dry out now.
 
Throughout the process I essentially rolled around in spray foam, caulk and cellulose insulation.  My hands looked like I made love to an unwilling bird.  Pulling the dried caulk from my fingers tested my hand’s ability to retain skin to flesh.  I’m pretty sure I inhaled enough chemicals and insulation to obliterate any hope of not dying of cancer. I basically, figuratively….slightly literally, tarred and feathered myself over the course of an hour.
 
It was not a text-book operation by any scope of the imagination, but I will say, our little cavity under the fireplace did start to warm up after a while.  And I couldn’t feel any direct cold air anymore.  After that was done we started to skin the fireplace with 1/2″ OSB.  Upon that will go chicken wire and our masonry stone.
 
Elsewhere in the house Eric is continuing to work on trimming out the doors.  The three panel doors look really nice in person.  Tony and I trimmed out the top of the master closet with 1/4″ luan plywood and some left over 1x scrap we had lying around. The coming week should include kitchen cabinets and baseboards starting to go in. 
 
‘Til next time, stay warm. 

Trimming closet top in 1/4" plywood


Using left over 1x2 rips to trim top of closet


Trimming out the interior of the porch door


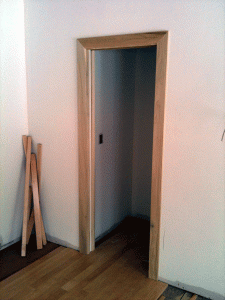
Pantry pocket door with trim.


If you're doing this at home, start with the top piece then do the sides. Our casing is about 3.5" wide. Base board will be about 5" tall.

Field Trip

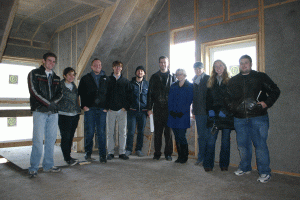
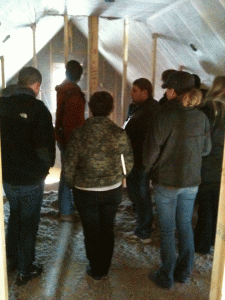
Photo of KSU students and I during their tour. Of note, you can see the hole in the studio wall for the drywall to be offloaded into the house. It was sealed up later that day.

We had some very special guests stop out at the job site today.  We (I) welcomed Joe Ferut’s architecture class from Kent State University.  Joe is our architect and a professor at the school.  We had nine of his fourth year students visit.  It was fairly cold out there today but fortunately the season’s first snow fall gave way to partly sunny skies by ten o’clock. 

The insulation crew was hard at work when I showed up.  The second floor had been insulated the previous day and today the first floor was being wrapped up.  We’re using a spray cellulose insulation made from recycled newspapers.  This process creates a lot of dust and left over insulation bits, but everything is swept up back into the hopper and sprayed back onto the walls.  A large truck pumps the material to and from the house.  Inside technicians spray the insulation between each of our 2×6 framed bays.  They then take a board and drag it along the studs, removing the excess insulation which is collected and returned to the truck.

We talked to the students about the architect – client process, our project and some of the exterior features.  We then walked inside and toured the house.  Much was mentioned regarding the energy-efficient tactics we employed as well as some of the products we used such as the Serious windows and the Quadrafire pellet fireplace.  The students seemed to like climbing up into the loft and admiring the view and space.  apparently I now know, the loft can hold eleven people at least.  Party!

I had to leave soon thereafter but I had an enjoyable time showing off the project.  We’re really proud of what we’re accomplishing, and more importantly energized knowing that we’re sharing info that will be beneficial to the next generation of architects.

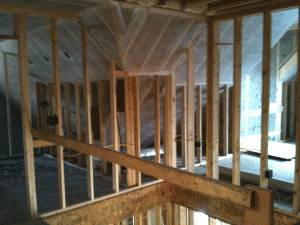
Good pic illustrating all the insulation strategies including caulk, spray foam and blown in cellulose.

Happy corduroy day by the way (11-11-11).