Basement Update – Drywall

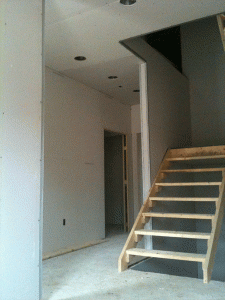
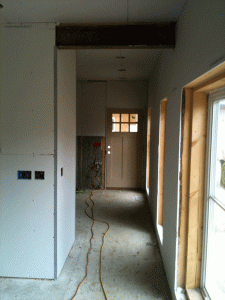
The basement has drywall! Happiness.

Once completed this will be our first finished basement as a family. In fact, the wife’s never really ever lived in a house with a finished basement. So getting the drywall installed is a big step towards that goal.

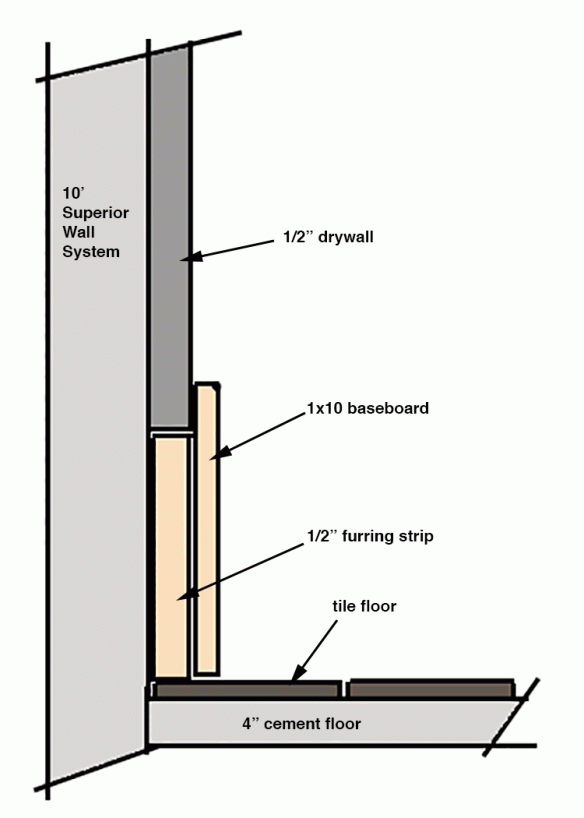
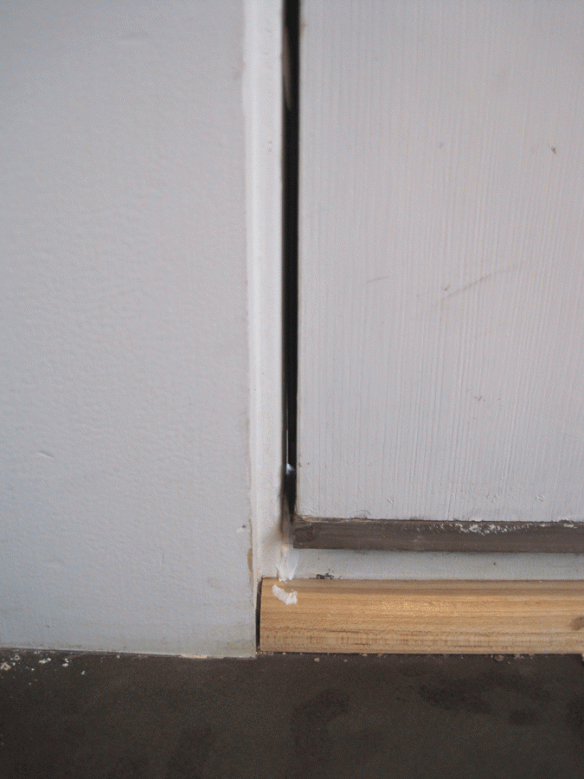
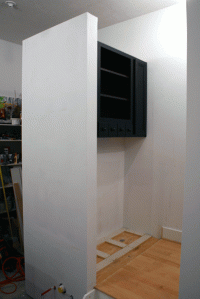
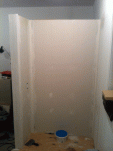
The space actually doesn’t look all that different, or at least not as different as I expected. It does look good though. You can get a feel for the large rooms down there. And as you look at the photos you can see how we left the sheet rock up about 8″ to mitigate against any potential future basement flooding. We’ll cover that gap with replaceable plywood baseboards that can be removed in event of water pooling in the basement as a result of sump pump issues.

I didn’t install the drywall myself, rather we contracted that out. It took about a week for one person to hang, tape, mud and sand. It installed with no problem onto our Superior Walls foundation, and the metal stud partitions I raised.

To a certain extent, installing sheet rock on the foundation walls, along with caulked baseboards, should insulate the basement even more, and make for a tighter envelop on our home. Maybe once the basement is complete, and I do a few other things (all LED light bulbs for example), I will have the house re-evaluated for energy efficiency and see if we’ve improved our HERS score.

Take a look at the photos and captions for more on the drywall.

Next up will be painting all the walls. We’re going to do this next because with the floor being bare cement, we won’t have to worry about paint spills. We can get at least a coat or two on the walls, then touch up later if necessary.

Speaking of the floors, we have tile on order from Lowe’s. We went with a distressed wood look porcelain tile, which is very trendy right now. The 6″ x 36″ tile is called ‘Sequoia Ballpark Tile’, and it is $2.99 a sq. ft. which is a bit pricey. In our search we did come across tiles that are upwards of $10 a sq. ft., so everything is relative. We like the look and will save some cash by installing it ourselves. We’ll cover all 948 square feet of the basement with the tile. This will give us a nice looking floor that will be impervious to any flooding or moisture in the basement. The distressed look, with brown, white and grey tones should be timeless aesthetically, and congruent with the style of the rest of our home.

It’s very exciting to well on our way to finally having a finished basement space for work and play. This will accomplish a major house goal for us. One that has been around for over fifteen years really.

Basement Update

Tonight a quick update on the basement project. We actually have not done much since I last wrote about the electrical in June. Everything passed inspection so far – electrical, framing, insulation. Next up is drywall.

I decided that I would just hire a drywall contractor to do the basement drywall. My time is better spent working, and a contractor is going to do a better job than me anyway.

Because the house is done, there’s no way to get really long 12′ sheets of drywall into the basement so we’re using 4’x8′ sheets. We’re using USB Ultralight weight 1/2″ sheets. 58 regular white ones, and 8 green mold resistant green ones for our 900′ square foot basement. Cost was around $700 for materials and truck rental.

Our ceilings in the basement are 9′, but we’ll lose some height with the drop ceiling. To make up the rest of the difference between the ceiling height and the 8′ tall sheets, we’re going to install 10″ tall baseboard trim.

We are worried about flooding in the basement, if the sump pump ever failed during a storm. We were originally going to install cement board on the lower foot so that if the basement flooded, we wouldn’t have to rip out the drywall. Well our drywall contractor came up with a better idea. We’ll paint the baseboard all around, front and back, to create a water-resistant seal. The baseboard will then cover up the bottom 8″ below the where the drywall ends. We’ll fir it out a 1/2″ so the baseboard overlaps the drywall. Then if it ever gets wet down there we can simply unscrew the baseboard and throw it out if it’s ruined, or remove it before it gets too wet. I need to talk to my trim carpenter to see if using MDF or hardwood is preferred for the baseboard.

Detail of how I'll finish the basement walls

Detail of how I’ll finish the basement walls

It should be a pretty neat trick. And the tall baseboard will fit in with the contemporary feel of the rest of the house.

I went to Home Depot and picked up the drywall material. I was able to rent their truck and get it unloaded in an hour.

Next week we start installing drywall so I’ll share more updates then.

My rental truck with all our drywall loaded and ready to go home.

My rental truck with all our drywall loaded and ready to go home.

Basement Planning and Pricing

Before we jump into all the “fun” work I’ve been doing in the basement for the last six weeks, let’s do a post to go over our game plan.

Budget is the biggest driver for the project. We have zero money frankly, but as I said in the last post: we feel strongly that we need the space to be useful, otherwise what’s the point. Before the project the basement was full, no exaggeration, of “stuff”. Furniture, half filled boxes, years worth of stuff that had just been moved from house to house. For example, in our old house we had a library filled with books. There’s nothing like that in the new house, so there are just box after box of books. My wife collects board games and we’ve never once had a place to store and display her very extensive collection. I have every car magazine from 1986 to the early 2000’s. Yes, those can be recycled but I’d like to go through them first. Point is we have more crap than most of you combined.

The basement has to stop being a big catch-all.

Okay, back to design and our plans. Here are the main project areas. I’ll go over them in detail in subsequent posts.

Exterior Walls

When we built the house, you may recall we used Superior Walls for our foundation. The basement walls are prefabricated out of cement and steel, and stand nine feet tall (9′). The walls feature metal stud facings so we can apply drywall directly to the face of them. No need to fir out the walls which saves a lot of time and money. I just need to frame in a few of the corners with drywall nailers. Note, we would also have to frame in for any shelf or cabinet supports ahead of time. Superior walls cannot support a vertical load so don’t go screwing in cabinets into the studs. More info, and to see nailer diagrams, click here.

Insulation

The foundation walls are insulated to R12.5 from that factory with blue rigid insulation. When we installed them I speculated that we would insulate them with another R-20 worth of insulation, which I think is the maximum if we fill the rest of each cavity with sprayed insulation. Well to keep costs down we did two things 1) only insulated the top 4′ of the exterior walls and 2) went to a depth of 1.5″ (R-10). Why? The top half of the wall has the most exposure to outside temperature changes. Once you get beyond 4-5 feet the earth’s temperature is pretty stagnate, something like a constant 50 degrees or something (I’ll let you look it up). By the way, cost to insulate the top 4′ with 1.5″ of 2 lb. spray insulation (R-10): $2,164. Three inches (R-20) would have been $4,040.

Floors

The floors in the basement are cement (over 4″ of rigid foam insulation by the way). Our basement is prone to flooding if the sump pump ever fails, so that drives many of the design decisions we’ve made in regards to our basement project. Long term our plan would be to cover the entire 950 sq. ft. of living space with ceramic or porcelain tile. Short term though we’ll leave it cement. I’ll rent a floor cleaner from Home Depot and clean the cement myself. Not sure if I’ll seal it at this point. I’ll decide when the time comes. We could stain the floor like we did in my studio. That is always an option, in lieu of putting tile down. For now though regular concrete will suffice everywhere, though the bathroom will likely get tile right out of the gate. Cost should just be a few hundred dollars for cleaning and any tile.

Ceiling

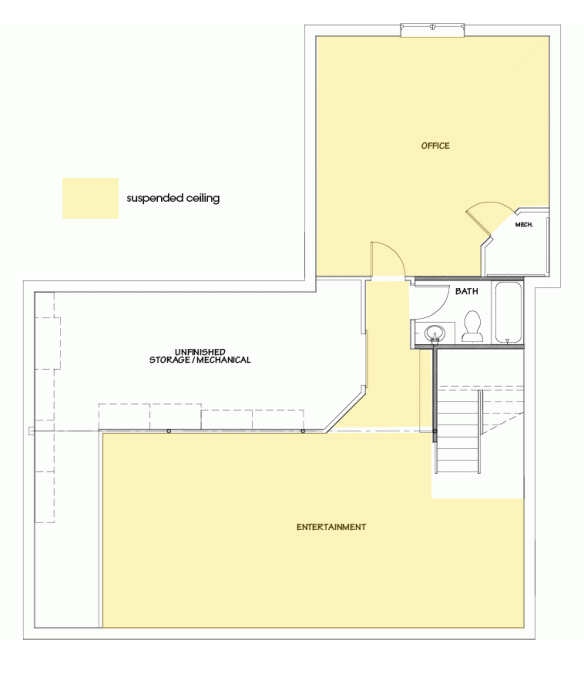
There is some debate whether to put in a drywall ceiling or suspended ceiling. Drywall is cleaner and more finished. Suspended ceilings give you access to HVAC, water and electrical. If you think about it, the other floors of the house are covered in drywall with no utility access. So I think drywall is a fine choice. The problem with our ceiling is there are a lot of pipes, ducts and other obstacles that I don’t want to, or can’t, soffit around. We’ll be putting a drop ceiling in all the living areas except the bathroom. Armstrong has a wide selection of ceiling tiles and a lot of inspiration shots on their website. I got a quote for installing a generic Armstrong system: $3,500. I’ll do it myself. Hopefully the material cost will be closer to $1,000-$2,000. We may hold off and do this next year if we can’t afford it.

The yellow areas will likely be drop ceiling.

The yellow areas will likely be drop ceiling.

Interior Wall Framing

Because of the potential for water flooding should the sump pump fail, I was hesitant to use wood framing. If the basement flooded there’s potential for mold to grow in water-logged studs and walls. Regardless always put down pressure treated sole plates, but I didn’t feel like using treated studs. I was curious about metal framing so that’s what I went with. I still used wood for soffits, blocking and ceiling areas. Look for my thoughts on metal framing in a future post. Cost wise we got an estimate for $1,791 to have someone else do the framing. I did it myself, learned a new skill and spent about $750 on materials to partition the basement. By the way, this includes material for desperately needed storage shelves in the storage room.

Electrical

I don’t do electrical so we’ll have to hire a pro. We’re doing the bare minimum. With the drop ceiling and good access from the storage room we can add-on later. For now it’s all switches, outlets, and ceiling cans. I’d like to swing for 4″ cans but may just default to 6″ to save money. Would like to populate them all with LED bulbs though. Cost estimate for electrical parts and labor is at $4,000. Yikes!

Walls

We’ll drywall everything. I may put 12″ of cement board at the bottom of every wall because of the aforementioned water damage potential. Or not. Estimate we got was $3,757. Doing it myself will hopefully save some money. But I don’t have the patience or craftsmanship (or desire) to mud it all so I may have to source that.

$4K electric, $2K insulation, $1K framing, $3K drywall = $10K, then do the ceiling next year or down the road maybe. We’ll see. I just hand over receipts and the wife keeps track and cuts checks.

Stay tuned for future posts on each step of the way. As of this writing I’m wrapping up framing and the insulation is done.

-Chris


Random House Repair

Sunday found me tackling a three items on my “honey do” list. Here is how things went or are going:

Repair The Coat Hook Rack In The Foyer

As you may remember, my sister-in-law ripped the coat rack off the wall in a drunken fit of rage on Thanksgiving (okay not really but that sounds better than “my wife and kids overloaded the coat rack, and my sister-in-law’s coat was the last straw”). Well anyway, the coat rack ripped clean out of the wall. My fix is to install a 1×8 poplar board, between the trim of the studio and front doors. I’m actually a huge fan of horizontal trim boards on walls. I think they add a “farm-y” or “craftsman” look to the interior and they are extremely practical, especially for coat racks, shelves or garment pegs. They also add some visual interest as well as make the wall color pop, if the trim is of a contrasting color such as white. If I was a designer, I would put them all over the place.

As of today, I’ve got the poplar trim board installed and painted. I’m trying to decide how best to install the coat rack. I’m leery to just screw it to the board, as I don’t want the screws to rip out of the poplar board. No worries about the board coming off the wall, it’s fastened with eight (8) SPAX screws so the board is going nowhere; just that the coat rack may still pull off under load if I don’t attach it properly.

Here’s the progress so far:

The coat rack ripped right out of the wall under load.

The coat rack ripped right out of the wall under load.

I cut away the damaged drywall.

I cut away the damaged drywall.

I spackled / mudded over the holes to repair them.

I spackled / mudded over the holes to repair them.

I pinned the 1x8 poplar board in place using my nail gun and small trim nails.

I pinned the 1×8 poplar board in place using my nail gun and small trim nails.

I used awesome 2-1/2" SPAX wood screws to attach the board to the studs, countersinking the heads.

I used awesome 2-1/2″ SPAX wood screws to attach the board to the studs, countersinking the heads.

I used spackle to cover up the nail holes. I then painted the trim generic white.

I used spackle to cover up the nail holes. I then painted the trim generic white.

Therma-Tru Door Corner Pads

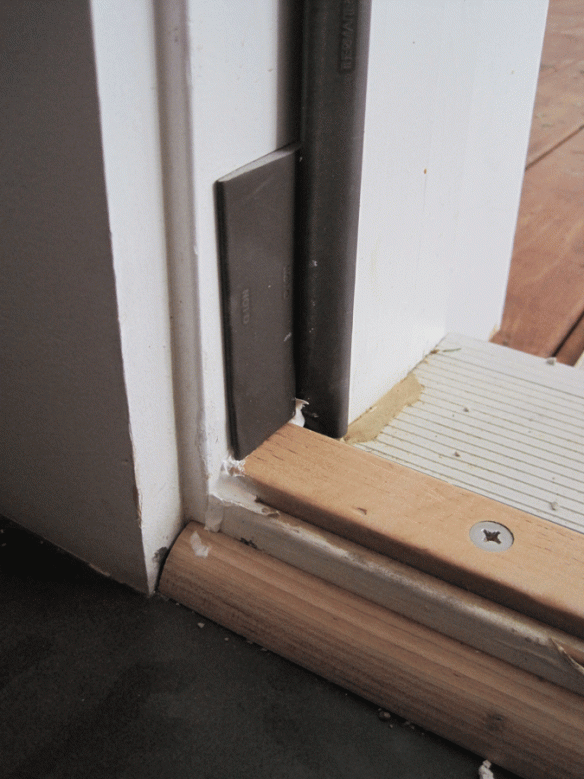
For 18 months now I’ve needed to install the little “L” shaped pads in the lower corners of our Therma-Tru doors. We could see daylight in the corners which means we were leaking warm air outside all winter. I simply followed the directions that were included with the pads. It was super easy.

  1. adjust the threshold plate so the seal under the door fits snuggly
  2. caulk the seam where the plate meets the door frame
  3. install the wedge-shaped pads in the lower corners, tucking the “L” part behind the vertical seal on the door frame. I put the “L” part up. I think that was right.
You can see daylight before the pads were installed.

You can see daylight before the pads were installed.

Here are the parts and directions from Therma-Tru for the corner pads. They sent these to me for free after I sobbed that I didn't have any and could see daylight in the corners of my exterior doors.

Here are the parts and directions from Therma-Tru for the corner pads. They sent these to me for free after I sobbed that I didn’t have any and could see daylight in the corners of my exterior doors.

I caulked the plate after adjusting it vertically to fit snugly against the door's lower seal.

I caulked the plate after adjusting it vertically to fit snugly against the door’s lower seal.

The pad installed. Now we can't see daylight. Not sure if the house is any warmer.

The pad installed. Now we can’t see daylight. Not sure if the house is any warmer.

Laundry Room Drywall Repair

When we moved the water hook ups for the washer and dryer the plumber left a huge hole in the wall of our Laundry Room.  With two new cats exploring, the last thing I need is a cat, or kid, winding up behind the drywall meowing (yes my kids meow too, on occasion).

While the Cleveland Browns were blowing yet another football game I was in my studio cutting drywall. I attempted to cut it out of one piece and install it as such, which I was fairly successful at doing. The problem I ran into was for whatever reason the planes of the new drywall and old drywall already on the wall, didn’t really match up. Well let’s just say I didn’t let that dissuade me from making a mockery of the art of drywalling.  I proceeded to slather mud on the wall and squish tape into the joints. I pretty much hate drywalling.

Most “handy” people would look at something a homeowner does and give them pointers….”do this” or “try that“.  They would encourage and empower that person to do it themselves. They’d even make you feel bad if you called an electrician or plumber. ‘Cause after all, we’re all innately born with the ability to do simple house repair.

If a handyman saw how I do drywall they would say “You really should have hired someone to do that for you.

To say the drywall repair behind the washer and dryer is bad, is a gross understatement. It’s so bad, I CAN’T EVEN THINK OF A SNARKY ANALOGY! Just be glad I don’t make airplanes, condoms or lentil soup.

I put the second coat of mud on today. I’m thinking 32 more coats and everything should be evened out. The tape over some of the joints wasn’t sticking so I pulled it off and just slathered mud over those joints. It’ll be fine (no it won’t).  In the end, aren’t we just gonna tile over it all anyway?

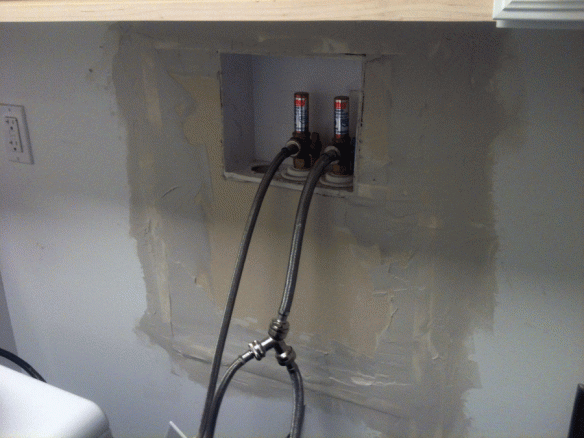
The hole in the wall; a result of moving the water connection up in the Laundry Room.

The hole in the wall; a result of moving the water connection up in the Laundry Room.

On the right I screwed a piece of particle board in place so I'd have something to screw the drywall to.

On the right I screwed a piece of particle board in place so I’d have something to screw the drywall to.

This is where is started to go wrong. Once in place none of the drywall was on the same plane. Instead of fixing I figured mud could cover everything up. Frankly I'm not sure how I woulda fixed it anyway. What the hell, just "do it" baby!

This is where is started to go wrong. Once in place none of the drywall was on the same plane. Instead of fixing I figured mud could cover everything up. Frankly I’m not sure how I woulda fixed it anyway. What the hell, just “do it” baby!

After the first coat of mud.  Eeek!

After the first coat of mud. Eeek!

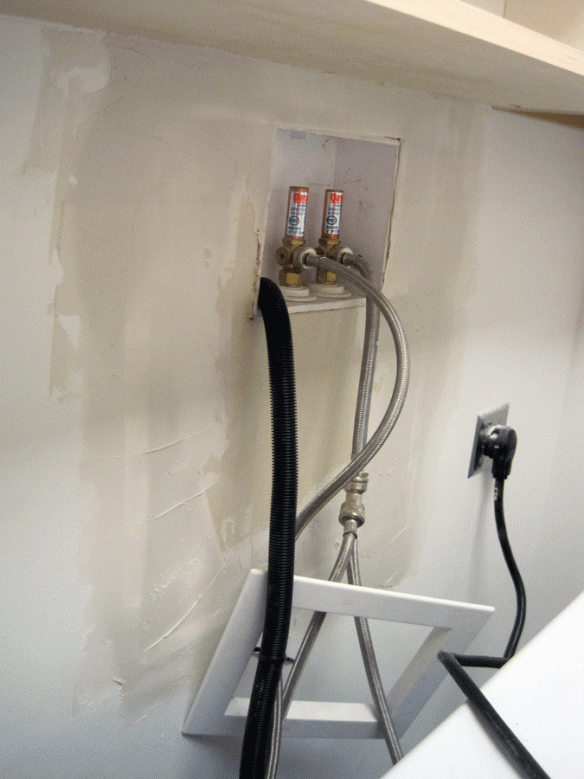
After the second coat of mud.  Looks better, kind of like having beer goggles on, and drinking your second beer.

After the second coat of mud. Looks better, kind of like having beer goggles on, and drinking your second beer.

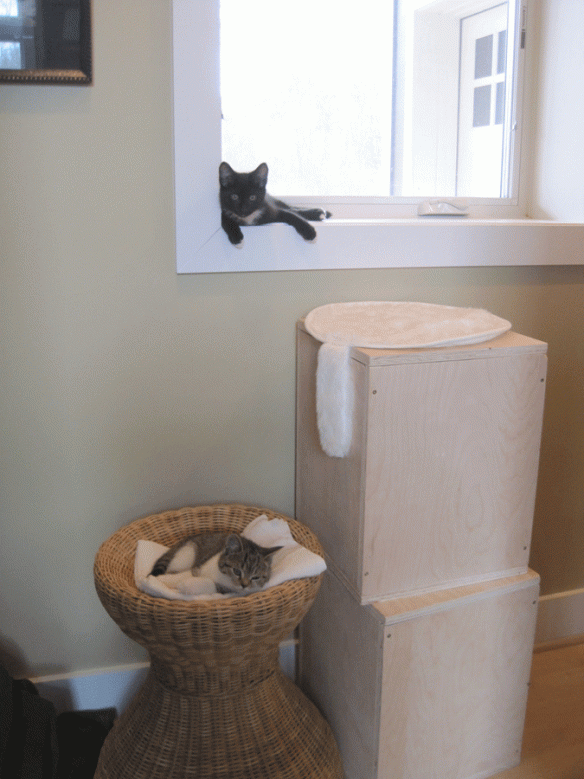
I leave you with a picture of our new cats. Both of whom are driving me insane. They have to be sequestered in my studio indefinitely and cabin fever is forcing them to go insane to. I may have kitten fur mittens by Christmas.

cats-in-studio

Studio Cabinet Project Update

I made good progress on the cabinet project in office area of my art studio.  I put 2-3 more coats of drywall mud over the corners, screw heads and tape joints.  I sanded in between coats.  The mud I used was a premixed, low dust, type and it worked wonderfully.  All the sanding dust fell right to the floor making vacuuming it up an easy clean up task.  Look, I’ll never be a drywaller but the job turned out nice enough.  I don’t really have the patience to do a perfect job, plus I’m overly detailed so I tend to over work things, especially when it comes to wet drywall mud.  Long story short I lack the skill and desire to be a dry wall guy beyond the random wall here and there.  The areas where the cabinets were going I didn’t finish up completely just because the cabinets would hide any flaws.  This made the work a little easier.

So once the mud was dry and sanded to the best of my ability, I applied a layer of Kilz primer to seal the raw drywall.  A quart covered my “T” shaped wall assembly…about 8′ tall and ten linear feet.

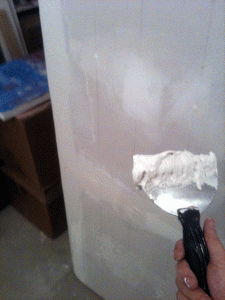
I just load a bunch of mud on the palette knife, spread it like peanut butter and then smooth it out.

I just load a bunch of mud on the palette knife, spread it like peanut butter and then smooth it out.

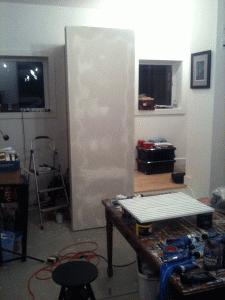
patchy mud drying on wall.

patchy mud drying on wall.

I laid down some primer to seal the drywall.  Nothing pretty, just get paint on the wall for now.

I laid down some primer to seal the drywall. Nothing pretty, just get paint on the wall for now.

Once the walls were prepared, I turned my attention to the floor where the base cabinets are going.  I screwed in some 3/4″ thick furring strips to bring the floor up to level with the hardwood in the office area.  In front of the cabinets I have about 5″ of floor space that needs some sort of flooring.  I don’t have any wood floor left over from the build so I have to come up with plan “B”.  We have a few options.  I could reach out to the place I bought the flooring from and see if they have any scrap laying around.  Our wood floors are a light maple so pretty much anything would do in the light maple family.  I don’t think anyone would notice.  I would just lay down two boards perpendicular to the existing hardwood floor boards.  Another option is taking a piece of the dark walnut colored laminate flooring from the wife’s studio.  Each piece of flooring is about 5″ wide I think so this could work.  I have a half dozen left over pieces so I could fabricate something that would work.  Lastly, I have some of the bronze porcelain tile left over (I think) from the build.  I could inset some pieces of that to fill the void.  Right now I think the last option is what we’re leaning towards doing.  We’ll see.  First things first though, I had to even up the now exposed edge of the existing hardwood flooring.  I used a circular saw and plunge cut most of the boards, after scribing a line perpendicular to the wall.  For the remainder pieces that the circular saw couldn’t reach I used my trusty oscillating tool.

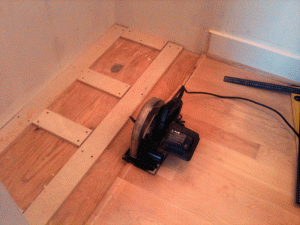
I used a circular saw set to a little over 3/4" to create a straight edge where the flooring ends.

I used a circular saw set to a little over 3/4″ to create a straight edge where the flooring ends.

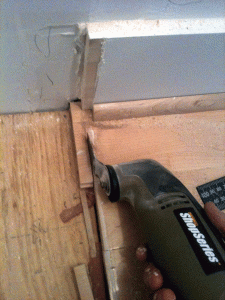
Oscillating tool comes in handy to finish up cutting the floor boards.

Oscillating tool comes in handy to finish up cutting the floor boards.


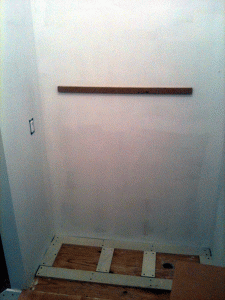
Once the floor was prepped, I jumped onto mounting the cabinets. I set a level line across the wall to denote the bottom of my wall cabinets.  My base cabinets and counter top out at around 30.5″. I then added another 17.625″  to represent the space between the bottom of the wall cabinets, and the countertop.  So about 48″ up is where my line went.  This matches what I did in the adjacent desk area of the office.   Under that line I mounted a  wood strip to provide support to the cabinets while I install them.

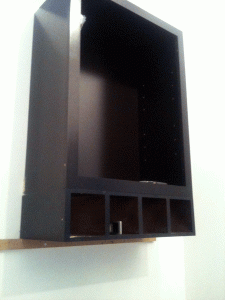
A wood strip (and a friend) comes in handy to support the cabinets during installation.

A wood strip (and a friend) comes in handy to support the cabinets during installation.


Also since I still had access to the back side of the wall I added some more wood blocks so I’d have something to screw my 12″ wide cabinets to when mounting them.  Normally this isn’t an option with small cabinets, they usually fall between studs, but since I could, I did.

I added a 2x4 up high and about 36" down from the top so I could fasten the 12" cabinets securely.

I added a 2×4 up high and about 36″ down from the top so I could fasten the 12″ cabinets securely.


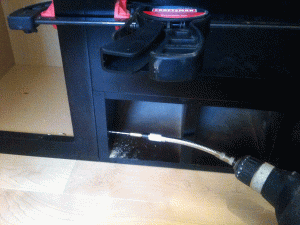
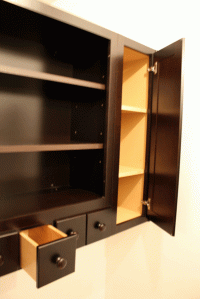
Once that was done I preassembled the three wall cabinets on the floor.  I also mounted a row of spice drawers under the center 24″ cabinet. With everything clamped together I predrilled all the holes…..holes in the frame rails to attach the cabinets side by side, and holes in the mounting rails in the back of the cabinet to mount them to the wall studs.  By the way, I simply measured the stud locations and transferred marks to the back of the cabinet, and drilled pilot holes….about 1/8″ holes.  A flexible shaft for the drill came in handy as it’s difficult to drill holes in the face frame of small 12″ wide cabinets.  The center cabinet is open (no doors) so I wanted the exposed mounting screws on the 12″ cabinets so they’d be hidden behind closed doors.

Flex shaft for the drill is a great tool for the job.

Flex shaft for the drill is a great tool for the job.


I then disassembled the cabinets and hoisted the center cabinet assembly up onto my support strip.  With someone else holding the cabinet in place I drilled pilot holes into the studs, through the pilot holes I drilled previously in the mounting rails of the cabinet.  Before the screws were all the way in, I checked to see if the cabinets were level.  I leveled them up with some shims…actually removing the mounting screws so I could then repass them through  the shims.  Anyway, after much fussing the cabinet was mounted.  I then repeated the procedure for the two 12″ cabinets.  The one twelve incher I was able to secure sideways too as a bonus, passing a screw through the cabinet into a block I put in the wall a while back.

Once all the cabinets were installed I mounted the knobs on the spice drawers and re-installed the doors on the 12″ cabinets (I’d removed them for installation).  Next I’ll install the base cabinets as well as the sink area cabinets.

009-center-wall-cabinet

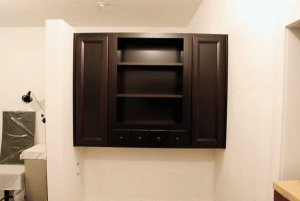
Wall cabinets installed.

Wall cabinets installed.

Open center cabinet for knick knacks or whatnot.  Spice drawers for charging cords and whatnot.

Open center cabinet for knick knacks or whatnot. Spice drawers for charging cords and whatnot.

012-wall-cabs-installed013-wall-cabs-installed

Studio Project Drywall

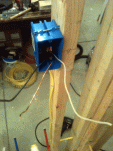
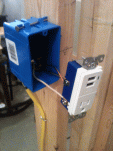
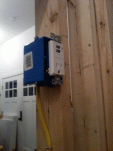
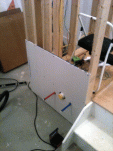
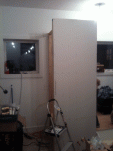
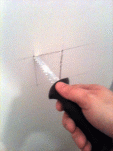
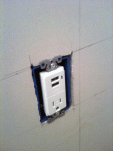
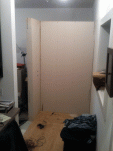
Sunday night after another busy weekend.  I didn’t get as far as I wanted but made steady progress on the office area in my studio.  Below is a photo tour of what I did this weekend including adding an outlet and starting the drywall installation.  This desk area is primarily a catch all for the office space.  I found a really cool outlet at Lowes.  On the bottom is a regular outlet but on top instead of another outlet there are two USB jacks so we can charge our phones and other USB devices without the need for an adapter.  Very cool indeed; $20 at Lowes.  Another cool product I picked up there were dry wall corners that are made from metal and covered in drywall tape.  That way I didn’t need to screw metal corners on and try to mud over the metal.  I simply put down some drywall mud, squish the corners in and then cover in mud.  For an amateur like me these integrated corners were really easy to use and made the job simpler.  I got pieces for both the inside and outside corners.  I’ll even use them on the top of my freestanding wall.

One bad thing I noticed was somehow my calculations or my craftsmanship failed me.  The 48″ space I need for the office counter top is closer to 48.5″ – 49″ which means I need to figure out how to finish off the gap I’ll most likely have.  I had our countertops premade so it’s not like the counter will just go wall to wall.  I’ll figure it out, there’s not much I can do about it now.  Also I’m looking at my sink on the end wall and going to plan on a redesign of some sort.  That counter may need to be remade as I didn’t have the sides of the counter laminated….once again, we’ll see.  Better planning would have helped but I had a design in my head, seeing it in person I think I want it another way.  No big deal.  Live and learn.

Photo show of the weekends festivities…


Unofficial First Meal

The weather was nice yesterday and today.  A fair amount is getting done on the house.  They started back filling the cistern pipes as well as make additional underground connections.  The siding is going on slowly but surely as well. And I am caulking some more areas inside the house to make it air tight.

One thing we encounter in these parts of the woods is that the trades will take days off to go deer hunting this time of year so we lose out on a few days here and there.  I wish I could be out in the woods; maybe once this project is over I’ll have time to get back into hunting again.

I’ve spent the last two days giving tours to neighbors and friends as well as caulking all of the electrical penetrations in the drywall.  Bob came out and did a preliminary blower test Saturday morning too.

Saturday was extra special because Christine and the boys brought me out McDonald’s for lunch.  We had our first unofficial meal at the new house.  Much fun.  We made a makeshift dining table in the kitchen and ate our chicken sandwiches together.  Followed up with play time in the warm sun on the front porch.  Finally Christine and our oldest son helped pick up debris and throw it in the dumpster. 

For caulking I used a low-cost latex white caulk from Lowes.  I sealed around every electrical box, inside and outside walls.  I also caulked all the ceiling lights.  Caulking the inside wall outlets is probably not necessary but it is an added level of defense.  Ultimately all the air in and out of the house will be controlled.  We won’t let any air run around willy nilly in our house. No sir.  For electrical wires and the flashing around the fireplace flue I used a red fire rated caulk.  The drywall in the attic that was accessible from behind was caulked by our insulation contractor.  Speaking of access panels, later on in the project I’ll put weather-stripping around the panels to assure air isn’t passing through them either.  On a normal house they just lay a piece of drywall over the openings.  This allows air to flow from conditioned to unconditioned spaces.  In our house we’ll want to prevent that from happening so it will require special tactics.

As I said, Bob brought his blower testing equipment out to get a preliminary reading.  We’re shooting for EnergyStar 2.5 rating on the house.  It should perform beyond EnergyStar 3.0 but the only reason we’re not doing that yet is because 3.0 isn’t out yet.  He set up the blower (essentially a large fan in a sealed door opening) on the front door and put tape over the obvious openings in the house: door knob locations, basement window side cracks, dryer vent hole, etc.  The fan was then turned on and the equivalent of a 20 mph wind was hitting our house from the inside out.  The fan sucks all the air out of the house through the front door.  The air then needs to be replaced so it flows in from the outside through all the air penetrations in the house.  As we walked around we could feel air coming in around the door frames, attic access panels, un-caulked outlet boxes and even a light box that was already “caulked” by the drywall crew.  This then gave me an idea of what areas need additional attention.  I also got to see first hand why it’s critical to caulk between framing memebers throughout the house.  I could feel air coming though seemingly tight, nailed 2×4’s around the basement window.  Crazy.

The preliminary blower test also allowed us to see where we’re at on our performance numbers.  The numbers can be used to “right size” our HVAC system.  The system will be sized for worst case scenario, but even so it may be smaller than what a builder would put in a similarly sized cookie cutter house.  Full disclosure, I’m not an expert in what all the numbers mean, so consult your local home energy consultant.  And I don’t know if our numbers are good bad or indifferent, but they look good to me. These numbers you see here are from the estimate; which was verified by the blower test that we’re on track. Our calculated peak load and required capacity for heating is coming in at 31.1 (kBtu/hr).  For reference our EDGE60 pellet fireplace will output 52.5 (kBtu/hr).  I’m not sure if this means the house could technically just be heated by the fireplace. The specification for our a typical house our size is 84.0 (kBtu/hr). On the cooling end of the ledger our required total peak load and capacity are 17.6 (kBtu/hr).  With these numbers we should be able to get the HVAC system designed and set up to work well with our house while saving us money.

As far as whole house air infiltration goes the numbers are more difficult for me to understand but they are coming in as expected.  If you’re into this sort of thing here’s where we’re at so far.  Keep in mind once the house is complete the numbers should improve. ACH=air changes per hour (I’m pretty sure that’s what it means).  For heating we’re at 0.23 natural ACH, cooling is 0.18.  Don’t ask me why they’re different.  Go ask your pop.  ACH at 50 Pascals is 3.00 (still no idea what this means but Bob said it was as expected).  CFM at 50 Pascals is estimated at 2050, and we came in around 2000.

For what it’s worth annual heating cost is projected to be $439 and cooling to be $116.  Water heating should be around $183 and lights and appliances (which I’m assuming is way off) is at $1488, so we’ll re-look at that last number.  We’ll firm up these numbers once all the mechanicals are in and obviously for sure once we move in.  Stay tuned.

Pics from the last couple days:

Our first unofficial meal in the new house. Look at all the sunlight we get in the fall through the south-facing windows.


Overkill, I caulked every outlet and light fixture in the joint. This will assure air flow is controlled from room to room, cavity to cavity. I used a simple white caulk and squished it around with my finger as best I could. No one will be hiring me to caulk their house any time soon. I'm very messy. Red fire rated caulk should go where the wires come through the top of the box.


Future architect in the making, enjoying time on the sunny front porch.


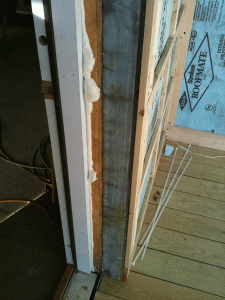
Good picture showing how thick the finished walls are. We've got 2x6 framing with 4" rigid on the outside and firring strips for the siding. Note the doors are mounted inboard whereas the windows were mounted outboard.

Crown Jewel

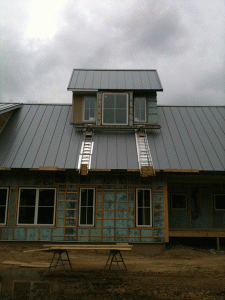
View of installed loft window.

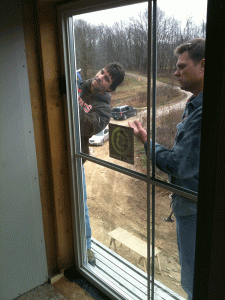
Today we installed the last window in the main house.  The largest window in the house punctuates the “crown” of the house, front and center in the attic / loft.  It’s approximately 5’x5′ and understandably it weighs a fair bit.  It took four of us, (myself, brothers and Tony) to install it.  I have to check but it showed up a few inches too wide and tall.  You’ll remember this is the window that was too tall to begin with so we had to re-order it.  Something about it, it just wants to be a really big window no matter how small we try to make it.  How can a window be an overachiever?  I don’t know but this one’s doing a pretty good job.  My brother and Tony carried it up through the staircase to where we prepped it in the second floor gallery.  They removed the handles and remounted them on the inside face.  I crimped and cut the air expansion balloon and capped it with silicone.  Tony and I then went up to the loft and my brothers handed us up the window.  If the window was an inch wider we wouldn’t have gotten it through the ladder opening in the floor.  Once topside my brothers stepped outside onto the sider’s scaffolding.  One interesting note, the wood blocks holding up the scaffolding are lagged into the gutter boards with bolts.  This provides enough support for the scaffolding ladders.  Anyway, my brother’s get the gold star for the day cause the scaffold platform is about 20′ in the air outside the window opening.  No worries, I think it’s 30′ before humans die from falling.  We caulked the window rough opening surround with silicone to give the window a tight seal once in place.  The rough opening was incredibly tight so Tony and I slowly fished out the window to the guys outside.  With a little pounding the window was then inserted into the opening and nails pounded through the aluminum nailing flanges.  The opening was leveled and because it was so tight we had to basically go with it “as is”; no shims or anything to fine tune.  It’s a non operating window so it should be okay.  I’m glad we’ve passed this hurdle. 

Nailing the loft window in place. Note how the window goes floor to ceiling. The glass is tempered to meed code and for safety purposes.

Now the house is basically sealed up except for a couple minor details.  Should be ready for our blower test any day now. The blower test will be used to assure everything is tight as well as the information will be used for our EnergyStar 2.5 rating paperwork.

It was nice to see the house in daylight since I miss it most of the week.  All the drywall is hung, including the garage.  The exterior blue foam is virtually done and the siding is coming along.

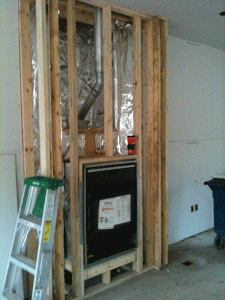
One of the things that happened this week before / during drywall installation was the fireplace was removed so that area could be properly insulated with caulk, insulation and fire resistant foil paper.  The folks over at the Fireplace Shoppe then had the unit back in the next day.  We’re definitely looking forward to firing the unit up once we move in.

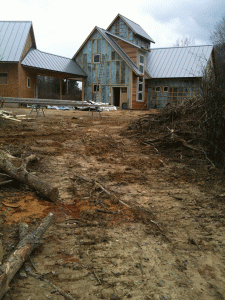
What I call the "mill" view of the house showing the siding on the studios.

 Christine and I have been frantically spending our weekend selecting lighting and other assorted finishing items.  Due to budget constraints, we’re all over the map in terms of sourcing lighting.  A bulk of the lighting is recessed so we have minimal fixtures.  Many of the lighting fixtures (and ceiling fans) will come from Barn Light Electric in Florida.   Their selection is crazy cool and suits our taste and Joe’s artistic creation extremely well.  It’s an eclectic blend of industrial, rural and vintage lighting. Beyond that we picked up a couple of light fixtures at Home Depot as well as Restoration Hardware out of Columbus, Ohio. Some of the lights we ordered started arriving so it’s kinda cool to see the hardware in person.  We are also picking out the exterior door handles and locksets.  The house will be under lock and key very shortly. It’s crazy to think just a few months ago Corky and I were cutting down trees.  Now here we are this far along in the process.  Very cool, very exciting.

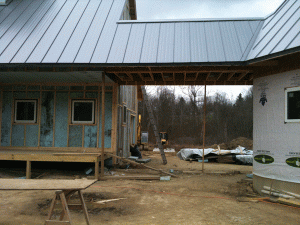
Breezeway between house and garage.

 
This coming week the cistern will go in.  The septic system has been tested and approved by the county / health department.  We’ll also be getting a temporary furnace to get the house up to temperature so the guys can finish drywalling (taping and mudding) the interior.
 
One interesting thing I noticed this morning is the house was very cold.  Which is remarkable  

Fireplace properly insulated. Foil paper is fire resistant just in case.

 because it was very warm outside.  Now that it’s virtually sealed up the house is isolated from the world around it thermally for all intents and purposes.  It was cold cause there’s no heat / furnace but regardless it will hold its internal temperature now. 
 
Take a look at the pics.  The project’s coming along nicely. 


Fancy hotel look wall sconces for the Master Bathroom courtesy of Restoration Hardware. I asserted myself and selected these much to the chagrin of the wife. Trust me I say, I'm a trained professional. She reminds me she is too.


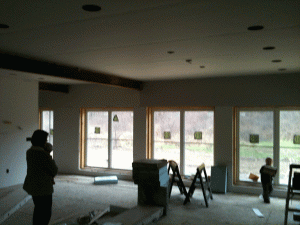
Family room. Only about three months from beer, food and game night with friends or family.


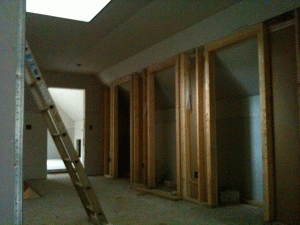
Upstairs art gallery wall. Will all be covered in wood, secret doors, and artwork. Ceiling opening is for ladder to attic / loft. Windows up there will route hot air out of the house by way of cyclonic action from the basement all the way up. Think giant helical air flow up stair case, gallery and loft once the windows are opened up.


Downstairs gallery and temp staircase. Located near the studios for clients to traverse between Christine's and my studios.


Front hall. Real fake I-Beam above.


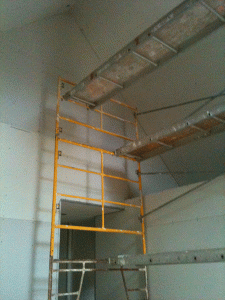
Drywall scaffolding. Eventually the upper wall will be frosted acrylic to get light into the craft room. At some point the attic / loft floor will be frosted glass as well to drive daylight into the gallery.

Poof!

 The orchestration and tempo of our home construction ballet was devised not by the minds of a men but rather it is born from an amalgamation of planning, circumstance, irony, luck and a messed up sense of humor that permeates our universe.

On one hand certain tasks move along at a glacial pace.  This can be a blessing when you waffle as much as I do on seemingly everything.  It’s a curse when you’re dolling out money hourly or you’re at the mercy of Mother Nature.

Other tasks take barely the blink of an eye.  Great when you’re behind schedule and over budget.  Shakesperian-ly tragic when you’re not sure if they’ve just drywalled a small woodland creature in your walls. 

Insulation, drywall, siding and a few minor odds and ends were all planned for this week.  Siding should be complete in about 72 years from now, and even so, some detail mistakes are showing through.  Insulation went remarkably fast, almost too fast but manageable.  Fast that was until the drywallers showed up.  I sould’ve known something was up when 10 guys showed up just to deliver the drywall during our KSU tour.  These guys rolled in on two boomed straight rigs and descended on the house.  They were just delivering and they meant business; mildly disturbed the insulation guys weren’t out possibly.  I can tell you me my theory on insulation guys vs. drywall guys, but that can wait for another bed time story.  I wasn’t in the mood for stories so I high tailed it the hell out of there to leave the drywall guys to their own devices.  Left Tony to talk ’em off the ledge and the KSU students to fend for themselves.  The numbers were fairly close.   Last thing I needed is someone figuring out I was the owner and start asking me questions.

I stopped back after work to find the house filled with drywall.  The studio wall hole where they boomed in the second floor drywall was patched and the entire gable covered in rigid insulation.  I don’t know what the heck Tony did but it was buttoned up tight in an afternoon.  Blink.

Moving fast, but not too fast.  Needed insulation guys to wrap up and they did, drywall started the next day.

My late afternoon phone call turned into primitive panic upon learning that basically the entire house was drywalled in a day.  I’m sorry, other than the foundation, I’d become accustomed to “Glacier World” at the homestead in terms of work flow.  Need to pick out roofing?  How bout you do it as we’re standing on the roof.  Windows?  Tell you what, how ’bout we order one during framing, four after the others are delivered and for sh*ts and giggles we’ll forget to order one until all the others are installed.  Cool. 

Drywall up in a day?  I guess I don’t follow.  You’re saying you hope it’ll be up in a day? No.  No, you’re saying it’s all basically up already.  It takes me longer to mentally debate the nuances of Pumpkin Spice vs. Cinnamon Dolce Lattes at Starbucks than it took for them to drywall my house. 

I didn’t get to “bond” with the wiring, framing or insulation.  We were going to talk about our feelings…..life plans.  And “poof”, they’re all covered up, just like that.  In a way I feel violated.  Someone get my therapist on-line one.  See, drywall, other than framing is probably the biggest game changer perceptionally (I just made up that word right?) when it comes to building a house in my opinion.  It changes everything as where you could see (walk through for that matter) walls the day before, today you can’t.  It can really make a spacious house seem small.  And in some cases just the opposite. My mind races so I gather up my briefcase and hop in the Rabbit.

Did I take pictures of all the wiring?

Pics of the HVAC ducts so I don’t peg ’em when I go to hang art?

What about insulation to sound proof the 1/2 bath? (damn it, turn the fan on and hum Hall & Oates tunes if you’re going number two).

The Rabbit leaps as I exit the highway in anticipation of seeing the house in its latest state and my mind disintegrate 1/16th more.  Not since I was heading off the framers has the Rabbit been this excited.  It’s a miracle I don’t run us both into a rain-soaked guard rail out of spite.  I pull up the drive…..

…there are lights on inside for the first time ever.

I park and stumble towards the studio, greeted by a pile of white drywall scraps and three smiling drywallers.  Timidly stepping into my new studio I’m greeted by four more smiles and nods.  I scamper upstairs to get out-of-the-way of the men working below.

Upon returning downstairs I expect to see the international sign for “we just drywalled the sh*t out of your house today like it was a walk in the park” glinting in every eye I see.  Rather the twelve man crew is packing up the last of the days provisions, stepping through the inky blackness of the November night and into the white van that will take them home (presumably). The red glow of the tail lights all there is to betray the otherwise quiet dusty walking silhouettes.  These guys banged out a pretty incredible amount of work in short time.  I don’t know what their demeanor was when the did it but I would hope it was with some swagger and boastfulness worthy of the job done.  Maybe Cypress Hill playing on the radio. 

But I suspect it’s all in a day’s work for them.  They’re happy to do it and make it look easy. Just another house in a long line of houses.  For us it’s home though.  Less than 24 hours later the garage and all the loose ends are drywalled. 

I didn’t go to see the house today.  It gets to dark after work to see it anymore.  I’m now reluctantly relegated to living vicariously through field reports, night-time emails and phone calls.  I’ll see her, the house, on the weekend.  She changes a lot day-to-day now I suspect, with the drywall that I have yet to fully see and the siding going up. I had grown accustom to my daily visits.  Being so drawn to the house and land that I would think of excuses not to leave.  Yes, it will be special living there.  But it won’t be the same as those hot summer days and nights out there….before.

I shudder to think if I turn my head or blink an eye…..poof!  It’s done.  Then what?

Pics, enjoy!
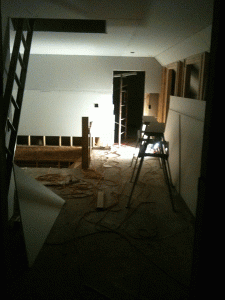
Upstairs Gallery. Note we're leaving drywall off Gallery wall to accommodate hidden storage doors made of MDF or plywood.
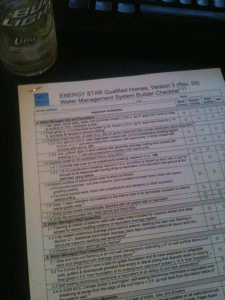


Energy Star docs I have to fill out. Ugh, homework.


Just noticed this now, but not a big fan of roof intersecting studio window assembly. 4" trim compounds the problem visually. Going to correct this at some point with 1x8's and possibly shave roof back on each side.
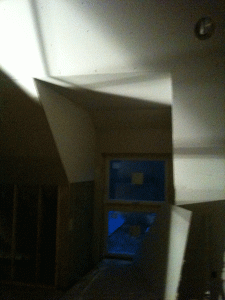


nighttime studio drywall shot.