Too Many HDMI Cords? Fix It With This…

January?

I haven’t written since January?

Ugh, I’ve been stressed all year – work has been crazy so I haven’t had the energy to sit down and write. Which I kind of miss it. So, today I had a blank Saturday in which I could do anything I want to do, including putting off cutting the grass. Even if not a lot has been going on, there’s gotta be at least something to write about since January, right?

Alright I’ll throw some product reviews at you all, over the next few posts. And we can touch base on the mice and whatever else I can think of. I need to write.

First up, back in February I picked up a pair of these Techole HDMI splitter switches. They are about ten dollars (US) on Amazon and got decent reviews.

Techole-switch-in-box

We use our living room as our primary living space. And our family time usually includes an hour or two at night watching tv or movies together. We also play video games…I think if I added it all up there are like ten devices in the living room cabinet…let’s see: two xBoxes, two DVD players, a Nintendo Switch…cable box…anyway it’s more HDMI cables then the Sony tv (the old ~50″+ version of this tv) has ports for. So I needed a splitter to take the HDMI from the tv and feed in two devices. I think I had 5 ports so I picked up two splitters or switches.

There’s not much going on here but these are solid metal switches (like I said, I ordered two) each packaged in some nice simple brown packaging.

Obviously super easy to install, just plug in your HDMI cables and you’re good to go. I believe because the devices I plugged into the switches are powered, the switches themselves are “powered”. This allows the number on the switch to illuminate so you can tell if cable 1 or cable 2 is hooked up at any given time.

Whenever you need to access a device just press the button on the switch and tune to the right input on the tv.

I also ordered these color coded HDMI cables from Cable Matters and love them as well. Good quality and very low cost. $12-18.50 for a three pack. Color coding is a blessing with all that’s going on behind the tv.

I don’t notice any reduction in quality and the switches (and cables) have worked fine since I bought them. I’d definitely recommend trying them out to help manage things and expand your cable capacity behind your tv.


Garage Work Shop

A couple weeks ago I was at a party and my brother-in-law asked me if I had any projects going on around the house. I had to answer “no” because I haven’t had anything going on for quite a while. Work had been slow so funds were non-existent for home projects. And as you all know we’re always knocking around the idea of moving, so why bother. Well the last couple months have found me with a couple extra dollars in my pocket, and a raging desire to do something constructive. I have a mental backlog of projects I’d like to do:

  • garage organization
  • basement ceiling
  • storage room lighting and clean up
  • bar on the screen porch
  • paint the laundry room and bathroom
  • paint the trim and doors in the basement
  • finish staining the porch and sand box

Probably a lot of other little projects I can’t think of right now. I decided to start tackling the garage because it would be nice to fit two cars in there, and we just recently built that storage loft, so let’s get ‘er done, right?

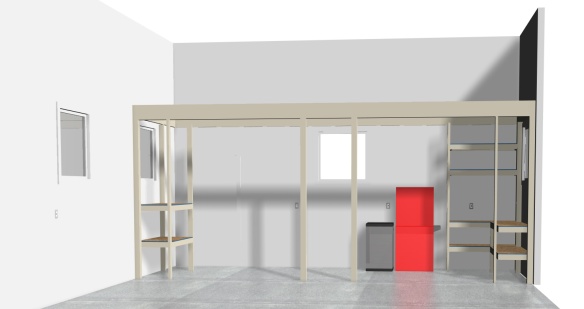
I’ve started drawing up plans for a workshop in the garage, back in September of 2017.  Here:

Workshop Model 181101

The storage loft covers the entire half bay. Below that I’m going to infill with a variety of work benches and shelves made from 2×4 lumber and plywood. These will replace the existing hodge-podge of store bought metal shelves. The red thing in the rendering is my tool chest and the silver thing is a wicked cool little mini fridge that holds frosty beverages.

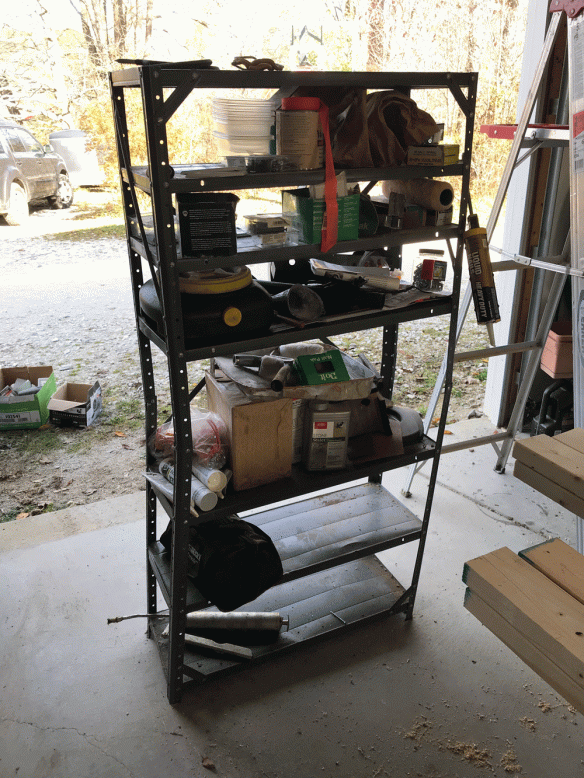
metal-shelves-1

This shelf has served me well for over 18 years but maybe it’s just time, you know.

I modeled up and drew plans for the secondary work bench on the far left in the rendering, and the larger “L” shaped work bench on the far right. Budget wise the cost for lumber and screws to make these two came out to about $250 total including delivery of the wood to my place.

I put 1/2″ OSB on the shelves, and 3/4″ pine plywood on the work bench countertops. The countertops are all at 36″ height from the floor. I spaced the lower shelves to accommodate my plethora of plastic tool cases I’ve collected over the years. I ran 2×4 supports from the floor to under the loft rim joist as an added measure of support for the loft above. I’ll connect these supports with “L” brackets at the top and bottom. I screwed the shelves and countertops not only to the supports but also the wall where I could. Everything seems very solid. The “L” shaped workbench does not have a center support, but I think it’ll be strong enough as is (look at the photos). I wanted that corner open and easily accessible.

It took me one day to build and install everything. I think it works and looks great. I have counter space for my bandsaw, drill press, sander and other tools. And something neat: I finally unboxed a scroll saw we bought 18 years ago at Sears which has been sitting in a box because we never had space for it. I did lose some small shelf space, but I plan on installing pegboard and smaller shelves or cozies for small items and fluid bottles.

unboxing scroll saw

I finally got to unbox the scroll saw after picking it up on sale at Sears 18 years ago!

Playground Stain

With Memorial Day weekend coming up, now was the time to finally clean up and stain the kids’ playground set. We’ve had the set for five years now and it was looking pretty sad.

Once again I found myself at Lowe’s, I picked up some Olypmic deck cleaner and two gallons of stain. I got Cabot semi-solid deck stain, in two colors. Mission Brown for the play set, and an Oak Brown for another project. It was buy one get one free (after rebate). About $46 per gallon. The cleaner was like $20. I picked up some brushes and mineral spirits too.

I had planned on pressure washing the set but the cleaner said that wasn’t necessary. I applied the cleaner section by section with a pump sprayer, let it sit for a few minutes and used a hand scrub brush to take the dirt, cleaner and old stain off.

Yes! The cleaner actually was taking the old stain off! Left behind was grey weathered wood in some places. In other places it looked like brand new wood. It worked awesome. I could have power washed the set at that point to remove remaining residue but honestly I was trying to do this efficiently and rinsing everything off with a hose worked well enough for me. Two notes: 1) the old stain clumps up and will create a mess and lots of residue so rinsing is critical, and 2) use the cleaner everywhere because it takes the stain off. If you leave the stain on and don’t use the cleaner certain areas, those areas won’t take the new stain as well.

The stain took to the set wonderfully. The Mission Brown was basically a match of the original color, a nice deep brown with reddish hue. One gallon was enough to almost do the entire set. I need about a quart more to finish some underside portions.

The project took about 2-3 days by myself, a few hours each of those days.

LED Lighting Update

I’ve been quietly updating the light bulbs in the house in order to lower our electricity costs, as well as re-illuminate areas where I had let bulbs burn out over the last four years without replacement.

First up were three outdoor sconces that each received one of these 7w decorative Philips LED bulbs – 2700K color (warm), 500 lumen rated at 22 years of life. I’ll be 65 when they need replacing. Actually longer than that because there’s no way we’ll use them three hours a day. All three total will use $55 in electricity in their lifetime.


Next up was my art studio. I had one of these awesome looking, “flying buttress” 8w, 650 Lumen, 2700K Green Creative bulbs from my LED light bulb test article. So I rounded out the rest of the studio with five more of them. A great looking, great performing bulb.

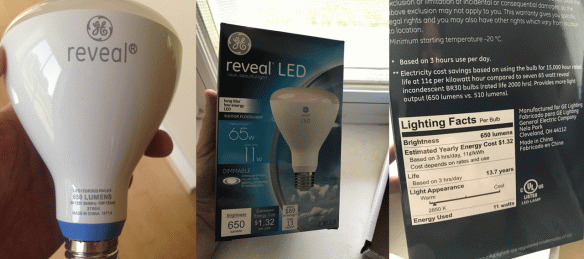
And most gratifyingly I completed the update of the kitchen light bulbs. I had a single GE Reveal bulb from the LED light bulb test  in one of the kitchen’s non-dimming fixtures, and five other burned out ceiling cans to compliment it. Well by time I decided to pull the trigger on getting five new ones to finish off the set, Amazon.com was out of them and I couldn’t find them online. GE actually updated the model of bulb with a 2800K color. The original was 650 lumens at 2700K color. So the colors wouldn’t match with the new bulbs and it’d look wonky. I did buy six new bulbs from Lowe’s but as it turns out, the lens on them looked decidedly “pink” which was no bueno, so I returned them and forgot about it.

Now you have to understand that every time I go to a retail store, I may spend easily fifteen minutes analyzing their LED light bulb offering. Wouldn’t you know it, a random trip to Walmart yielded five bulbs that matched my original GE Reveal bulb, 650 lumens AND 2700K color. Oh happy day! So I snagged them up an installed them upon returning home.

ge-reveal-comparison

A comparison of GE Reveal bulbs. The “discontinued” bulb on the left. A newer option I tried, center and right, had a pink lens which I found to be distracting.

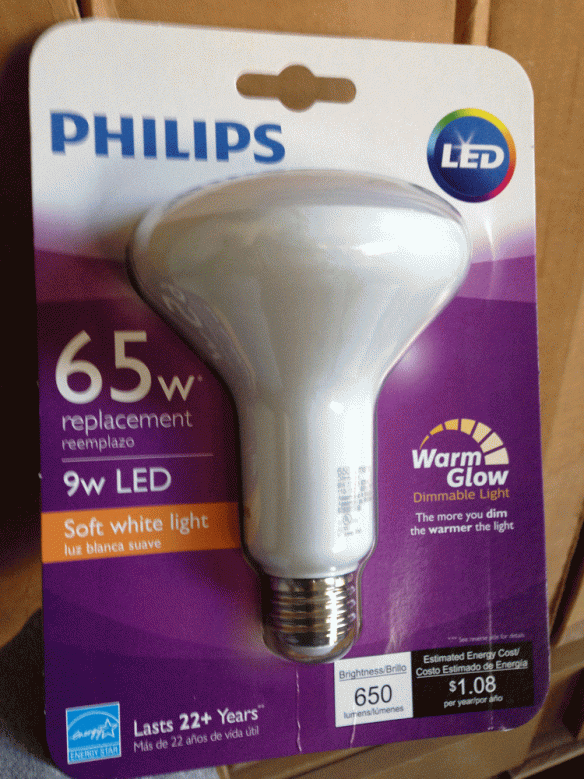
As for the rest of the house, the remaining BR30 size can light bulbs will be replaced with 9w 650 lumen, 2700K Philips brand bulbs which have the best overall performance and lower cost.

philips-br30-led-spotlight

Overall LED bulb costs have plummeted in the last four years. You can now get a three or four pack of 100w equivalent bulbs at any big box store for around ten dollars. There simply is no reason to get incandescent or even fluorescent bulbs anymore. LED’s are here to stay. They are low cost, last decades, and use very little energy compared to conventional bulbs. They also come in a variety of sizes and shapes. They even come in ultra warm, vintage style finishes.

I recently saw an article on Core77 about a new LED bulb that finally takes bulb design to the next level. This artful bulb by Plumen elevates the bulb from commodity item to work of art. It’s timeless design leverages the two decade lifespan of the average bulb as well. No shade required thanks to it’s incredibly good looks, and multi directional lighting solution. $170 per bulb but looks to be well worth every penny. Images are from the Plumen website

Bee Wildflower Honey

Had to share my impromptu design for our honey jar labels.  I want to get them labeled for this weekend. There’s a village peddler’s day this weekend and I’m going to whore my wares in the center of town; selling honey alongside my old lawn mower and any trash to treasure stuff I can find in the basement or garage.

“bee” is our brand 🙂 I don’t know if anyone else is using that, but I’ll keep using it until someone tries to stop me (I generally always get what I want).

I drew the wildflowers using a photo I took earlier this year of flowers on our land. I don’t know what they are but they are yellow with red centers. There’s a photo on the blog somewhere.

The copy font is avant grade which is one of my all-time favorite fonts. The font choice, along with my black and white trace drawing kind of gives the label a retro 70’s vibe which I like a lot as a child of that decade (and the one after). We grew up in a classic 70’s house and they type of architecture is prevalent throughout the valley in which we live if you know where to look.

You know what’s really cool? Just like wine I’ve labeled the honey with the season, year, type and even which hive it came from. Honey never spoils, which makes it even better than wine. (We’re having a honey tasting later this fall, as a random side note – just like wine tasting!)

Available in 8oz and 4oz glass bottles, 100% of the proceeds from our honey sales go towards educating our kids, paying for our eco-friendly house, buying wildflowers and trees, and supporting our bees.

Seems legit, right?

Label for "bee" brand honey - includes hive, season and type information.

Label for our “bee” brand honey – includes hive, season and type information.