Today is Saturday. I picked up a paying project on Friday so I spent a few hours working on that. When I reached a point where I needed feedback I stopped. It’ll wait until Monday when the rest of the world hops back into the office. For me, well that meant I kinda had Saturday to myself. We’re expecting the bottom to fall off the thermometer here by Tuesday, when the project high will be -1 F. The sun was shining so I checked with the boss of this household, my wife, to find out what plans if any we had today.
Nothing planned.
“Cool, how about a trip to Hartville Hardware?” I proposed and she was agreeable to that suggestion.
Up until a few months ago I had no idea what Hartville Hardware was. But I picked up a design project that required me to go visit the store located in Hartville, Ohio which is about a half hour south of us. I found it to be a really cool store. All I can liken it to, is like what Cabela’s is to outdoor gear, Hartville Hardware is to home supplies. Though as far as I know Hartville is a one of a kind store, not a chain. The place is huge and has a wide variety of products for your home. Not really raw materials per se, but more like housewares, but also tools, clothing and fittings such as light fixtures and plumbing fixtures.
Our trip today was not completely random, I did have a need. When I was down there last I noticed they had a totally awesome collection of cabinet hardware in store, much more than you’d find in Lowe’s or Home Depot. And since that trip I installed the cabinets in my studio. The drawers needed pulls. Also the sink stand in the half bath needed some unique decorative pulls as well. I thought taking the family down there would make for a nice Saturday trip. The store has so much for everyone, of every age to look at, I was certain it’d be a hit and it was. I wish I’d known about the store when we were building. And by no means does its country location mean it only carries cheap off brands. We say vacuum cleaners that cost $750, as well as high end faucets and appliances. Their tool selection is beyond anything you’ve ever seen. They have demo houses built right inside the store and there is even a John Deere dealer up front.
We ended up spending more time than we thought we would (but not more money), and didn’t even get through the whole place. We did discover lots of goodies for the house. Grumbling stomachs decided we were about done with our visit. Instead of heading home for leftovers, we decided to make our trek more of a “trip” and we visited Hartville Kitchen next door for a nice family lunch. The restaurant is part of a huge building that also has a bakery, gift shop and candy store. Lunch was simple fare; I had a chicken salad sandwich which was very good. Of course we stopped for some candy after lunch.
If you find yourself in the area, do plan on stopping in Hartville and enjoy a visit to one or both places I mentioned. You won’t be disappointed.
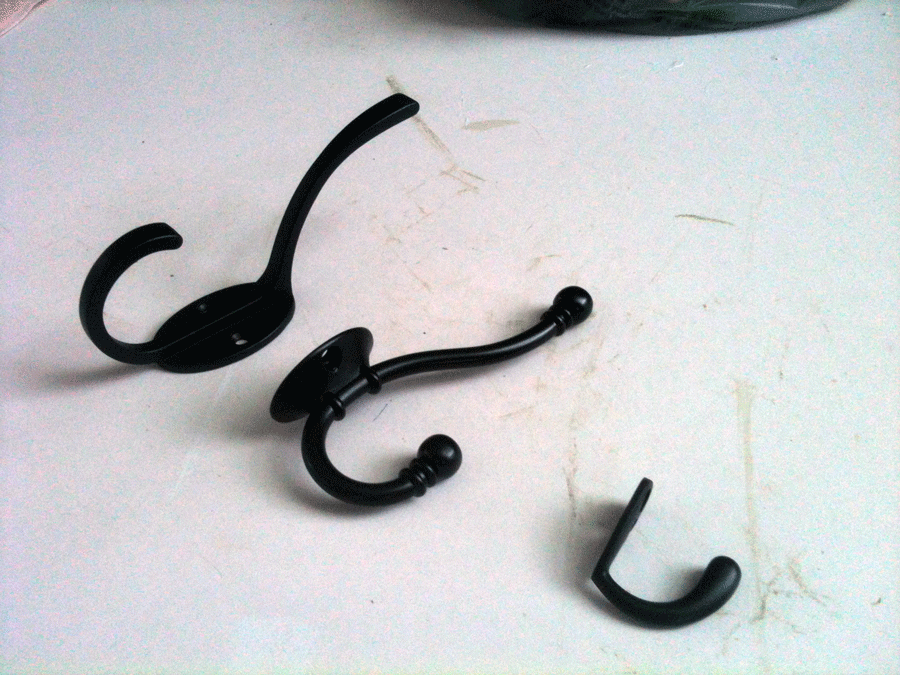
Back home we unpacked our goodies. We looked at the coat hooks we got for my studio and the crystal knobs we purchased for the half bath cabinet. I didn’t take a photo, but suffice to say we didn’t like either of our selections so I’ll take them back. Surprisingly the coat hook selection was lacking at Hartville, I will say. I may shop elsewhere for those, or at least get double (one over the other) style hooks instead of the meal looking single hooks.
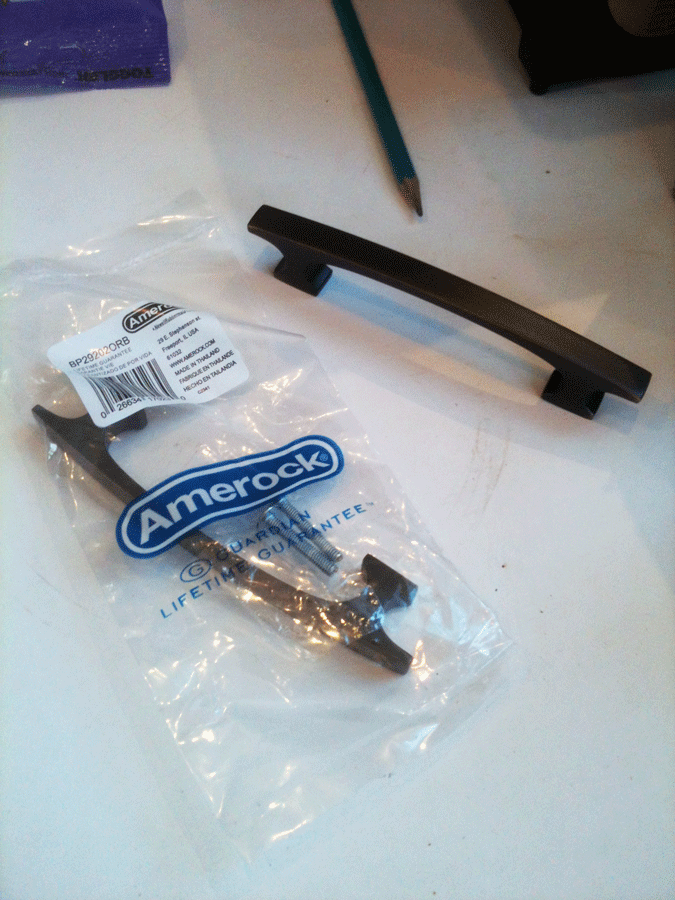
The drawer pulls for my studio drawers were perfect though. I selected simple Amerock pulls in a oil-rubbed bronze finish. They cost around $4 apiece. My drawer faces are 1.5″ thick so I scrounged up some leftover hardware screws from another project and install the pulls easily. Love them.

Amerock drawer pulls in oil rubbed bronze finish. They hole spacing is 3-3/4″. BP29202ORB Conrad is the pull part and name.
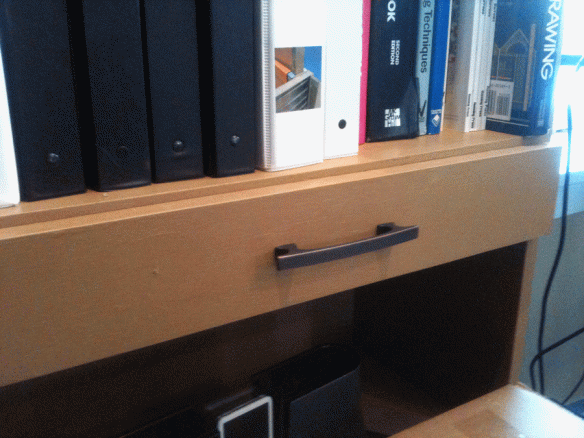
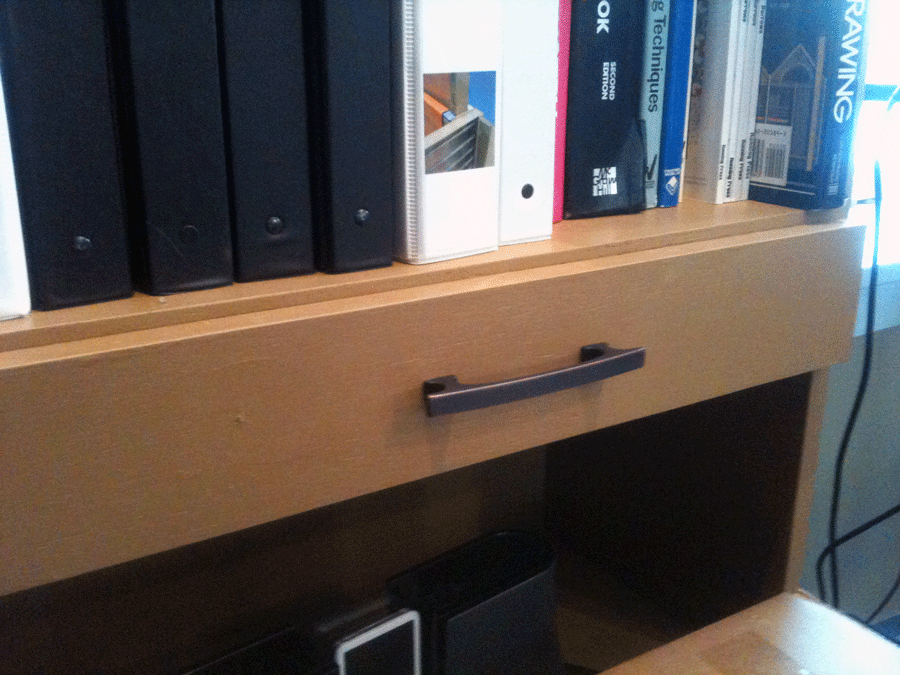
The installed drawer pulls look great in my studio, and I don’t think they cost a whole lot.
Next up I installed a towel bar over my sink in the studio. The part I bought is actually a paper towel holder from Interdesign but for my purposes I’m using it as a towel bar above my sink. The folks at Interdesign do a nice job with the design of their products. The cantilever design of the towel holder is simple and easy to install.

Chrome towel rack. In hindsight I should have mounted it a couple inches lower in case I ever want to put paper towels on it but it’ll be fine for a washable towel at this height.
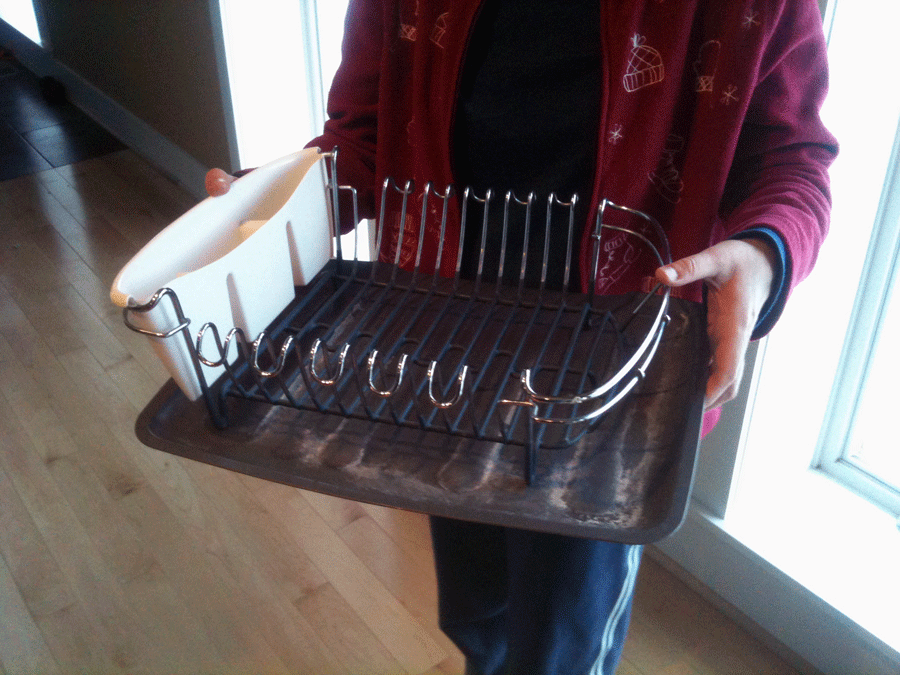
More interesting though is the dish drying pad we purchased, also from Interdesign. It’s a simple fabric pad that I convinced the wife could replace the bulky, ugly, metal rack she’d been using for the last 14 years. Interdesign is a smaller, local design company and they really thought out of the box with this product. Instead of designing yet another drying rack they analyzed the real problem and solved for that. The result is a machine washable pad that looks great in our modern kitchen and can be easily folded and put in a drawer when company comes over.
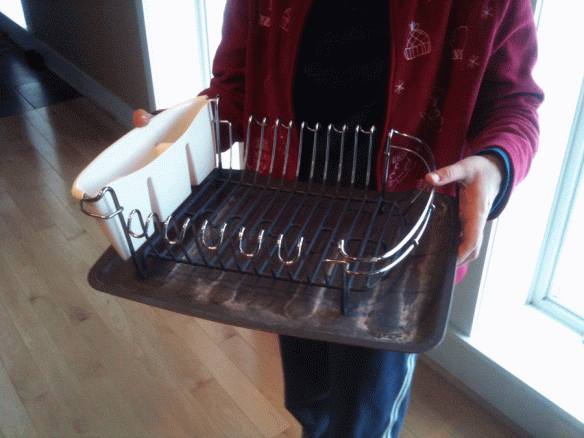
Goodbye yucky dish drying rack….
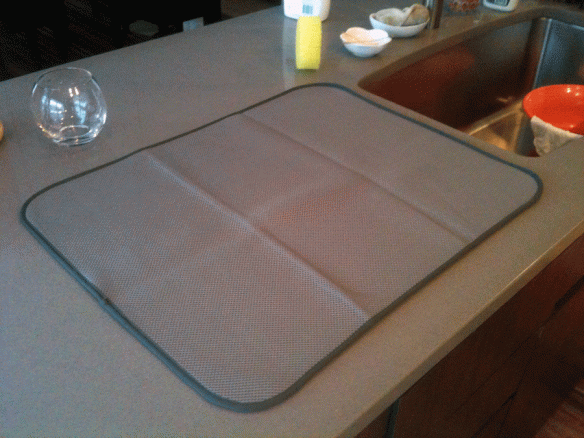
Hello sexy machine washable drying mat, in a grey color that matches our Silestone counter.
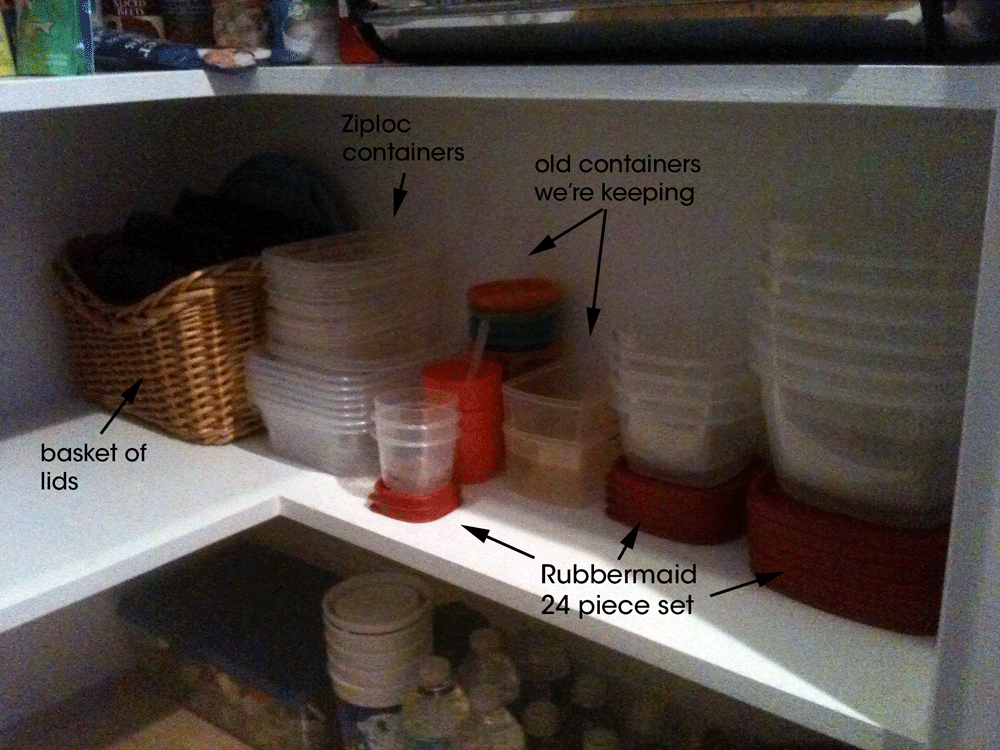
Hot on the heels of our pantry clean up, we picked up a 24-pack of Rubbermaid food storage containers. The “Easy Find Lids” kit is reasonably priced at $25, which compared to $15 for just one Tupperware piece, seems like a pretty good deal. The thought is, If you have a family of four, you only need about 12 food storage containers of various sizes. These new containers allowed us to get rid of the old ones – some of which were not BPA free, and others that were over 15 years old. Most of the old ones no longer held their lids very well, and that’s if you could find the lid. The “lid basket” was a real mess. Hopefully now with the new ones we’ll be better organized, food will stay fresher. We definitely gained some more space in the pantry.
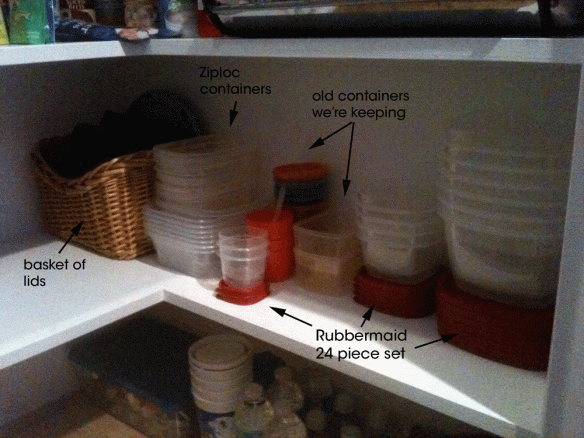
The new containers, and some old ones that we’re keeping. We did gain some space and organization with the new set. Notice how the lids store right under the stackable containers for easy finding.

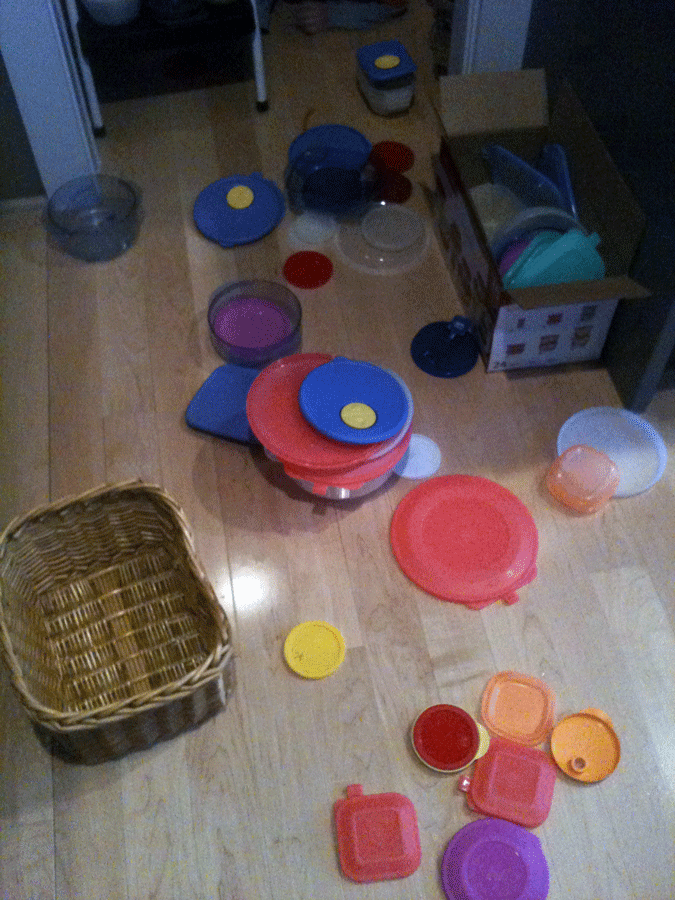
This mess of old lids and containers is going in a box in the basement until we figure out what to do with them. Some of them are being used by our oldest son as “toys”…I can only imagine.
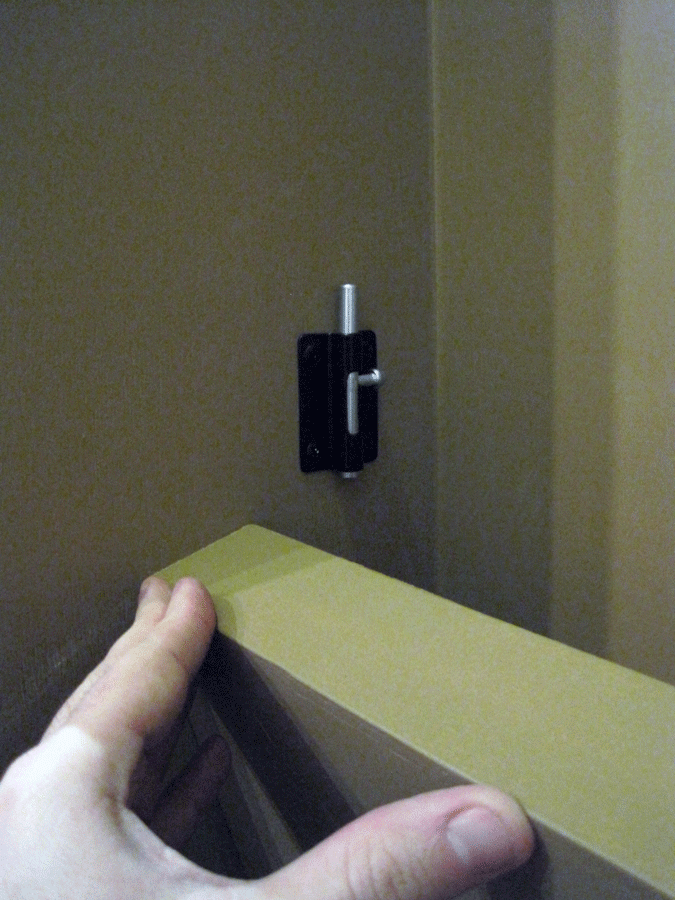
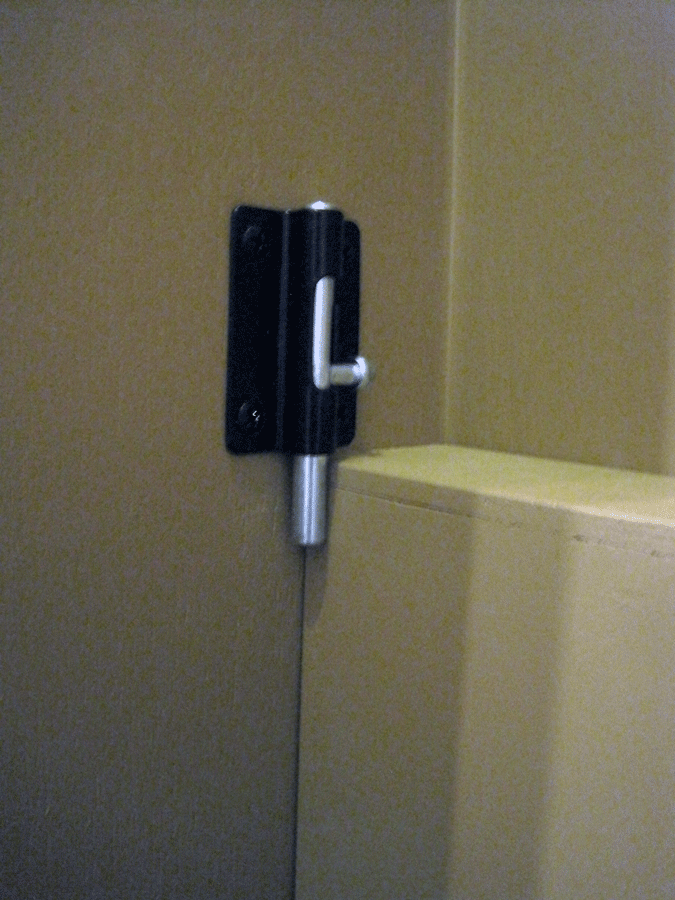
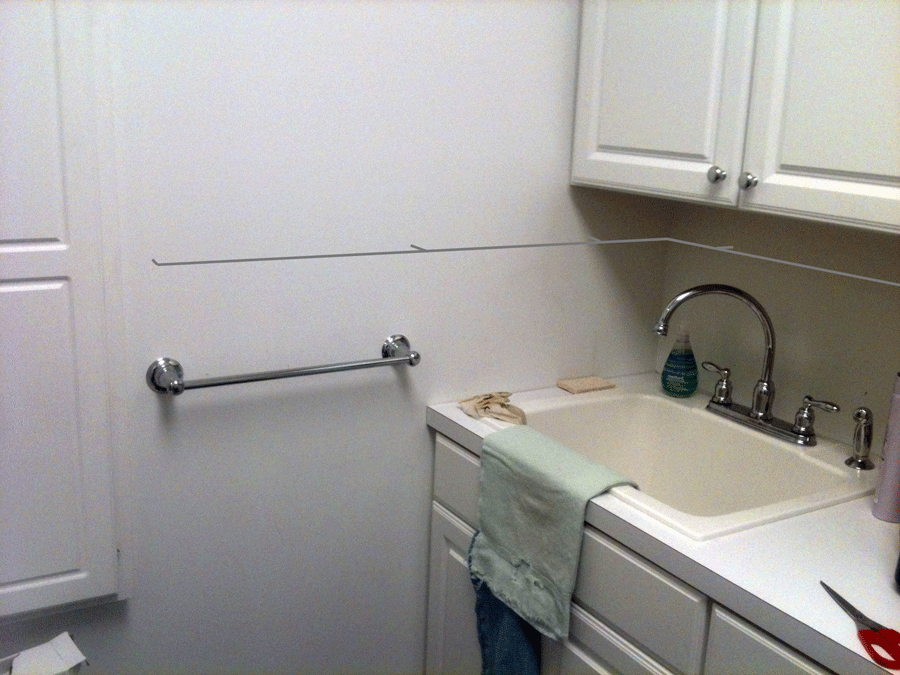
In the laundry room I install an 18″ Delta towel bar near the utility sink; I want to say it was like $24 (though the Delta site shows it costing more than that). Christine washes her hair in the laundry room and needed a spot to hang a towel. I installed the bar at 41″ off the ground. I was leery of the design of the mounting brackets. They are simply prongs that you screw to the wall and them slide the bar posts over them. But sure enough they seem to be secure after installation. Not sure if they come off easy, like when we go to paint the room, so we’ll have to wait and see.

I was skeptical of the prong design of the towel bar mount.
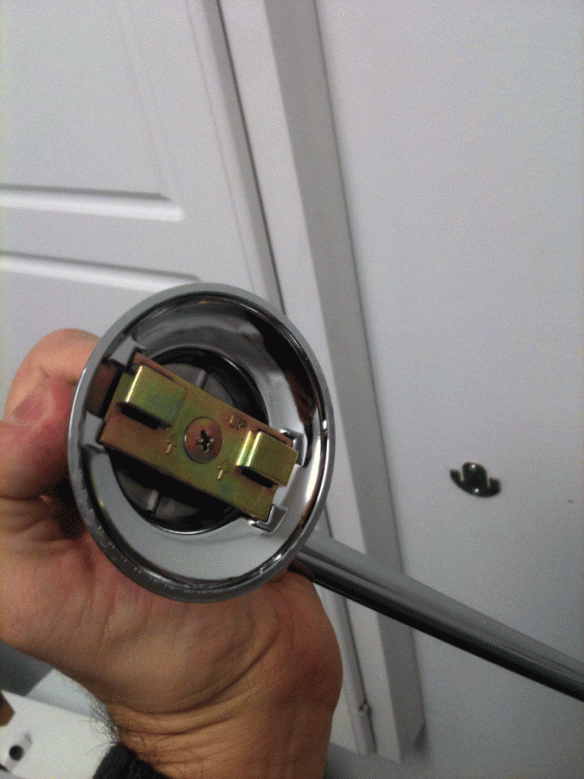
The prongs fit into these pockets on the back of the bar posts.
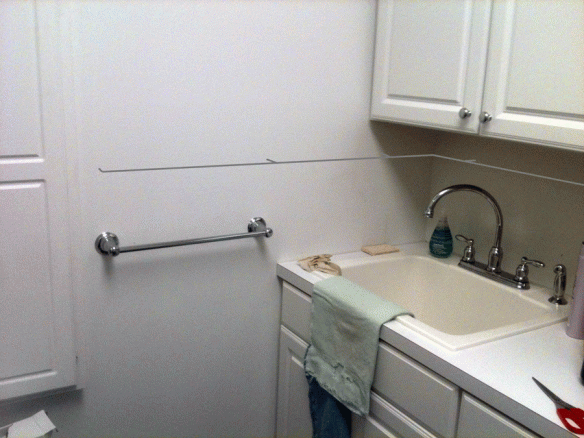
The towel bar seems secure though. The grey line is my thought for something down the road…maybe a fabricated “L” shaped metal rod that would allow a variety of towels and accessories to be hung around the utility sink. “She” doesn’t like the sponge just sitting on the sink, and I can’t find the box in the basement with the sponge hanger we had in the old house.
That’s about it, I got everything installed that we bought, including some suet for the birds, on sale for $0.98 a square – I put it out in the feeder along with birdseed in preparation for the big freeze coming up next week. In my studio I installed a couple of pads at the bottom of the Therma-Tru doors, hoping to keep some of the warm air inside the house. I can still see daylight in the center so maybe I’ll stuff a sock in the door for now. We lowered our thermostat to 69 degrees to hopefully cut down on our electric bill. December’s bill was a whopping $308, our largest yet. I wish we had a programmable thermostat that would lower the temp at night while we sleep. I know Nest has one that supposedly works with hybrid furnaces like ours. Or maybe there’s a more economical programmable thermostat out there. We need to get our electric bills to be lower this time of year.
One other thing, I doubt very much our bees will survive Tuesday if it only gets up to -1 F. We’ll see but I’m not optimistic. Fingers crossed.
Alright peeps, stay warm. Let me know if you have any questions on any of the products I’ve been installing or any of the projects I’ve been working on around the house. Until next time, be happy and healthy.
-Chris