Saturday Ramblings

A busy Saturday, but we’ve gotten somethings off the list. First off the gallery wall is completely painted with two coats of our Sable color paint. Check that off the list.

The gallery wall is painted. Another project complete.

The gallery wall is painted. Another project complete.

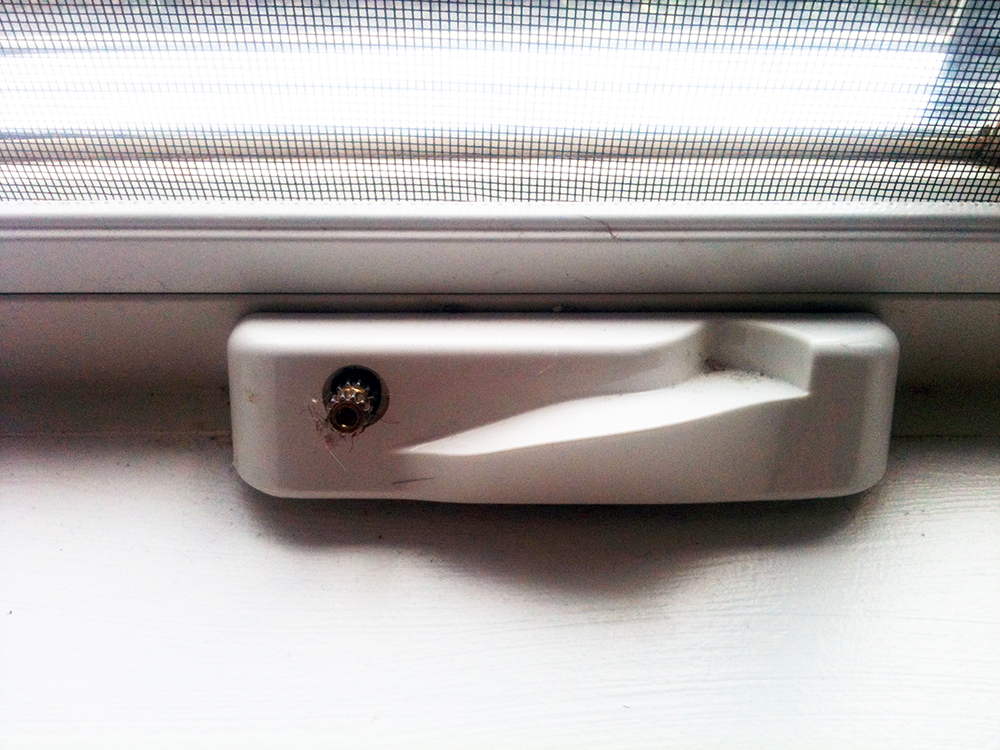
Also first thing this morning I went around and installed all the window cranks once and for all. We were missing a few and the set screws were never set. I went around and tightened the set screw and installed the missing cranks; I had to buy three extra sets at $30 a pop.

Tightening the window cranks, finally after 18 months.

Tightening the window cranks, finally after 18 months.

All the window cranks are installed, at long last.

All the window cranks are installed, at long last.

The window crank in the upper studio...well it's not going to get tightened since I can't physically reach it.

The window crank in the upper studio…well it’s not going to get tightened since I can’t physically reach it.

Wouldn’t you know it, I got to the last two windows and I was still missing two cranks. I actually had two in hand, but they were the wrong ones. Not sure why there are “left” and “right” cranks, but never the less I had two of the wrong ones.  I knew I had double and triple counted before I ordered the replacements. So I did the only thing I could do. I put a bounty out for two lefthand window cranks, promising $30 a piece for their discovery and safe delivery to me. Within an hour and a half the wife “discovered” where someone had inexplicably hidden said cranks; one in a junk drawer and one on a shelf somewhere. Having avoided ordering new cranks I installed the found ones, and forked over $60 in cash to the wife.

I am certain my family hides things now on purpose, because they know I will put out a bounty and I always pay in cash. Hey, if it means stuff is found and I don’t have to look for it, so be it. Our track record in the new house for finding bountied items is 100%.

The other day the wife and kids picked up an apple corer during a field trip to a local orchard. It’s pretty neat and makes apples fun to eat at lunch time. Also, not sure if you saw, but the front bed is now covered in fabric and mulch. Check that off the list.

The wife got an apple corer. It's a pretty neat little toy.

The wife got an apple corer. It’s a pretty neat little toy.

The giant front bed is now covered completely with fabric an mulch. Check that off our list.

The giant front bed is now covered completely with fabric an mulch. Check that off our list.

We checked on the bees this week too and they look great as always. The top mid-sized super has been prepared by the bees and is ready for honeycomb, then honey. We have a ton of late Summer flowers in the yard, and the warm days mean the bees are working hard. During inspection some honey dripped out of the comb and I snuck my first taste of our honey. It was magically sweet. I can’t wait to sneak a few small frames worth in October.

A tall frame capped with honey. You can see two colors of honey, light and dark, presumably from two different times of the year.

A tall frame capped with honey. You can see two colors of honey, light and dark, presumably from two different times of the year.

A frame from the center of the hive, covered with capped brood.

A frame from the center of the hive, covered with capped brood.

Bees enjoying a little sun, waiting for the hive to be reassembled.

Bees enjoying a little sun, waiting for the hive to be reassembled.

Bees congregating on an already inspected super.

Bees congregating on an already inspected super.

Inspecting a frame.

Inspecting a frame.

Our girls coming back home, and leaving the hive.

Our girls coming back home, and leaving the hive.

Our list goes on and on but it is very manageable. With every project complete the house feels more like home. Getting some art and photos up on the walls will help tremendously, and that is on the list. Another thing on the list is clearing out the brush around the gum trees. Which I need a working trimmer with a brush clearing attachment to do that job. Of course I wasted half of Friday trying to fix our TroyBilt trimmer…I replaced the spark plug, new gas, new oil, cleaned the air filter…in the end I couldn’t get it to start. I took it to a repair shop and the guy basically said he could clean the carburetor for $75 but why not just buy a new one with a warranty for $99 at Lowes. Basically ours was designed to be a throw away trimmer; a poster child for a throw away society.  Hmmm….what to do. I could fix it myself but that’d take hours of research and effort. I could go buy a new $99 one…after all ours is 10 years old and I could then use all the attachments with the new one (trimmer, brush cutter, blower). Or all we really need is a gas brush cutter, since we got a new electric GreenWorks string trimmer to handle grass duty. Getting a stand alone brush cutter would mean it was higher quality and not a throw away product. That would support a company making quality products that you want to service vs. a company making garbage products (I’m not a TroyBilt fan per se). In the end I’m going to go out and get a brush cutter, and probably drop $300 in the process. And yes it will be gas-powered, as I don’t know of any electric ones out there. I’ll try to sell off the old trimmer (along with my old gas mower) to some soul who is more mechanically inclined and adventurous than I am.

Okay, back to work for me.  Happy weekend peeps.

Burn Out

The number one rule of being a writer, or even an average blog writer, is writing creatively as often as possible. Well I’m sucking at being a writer because I haven’t written here in over ten days. In my defense we took a well needed vacation and I’ve been busy walking the tight rope between getting things done and going crazy with all the monkeys on my back.  Now all of a sudden Summer has flown by and I don’t know where all the time has gone.

I have been spending a lot of time getting some projects underway or at least planned out. I’ve had several tradesmen out to look at various projects including a small electrical punch list (adding outlets to the porch and finally hooking up the outlet in my studio), a gentleman came out to quote sealing my studio cement floor before we put in the new storage shelves, and I got an estimate on pressure washing the decks in preparation for staining them.  The pressure wash guy looked at washing the grey streaks off our gutters too but we ultimately decided to leave them because they’d just come back most likely. They only bother me and no one else cares so we won’t worry about it now.

For the studio floor there are several options. The company we’re going with uses H&C products, which I think is a division of Sherwin Williams. The finish that looks the best is an “infusion reactive acid” stain, which provides a mottled look. But the process sounded to hazardous for our comfort in our home – 4 day process, have to mask doorway to the rest of the house, and there are carcinogenic materials in the finished product. Instead I decided upon a water based semi-transparent decorative stain that is zero-VOC. We selected “espresso” which will hopefully match the tile found elsewhere in the house.  I just have to clear out everything from the studio so they can come in and prep, stain and seal the floor.  Once sealed I should be able to spill paint on it and have it be easier to clean up with soap and water.

Once the studio floor is done, we’ll start installing the new shelves and finally I’ll be organized in my studio, before I go insane.  Thank you god.

Speaking of organization, we got the laundry room cabinets installed and we love them. They make the room look more finished and now we have a ton of space to organize all of the laundry room essentials. I know all this costs money, and I know we should pitch 90% of what is in our home, but in the meantime it’s nice to have a place for everything. The cabinets should help with resale value as well, if and when the time comes for that. With the cabinets in, we’re waiting on laminate and then the countertop. We also need to select a sink for the laundry room and get that ordered….. So much to do not nearly enough hours in the day. If I win the lottery, the first thing I’m doing is hiring a personal assistant or two.

One other monkey I’m getting off my back is the window crank monkey. When they built the house three cranks went missing so I finally ordered new ones. Can you believe it, the bill is $96 for three sets of window cranks….eeek.  But at least that will be off my bucket list. Serious windows got bought out / went out of business so they’re under the Alpen name now. Regardless my old rep is the same. Something of interest: I had to describe which window cranks I needed to order them. Someone smart realized that they should color code the cranks so you can describe if you need a “right” or a “left”. Take a look at the photos and you’ll see that the “left” ones are silver and the “right” ones are gold.  Good idea.

Outside we’re slowly getting the fabric down in the front bed…still! We did plant the new, real, oak leaf hydrangea and transplanted the impostor ones.  I really like the texture of these new hydrangea; they look great outside the dining room windows. Elsewhere I put together the mail order bat house and mounted it to a 16′ 4×4 post. I just have to mount the other bat house to the other side and then go erect the post with houses attached out in the yard.

We’ve been harvesting a bunch of veggies, and wild blackberries in the yard and garden. And many of the wild flowers are still blooming. Everything looks beautiful. I find great pleasure in looking out my studio window as I work at the drafting board. Such a happy and pleasant view.

Sorry I haven’t been writing much lately. Not sure it will be any different in the coming days. But there is a lot going on project wise, life wise and work wise. I’m wearing many hats…which is how I like it I guess. I even have an art commission and I’m working on some things writing wise beyond this blog. So it’s all good. I’m too neurotic to make any of my endeavor amount to anything but that doesn’t stop me. It’s better to burn out than it is to rust right?

-Chris

A silver left crank on our Serious brand window.

A silver left crank on our Serious brand window.

A "gold" right crank on our Serious brand window.

A “gold” right crank on our Serious brand window.

Assembling one of the bat houses.

Assembling one of the bat houses.

Laundry room cabinets are installed.

Laundry room cabinets are installed.

I mounted the bat houses to a 4x4 post, slipping a 3/4" strip of cedar to mount the bottom of the house to the post even with the top of the house.

I mounted the bat houses to a 4×4 post, slipping a 3/4″ strip of cedar to mount the bottom of the house to the post even with the top of the house.

Oak leaf hydrangeas planted in front bed.

Oak leaf hydrangeas planted in front bed.

Wild flower annuals I planted from seed this year.

Wild flower annuals I planted from seed this year.

Crown Jewel

View of installed loft window.

Today we installed the last window in the main house.  The largest window in the house punctuates the “crown” of the house, front and center in the attic / loft.  It’s approximately 5’x5′ and understandably it weighs a fair bit.  It took four of us, (myself, brothers and Tony) to install it.  I have to check but it showed up a few inches too wide and tall.  You’ll remember this is the window that was too tall to begin with so we had to re-order it.  Something about it, it just wants to be a really big window no matter how small we try to make it.  How can a window be an overachiever?  I don’t know but this one’s doing a pretty good job.  My brother and Tony carried it up through the staircase to where we prepped it in the second floor gallery.  They removed the handles and remounted them on the inside face.  I crimped and cut the air expansion balloon and capped it with silicone.  Tony and I then went up to the loft and my brothers handed us up the window.  If the window was an inch wider we wouldn’t have gotten it through the ladder opening in the floor.  Once topside my brothers stepped outside onto the sider’s scaffolding.  One interesting note, the wood blocks holding up the scaffolding are lagged into the gutter boards with bolts.  This provides enough support for the scaffolding ladders.  Anyway, my brother’s get the gold star for the day cause the scaffold platform is about 20′ in the air outside the window opening.  No worries, I think it’s 30′ before humans die from falling.  We caulked the window rough opening surround with silicone to give the window a tight seal once in place.  The rough opening was incredibly tight so Tony and I slowly fished out the window to the guys outside.  With a little pounding the window was then inserted into the opening and nails pounded through the aluminum nailing flanges.  The opening was leveled and because it was so tight we had to basically go with it “as is”; no shims or anything to fine tune.  It’s a non operating window so it should be okay.  I’m glad we’ve passed this hurdle. 

Nailing the loft window in place. Note how the window goes floor to ceiling. The glass is tempered to meed code and for safety purposes.

Now the house is basically sealed up except for a couple minor details.  Should be ready for our blower test any day now. The blower test will be used to assure everything is tight as well as the information will be used for our EnergyStar 2.5 rating paperwork.

It was nice to see the house in daylight since I miss it most of the week.  All the drywall is hung, including the garage.  The exterior blue foam is virtually done and the siding is coming along.

One of the things that happened this week before / during drywall installation was the fireplace was removed so that area could be properly insulated with caulk, insulation and fire resistant foil paper.  The folks over at the Fireplace Shoppe then had the unit back in the next day.  We’re definitely looking forward to firing the unit up once we move in.

What I call the "mill" view of the house showing the siding on the studios.

 Christine and I have been frantically spending our weekend selecting lighting and other assorted finishing items.  Due to budget constraints, we’re all over the map in terms of sourcing lighting.  A bulk of the lighting is recessed so we have minimal fixtures.  Many of the lighting fixtures (and ceiling fans) will come from Barn Light Electric in Florida.   Their selection is crazy cool and suits our taste and Joe’s artistic creation extremely well.  It’s an eclectic blend of industrial, rural and vintage lighting. Beyond that we picked up a couple of light fixtures at Home Depot as well as Restoration Hardware out of Columbus, Ohio. Some of the lights we ordered started arriving so it’s kinda cool to see the hardware in person.  We are also picking out the exterior door handles and locksets.  The house will be under lock and key very shortly. It’s crazy to think just a few months ago Corky and I were cutting down trees.  Now here we are this far along in the process.  Very cool, very exciting.

Breezeway between house and garage.

 
This coming week the cistern will go in.  The septic system has been tested and approved by the county / health department.  We’ll also be getting a temporary furnace to get the house up to temperature so the guys can finish drywalling (taping and mudding) the interior.
 
One interesting thing I noticed this morning is the house was very cold.  Which is remarkable  

Fireplace properly insulated. Foil paper is fire resistant just in case.

 because it was very warm outside.  Now that it’s virtually sealed up the house is isolated from the world around it thermally for all intents and purposes.  It was cold cause there’s no heat / furnace but regardless it will hold its internal temperature now. 
 
Take a look at the pics.  The project’s coming along nicely. 


Fancy hotel look wall sconces for the Master Bathroom courtesy of Restoration Hardware. I asserted myself and selected these much to the chagrin of the wife. Trust me I say, I'm a trained professional. She reminds me she is too.


Family room. Only about three months from beer, food and game night with friends or family.


Upstairs art gallery wall. Will all be covered in wood, secret doors, and artwork. Ceiling opening is for ladder to attic / loft. Windows up there will route hot air out of the house by way of cyclonic action from the basement all the way up. Think giant helical air flow up stair case, gallery and loft once the windows are opened up.


Downstairs gallery and temp staircase. Located near the studios for clients to traverse between Christine's and my studios.


Front hall. Real fake I-Beam above.


Drywall scaffolding. Eventually the upper wall will be frosted acrylic to get light into the craft room. At some point the attic / loft floor will be frosted glass as well to drive daylight into the gallery.

Window Day

Wow, very busy day on the blog today.  My highest number of vistors to date.  Where’s the party?

It was a fairly busy day at the job site as well today.  Most of the windows are in.  Of course my notes were disregarded and feable attempts were made to crimp the gas tubes coming out of the windows, but even that couldn’t keep me down too long today.  We rushed out there with the boys in tow to catch a glimplse of the house before sunset.


My diagram of how to crip the expansion tubes on our gas filled windows. I of course did a stellar job. When I'm not around I'm pretty sure they do this shit on purpose just to see if I'll have an anyurism


We chose to install Serious high performance windows.  To be hard-core we would’ve bought German windows but we’re not hard-core.  We’re medium core.  Serious windows are made here in the good old USA.  They’re not a household name unless you’re building a seriously efficient house like we are.  To keep our budget in check we went with their middle of the road 525 series windows.  They’re decent looking windows although not aesthetic standouts by any means.  They’ll do the job.  We chose primarily casement windows as casements will net better performance than double hung.  Many of our windows are fixed which are even better.  Only problems we’ve run into revolve around our ability to order properly and issues with the expansion balloons.  No one told me about the balloons so we waited longer than the 5 days to crimp the tubes and cut off the balloons.  We were told this shouldn’t be a problem.  What is a problem is one balloon got sliced by a worker and was in the upside down position so for all intents and purposes I have to assume all the argon gas escaped.  We’ll get a Serious tech out to fix that window.  Additionally we had one window miss sized by the architect and two miss sized by the manufacturer.  I contributed by miss ordering 4 windows that needed to be tempered and they weren’t.  Finally today I noticed I forgot to order one of the garage windows.  So a bad start but at least they’re going in.
 

525 window performance chart

  
Our windows are white inside and out.  This should match the decor nicely.  Here are some more pics from today. 


note double fir strips for board and batten siding. studio window are individuals with framing between. Will be tough to insulate between.


Porch roof went on today too!


I showed you the rendering yesterday. Today a foyer wall.


framing for transom over doorway


kitchen area with i-beams above


this is the best thing I designed so far in the last six months. pipe cleaners as "hoses" on a Lego semi truck. Made one blonde kid really really happy. At least I have one fan.

Slow But Sure

We’re slowly wrapping up the rough framing and getting ready for insulation.  I met with our EnergyStar rater and insulation contractor this week to do a walk through of the house.  It’s best to know what we need to do before the insulation and drywall start going on.  On the exterior the windows are being installed and the rigid insulation is going up.

There is some concern regarding the HVAC ducts being on exterior walls.  These days most if not all the ductwork should be on interior walls to insulation them from the exterior.  Otherwise it’s difficult to get enough insulation in those wall bays.  At least I’ll have 4″ of rigid insulation on the exterior to mitigate the issue as best we can.  Flexible ducts have been installed in many of the kneewall attic areas of our Cape Cod style home.  This means that in reality we will have to treat all these areas as conditioned space.  This will mean insulating the roof and exterior walls just like the main house, but also using some paper material to prevent air movement.  The paper material will act like drywall in terms of controlling air flow, but will be less expensive to install.  Another concern with the flexible ducts is they were installed with too many tight turns or corners.  Flexible ducts need to have gentle radius turns to keep air and debris from piling up in the corners.

A bit more on insulation.  We’ll be using blown in cellulose insulation made from recycled newspaper.  Fairly green although it is treated to be fireproof.  For air tightness we’ll be caulking the drywall seams so that should minimize any perceived ill effects of the fireproof insulation.  As far as I know it’s a safe product.  Part of the insulation job will include extensive caulking and sealing of the entire house, including around light fixtures, outlets and any wall or floor penetrations.  One place to pay attention to is between the OSB sheets.  Technically the framers should space the sheets 1/8″ apart for expansion.  They usually don’t but regardless, any visible gaps in the OSB should be sealed with spray foam from the inside.  On our house there are a couple of areas where you can see daylight shining through the green Raindrop housewrap, between the OSB wall sheathing.

We’ll be having a blower test and filling out three sets of survey forms to establish our home’s HERS rating and ultimately our EnergyStar qualification.  It’s critical that the house essentially be air tight.  I Googled it and it looks like Ohio has about 1,300 EnergyStar homes so we’ll be in the vast minority.  Hopefully in a few years this will be the norm.

On the exterior we continue to pick away at sealing everything and installing the blue rigid insulation.  Windows are starting to go in.  We seat the aluminum nailing flanges of each window in a bead of silicone sealant / caulk and level / nail the windows in place.  Over the top of the flanges, just like our REMOTE wall article says to do, we cover with Grace Vycor Plus membrane flashing.  The insulation contractor will seal everything up from the inside with spray foam and caulk where necessary.

The windows show up with a breather tube and mylar expansion bag.  Serious windows do this because all the windows are gas-filled. Without the tubes the windows would explode when they’re driven over the Rocky Mountains.  Without the mylar balloon the gas would escape.  One of the balloons did get cut so I suspect we’ll have to have a tech come out and refill that window.  On all the other windows, I’ve been crimping the tube in two places and will cut off the mylar balloon.  I then hit the end of the tube with silicone caulk and then tuck it into the window frame.  The gas should stay in the windows for 100 years.  Definitely not my problem then.

On the exterior we’re installing aluminum termite shield to protect the bottom of the rigid from ant / bug infestation.  We simply bought some white aluminum sheet metal and bent it up to form an “L” with a little lip for water run off.  The termite shield gets tacked up behind the housewrap at the bottom of the exterior walls.  It overlaps the foundation by about 2-3 inches.  Resting on top of the termite shield and housewrap are our 2×8 foot  x 4 inch thick sheets of Dow blue rigid insulation.  The rigid is installed by tacking the panel with a couple of screws.  We then come back through and put 1×3 firring strips over the vertical seams.  The horizontal seams get a one foot strip of Raindrop; it’s zig zagged with 4″ stapled above the panel against the existing housewrap, then 4″ runs across the top of the insulation panel, and finally the last 4″ flaps down over the top of the panel.  If our panels weren’t so dirty we’d just tape all the seams.  The firring strips will help give us a decent seal as will the housewrap strips.  We use 8″ screws to secure the firring strips to the wall (passing through the rigid insulation).  Try to hit studs with every screw.  Otherwise the screw will act as a conduit for cold or heat.  We missed a ton and technically should back out the screws and try again, but it’s painfully slow already so we’ll snip the exposes screws and I’ll kit them with some foam insulation.  Should be alright, even for Ohio.

One interesting thing I came up with this week, the loft window is showing up late but we need to get the blue board in place ahead of time.  Once the blueboard is in I won’t be able to get the membrane flashing in place.  So I took strips of it and left the backer paper on and stuck the rest to the window buck perimeter.  After the window is in they can remove the paper and stick it over the flanges.

Here are some new pics from the last few days.


blue foam with housewrap horizontal "z" at joint


detail of housewrap "z" at horizontal joints of rigid insulation.


column pads for porches are finally poured. sono tubes shifted so much, threaded bolts are barely in pad. Bad workers, bad.


to remove just the backer paper from half a strip of Vycor membrane flashing, I use a common nail.


I remove half the backer paper so I can stick the strip around window buck. Once back ordered window is in I can stick the rest. In the meantime I don't hold up blue foam installation.


termite shield


window breather tube and balloon