As you may have read in a previous post, we’ve been forced to research driveway options beyond our existing driveway. We share the driveway with two other homes, which means if those two homes want to put in another driveway surface besides our gravel driveway then that’s basically what we have to do whether we like it or not.
Having had this sprung upon us a few weeks ago, there hasn’t been much time to react. The neighbors were nice enough to give me a few days to research all of our options before we just knee jerk go and put in an asphalt driveway. So in addition to my day job and in lieu of spending excessive time with my kids I spent a week researching options and gathering estimates.
So now I’m sort of involuntarily a driveway expert, or at least as expert as I can be in a week and one PowerPoint presentation later.
Here’s what I found out…
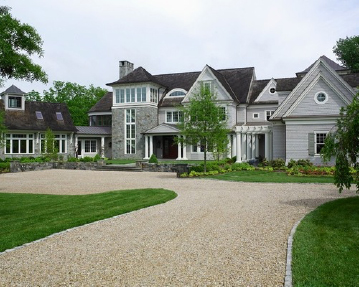
Our Driveway – Existing Gravel
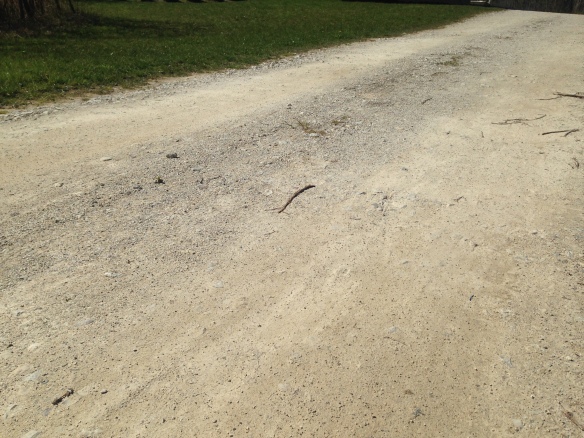
Current driveway is an almost cement like finish, despite technically being a gravel driveway. It is prone to pot holes.
Our property came with a gravel driveway already leading to it from the road. For the purposes of the neighbors intent, we’re just looking at changing the driveway material along the first 1,700 feet (about 17,000 square feet for a 10′ wide driveway). There’s a shared utility easement that the driveway resides upon. Neighbors are each responsible for 1/3 the maintenance and upkeep, while maintaining the existing material (gravel).
The biggest complaints are dust, pot holes and gravel being pushed into the grass.
Personally I think it’s congruent with the rural atmosphere of the property and our country setting.
To maintain it we got quotes from a gentleman who has an apparatus on the back of his Jeep that “rakes” the driveway to get help prevent pot holes. Driving slow on the driveway helps prevent pot holes as well.
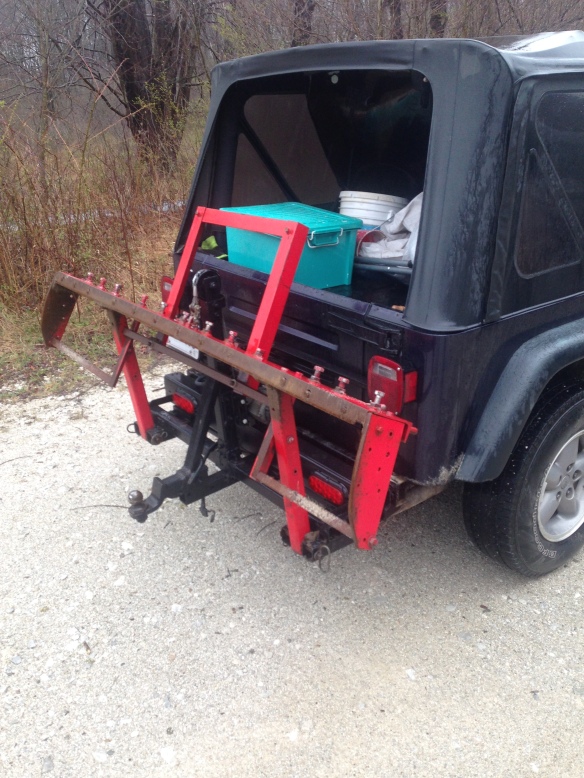
The knives aren’t on the rig in this shot, but the bar lowers down with metal posts on the end and rakes the gravel driveway
My recommendation is that we try maintaining the driveway properly and professionally. In addition to the raking, we could hire a landscaper to cut the grass in the utility area, as well as put a definitive edge on the drive; possibly even a hardscape paver edging. Raking is $300-$500 per year. Not sure how much a landscaper charges to cut and trim during the growing season. A hardscape edge would be a couple grand I suspect.
Pros:
- rural look
- low cost to maintain
- indefinite lifetime
Cons:
- prone to pot holes
- compacted surface is impervious can lead to flooding or erosion
- difficult DIY maintenance
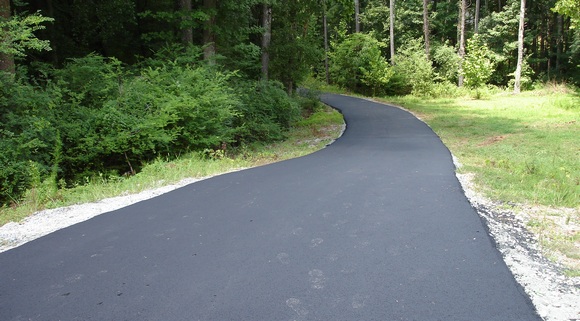
Asphalt – This is the preferred method of our neighbors. Asphalt is made from oil and crushed limestone. It’s put down in two layers, #57 stone makes up a base coat of about 2.5″ and at top coat made from smaller stone creates a smooth ~1.5″ driving surface. The driveway has to be sealed ever year or two at a cost of about $1,500. Installation cost for our driveway is around $30K-$37K, or around $2 per square foot.
Another option is just to install the 2.5″ basecoat, which is only $25K. This saves money but results in a rougher surface because it’s just the #57 stones. And it’s not recommended for drives that will get truck traffic such as from UPS or FedEx trucks.
Asphalt can be salted in winter (which is bad for the environment) and it’s dark texture radiates heat year round – melting snow in the winter, and making it unbearable to walk on in the summer.
It’s important to know what kind of sealant the contractor puts down. Coal Tar is a highly toxic chemical that causes cancer in children and adults, as well hurt wildlife and contaminate water supplies. Click here for more info on sealants.
Pros:
- relatively inexpensive
- fairly low maintenance
- 20 year lifespan
Cons:
- oil based product
- looks urban
- impervious so it can lead to flooding and erosion
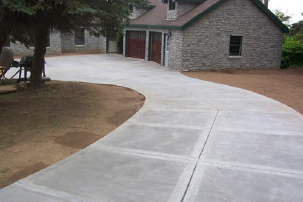
Cement
Cement driveways are pretty ubiquitous in America. They last a long time and are virtually maintenance free. The down side is they’re expensive to install and repair.
We got two quotes from $50K up to $95K for our driveway, or about $3 per square foot.
With all the water on the surface of our land, we want to make sure that the cement is reinforced with mesh and possibly rebar. Thickness quoted was 4″ total.
Pros:
- estate look and feel
- no maintanence
- 30 year lifespan
Cons:
- expense
- can’t drive on it for 7 days after install
- impervious material prone to causing flooding and erosion
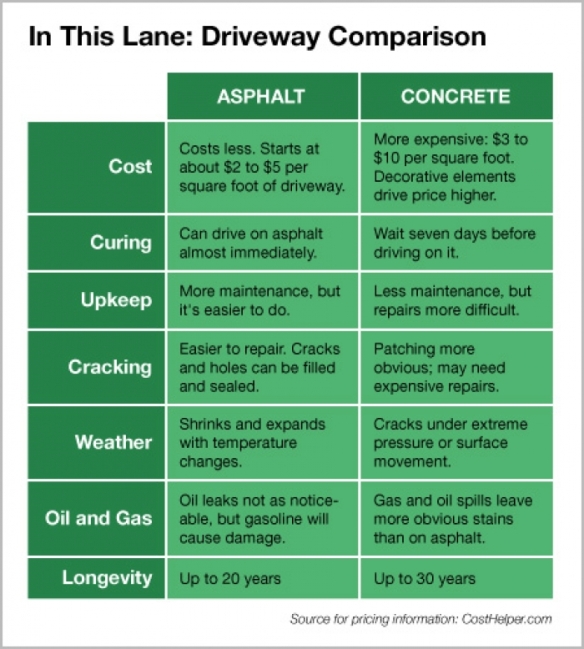
Chart from Angie’s List weighing pros and cons of asphalt and concrete:
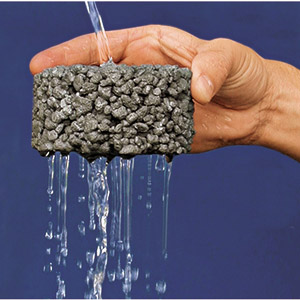
Pervious Cement and Asphalt
These are identical to their non-pervious counterparts, but they leave out some of the stones in the mix to create voids that water can pass through. This makes the surfaces better for the environment by allowing water to pass through and not run off and cause flooding. The surface also acts as a filter to clean oil and auto residue through the material, filtering it before it gets to the ground water supply.
I could not readily find any local contractors for the materials though. And the biggest down side is you have to pressure wash it regularly to keep the voids open, otherwise they clog up.
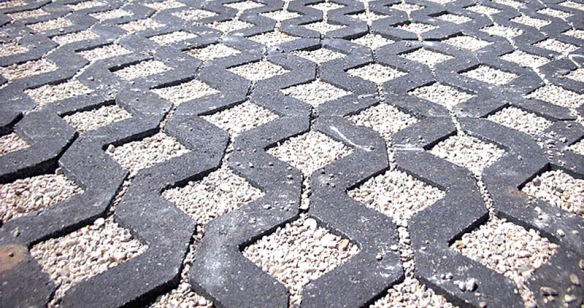
Grass Pavers
I love the look of these cast cement pavers. They have large voids that can be filled with pea gravel, and even allow grass to grow through. The biggest challenge here is the cost of $10 per square foot installed. Although for smaller areas they could be perfect, and even be a DIY project. Belgard Turfstone is the brand name we checked out.
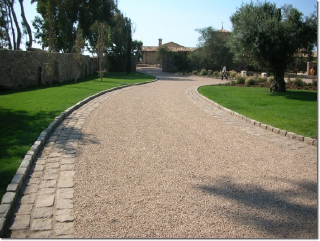
Pea Gravel
The one landscaper I talked to didn’t recommend cement or asphalt because we have so much surface water – which would but their lifespans in half potentially. His recommendation was edging the entire driveway and laying down pea gravel. Cost would be $7,000 year one, and then $7,000 a year to refresh. The cost seemed a little off but there’s no doubt the look is great. This would have to be investigated further. And there’s the potential that snow plows would trash it in the winter.
Chip and Seal
This is when they just lay down the base coat of asphalt then finish it off with decorative stones. I love the look of this. The challenge is finding a contractor in northeast Ohio that will do it. Also there are concerns with the amount of surface water we get as to how well it would hold up. I think there’s a lot of stigma at play here. If it were up to me, it’s definitely an option I would consider versus ugly black asphalt. Cost was around $27K or $1.60 per square foot.
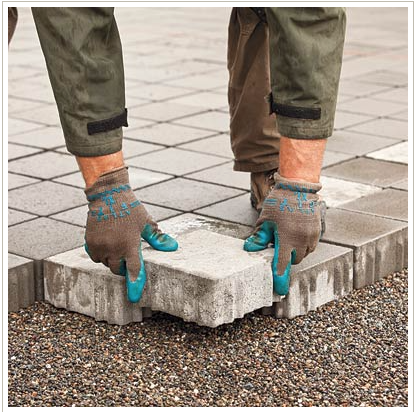
Permeable Pavers
Just like grass pavers, but no voids for grass. Can be anything from stones, to bricks and cement blocks. Cost is probably around $10 per square foot. Looks super high end though.
Here’s an article from This Old House that walks you through the DIY install process for permeable pavers.
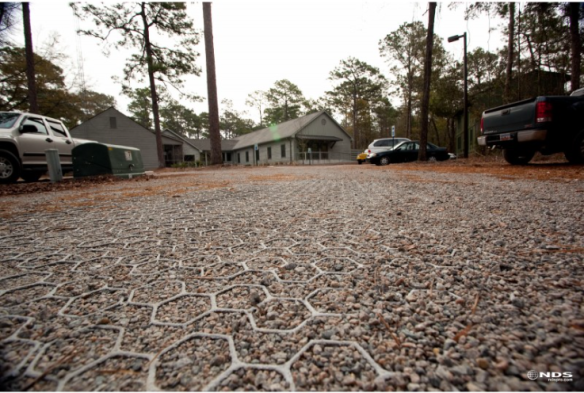
image from NDS website of their grid product for stabilizing driveways while allowing water to flow through.
Permeable Driveway
Companies like CORE Driveway and NDS make these plastic grids from recycled plastic that interlock and create a substrate upon which you can place pea gravel or even let grass grow through. Cities often use this for parking areas or emergency response centers where there isn’t alway vehicle traffic, but it can support traffic if necessary.
This is the most environmentally responsible driveway in my opinion, because it allows water to pass through, grass to grow through it as well. Plastic lasts indefinitely so it shouldn’t really need replacing if maintained properly.
One installer recommended against it for anywhere where cars will turn around, as that might damage the grid over time.
It’s expensive at $44K in material alone, $2.60 per square foot. Though installation could be DIY, plus the cost of preparing the base and topping it off with gravel.
This is definitely what I would put on my driveway, and even the parking areas around the homestead.
My Recommendation
After I researched everything, my proposal was to implement a maintenance program on the driveway, including landscaping. Also we could explore the pea gravel solution, with possibly some hardscape edging. This is a very nice look and would cut down on dust.
Ultimately a gravel driveway is congruent with the rural look and feel of the properties. And it’s the material we all knew we were dealing with when we bought our various parcels. I believe it can be maintained economically and effectively with a comprehensive, competitively bid program.
If money was no object I’d go the permeable pavers or driveway grid solutions, which are the most environmentally responsible solutions.
Lastly hard surface wise, if we had to, my preference is cement because it would eliminate maintenance altogether and it would last 30+ years, longer than I’m likely to be alive. It can also be budgeted for long term repairs and will increase property values quite a bit.
Would be interesting to explore chip and seal some more too.
Asphalt just doesn’t seem to make much sense to me environmentally, economically or aesthetically. It still requires cost to maintain, looks ugly and cheap, and is resource intense with the possibly of poisoning the environment. I think it’s just a typical suburban “this is how everyone else does it” response to a problem, which lacks elegance or thoughtfulness. But in this day and age it’s not surprising at all.
—
Here are some additional links for your reference:
Why Should You Consider a Stormwater Friendly Driveway?
https://www.burlingtonvt.gov/sites/default/files/DPW/Stormwater/Driveways/SW%20Friendly%20Driveways_web_v2.pdf
Permeable Pavement
http://www.montgomerycountymd.gov/DEP/water/permeable-pavement.html
Pros and Cons Asphalt vs. Concrete – Angie’s List
https://www.angieslist.com/articles/pros-and-cons-asphalt-vs-concrete-driveway.htm
Coal-tar sealcoats pollute nearby soil and water
http://www.environmentalhealthnews.org/ehs/newscience/coal-tar-sealcoats-release-pahs
University of Maryland Permeable Pavement Fact Sheet
https://extension.umd.edu/sites/default/files/_docs/programs/master-gardeners/Howardcounty/Baywise/PermeablePavingHowardCountyMasterGardeners10_5_11%20Final.pdf
Rainfall as a Resource – Connecticut Guide to Pervious Pavement
http://www.ct.gov/deep/lib/deep/water/watershed_management/wm_plans/lid/what_is_permeable_pavement.pdf
California Pervious Pavement Design Guidance
http://www.dot.ca.gov/hq/oppd/stormwtr/bmp/DG-Pervious-Pvm_082114.pdf
Could Your Driveway be Poisoning Your Kids?
http://ww2.kqed.org/quest/2014/01/23/could-your-driveway-be-poisoning-your-kids/
Coal Tar Free America
http://coaltarfreeamerica.blogspot.com
Alternative Asphalt Sealants Getting Mixed Reviews (4/11 – Columbus Dispatch)
http://www.dispatch.com/content/stories/home_and_garden/2011/04/10/alternative-asphalt-sealants-getting-mixed-reviews.html


